Saturday, January 30, 2016

Shabby Chic Handmade Valentines Day Card - Love Bird

Happy Saturday! Today I have a Shabby Chic Valentines Day card to share. When I finished this greeting card I noticed that it's embellished in such a way that would be fitting for many occasions, such as a wedding anniversary or Mother's Day. How cool is that? I'd like to say I planned it that way, but I didn't.

I used my Kirby Teesdale Paper Pack from the Paper Studio, DCWV Neutrals and K&Company 4"x6" Recycled Berry Pinks. My card measures 6"x6" so to make a mat with the smaller paper I cut 4 berry strips and taped them into place. Due to the style of my card I was able to blend those strips where they came together. 


I love the rose paper from the Kirby Teesdale paper pack, it's very elegant. I used the oval die from Spellbinders 3 Fancy Tags and Sizzix Thinlits Handwritten Love to make my sentiment and then attached it using brown ribbon. The tag is edged in Victorian Velvet Distress Ink and embellished with two pink adhesive-backed pearls.


To add some overall softness I pulled pieces from a used dryer sheet. There is a very faint fragrance left in the dryer sheet that makes this card smell really good, but it's not overwhelming at all and actually has to be held close to smell it. To make the large light pink and dark pink heart I used pink heart doilies colored with white ink and Victorian Velvet Distress ink.


I cut the bird from a page from the Kirby Teesdale paper pack and covered it in Glossy Accents


To give the bird some dimension I cut a wing from another page of the same bird, placed thick glue dots on the backside of it and then placed it directly over the other wing.


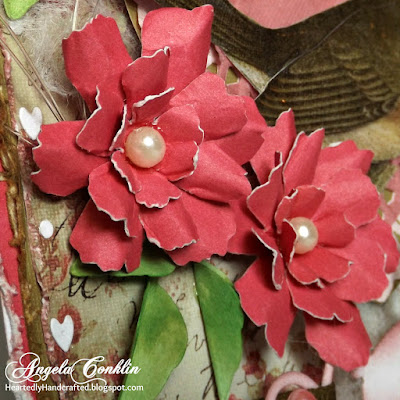
To make the flowers I used the Recycled Berry Pinks paper and the Tim Holtz Alterations - Tattered Flower Garland Die. I then chose one style of flower in 3 sizes. To shape each layer of flower I dipped them in a cup of water for just a moment, dried them off and shaped the softened paper by pinching the petals and pushing the back of a pen down into the middle of the flower while the flower sat on thick craft foam. I then used my heat tool to dry the flowers to make them stiff and hold their shape. I love that the paper I used has a white core because the flower edges were automatically outlined. 


To make the small hearts, I used the waste paper hearts from a Sizzix Border die. The hearts are very tiny so I placed them all the way around the edge of the card.

Materials:


If you like this card using the Kirby Teesdale Paper Pack you may like the card below as well

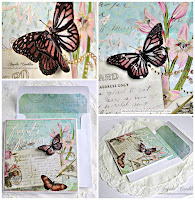
 Butterfly Card


Thanks for stopping by and for your wonderful comments! Come back again for new projects :)

Sunday, January 24, 2016

Cardmaker's and Scrapbooker's Inspiration Sticks: Never Run Out of Ideas Again Updated

Last year I wrote about "Inspiration Sticks". I learned of the idea from a video put out by Claudia Rossi. Her Inspiration Sticks were made for art journaling and it was such a great idea that I thought it would also be very useful for card-makers and scrapbookers. I would just have to make a list of ideas related to those topics to make the sticks work for me. 


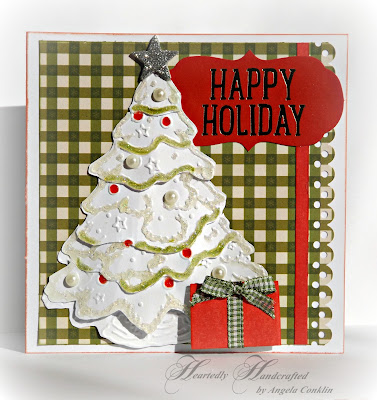
Below are the ideas I chose to write on my Inspiration Sticks and I add ideas as I discover them or think of things I've overlooked. Also preceding the list are two examples of using the sticks for an entire project and it can be quite fun going through your crafting materials to see what you have to work with.
  1. Plaid paper
  2. Add a die cut that you've decorated
  3. Glitter
  4. Bows are for more than little girls
  5. Star
  1. Two patterns or more
  2. Tie it up with some twine or string
  3. Embossing powder
  4. Let's see some stitches
  5. Tree

Card-making/Scrapbooking Inspiration Sticks

NOTE: The sticks below can be further separated into categories such as paper, shapes, etc.
Click on a highlighted phrase and it will take you to an example card in a new window.
  1. Reach for the small stamps
  2. Feeling Blue can be a good thing
  3. Make it look older than you 
  4. Make some embellies to use
  5. Add a die cut that you've decorated
  6. Freehand cut a shape ( i.e. tree branches and trunk)
  7. Use two embossing folders
  8. Sing it pretty with Sheet Music
  9. Tie it up with some twine or string
  10. Bows are for more than little girls
  11. Don't scream, it's just a Ladybug/Butterfly/Dragonfly...
  12. Two patterns or more
  13. It looks bolder with a banner
  14. Add something unusual (i.e. feathers)
  15. Button it up
  16. Greenery makes it look more alive (plant/flowers...)
  17. Make it a gift set
  18. Digital Image
  19. Special fold card
  20. Let off some steam and "punch" it
  21. Make something hang
  22. Layers, layers, layers
  23. Tag it
  24. Generation Stamping
  25. Where's the bling
  26. The hills are alive...(Create snowbanks or hills from ink or paper)
  27. Silhouette
  28. Burlap
  29. Lace it up
  30. Go for the glitter
  31. Doily
  32. Let's see some stitches (sewn or drawn stitches)
  33. Quilting is not just for grandmas (add many papers in squares to front of card)
  34. Make it two-toned
  35. Bird
  36. Textured paper
  37. Add an ornament or wooden piece on the card
  38. Book page
  39. Stack die cuts
  40. Masculine
  41. Black and White
  42. All White (one color)
  43. Incorporate pearls and/or gems
  44. Pretty in Pink
  45. Stamped Image
  46. Homemade patterned paper is perfect
  47. Flowers aren't just for a vase
  48. Polka-dots
  49. Tree
  50. Plaid paper
  51. Wrap it up with a wreath
  52. Vines
  53. Don't forget the swirls
  54. See through it
  55. Messy torn edges 
  56. Border or fancy edge or two or three
  57. Embossing powder
  58. Don't be so afraid of watercolors
  59. Dryer sheet
  60. Embossed border with ink
  61. Tissue paper
  62. Lots of texture
  63. Ribbon
  64. Something made of wood
  65. Numbers
  66. Add a tag
  67. Shape the corners
  68. Incorporate some quilling
  69. I'm stuck with Sticker(s)
  70. Parchment paper or Vellum
  71. Special shaped card (i.e. The Gardening card)
  72. Leave it looking good (leaves)
  73. Being square isn't a bad thing
  74. Round and round we go (circles)
  75. Make it a shaker
  76. Hearts
  77. Snow
  78. Moon
  79. Sunrise/Sunset
  80. Star
  81. Three or more solid colored papers
  82. Use two colors you tend to stay away from
  83. Look through a window
  84. Vines like to climb
  85. Challenge yourself - make three simple cards that are similar
  86. Decorate with washi/decorative tape
  87. Make it interesting with a Tie dye effect
  88. Incorporate the top layer of a napkin or paper towel
  89. Add some pretty beads
  90. ...anything you can come up with

Categories
I have a small separate holder for these sticks and only use them when I'm drawing a complete blank.
  1. Birthday
  2. Winter/Christmas
  3. Spring
  4. Mother's Day
  5. Father's Day
  6. Halloween
  7. Special Friend
  8. Thank you
  9. Fall/Thanksgiving
  10. Love/Valentines Day
  11. Red, White and Blue
  12. Sweet 16
  13. New baby
  14. Tag
  15. Layout
  16. Wedding
  17. Anniversary
  18. Hello
  19. ...and whatever else you want to include
Happy crafting! Thanks for stopping by. Stop back again to see new projects.

Friday, January 22, 2016

Make a Beautiful 3D Butterfly for Your Handmade Greeting Card

Happy Friday morning!
Today I have a greeting card made from the gorgeous Kirby Teesdale Paper Pack by The Paper Studio and Core'dinations Cards and Envelopes set. I have also included, a short tutorial to show how to make the 3D butterfly, and a materials list so that you can make your own card, but first things first.

Hope everyone is warm. It's freezing here in Western Pennsylvania and my furnace hasn't stopped running. Although, I have really enjoyed the beautiful snowflakes floating past my windows. Just as long as I don't have to go out into the snow, I can appreciate how lovely it looks. 

Speaking of looking lovely, below is paper that I will be adding to my "All-Time Favorite Papers" list. The colors are very soft and the designs are beautiful. I love the look of the paper so much that I wanted to bring an element of it to life. 

Card measures 5.5in x 5.5in and is decorated with paper from
Paper Studio's Kirby Teesdale Paper Pack
Matching paper was added to the inside of the envelope. The paper goes about half way down the inside and is only adhered at the top. Anything more is not necessary. I used a corner rounding punch and placed the top edge of the paper just under the glue strip of the envelope.


To give the white cardstock and sentiment a little color I lightly sponged them with Tim Holtz Distress Ink in the colors Victorian Velvet and Tea Dye. Glossy Accents was used on the sentiment and on both large butterflies to further accentuate them.


Adhering a three dimensional butterfly and a swirl of adhesive pearls was the last touch.


Materials List
Kirby Teesdale Paper Pack by the Paper Studio
Core'dinations White, Smooth, Square Cards and Envelopes sets

Tools List
Paper-cutter
X-Acto Knife
Adhesive
Black Sharpie (fine tip) 
Sizzix Thinlits Sentiments (660218)
Martha Stewart corner rounding punch
Glossy Accents

Card Assembly
White base card (5.5in x 5.5in)
Pink mat (Just 1/8 of an inch bigger than the front of the card)
Front of card (5.25in x 5.25in)
Instructions for Butterfly (This is your last step when making this card)

1) Use an X-Acto knife to cut out the same butterfly from another sheet of paper. You'll want to be careful to keep the butterfly's head intact, but there is no need to cut out the antenna. Just leave them behind.

2) I decided to draw over the black lines of the butterfly's wings with a black Sharpie marker to make the lines darker and stand out more.


3) Keeping the body of your butterfly flat, bend the wings into the shape that you would like them to be in when your card is finished. 

4) Now flatten out the wings a little bit so you can put your Glossy Accents on without it sliding off the wings. Bending the wings now will make it easier to move and shape them once the Glossy Accents is dry.

5) When the butterfly is completely dry go ahead and very gently shape the wings. Be careful not to crack the shiny coat by bending them too much.

6) Place adhesive only on the butterfly's body and adhere it right on top of the same butterfly that is on the front of your finished card. 


That's it!


NOTE: There is another way to achieve the 3D look. Before assembling your card, just cut around the wings of the butterfly you want to stand out. Then shape the wings and add Glossy Accents. No need for a second butterfly. Here is a card that I did using that technique.


You can find this card here.

Happy crafting and thanks for stopping by. Stop back again for new projects!

Saturday, January 16, 2016

A Quick Way to Give Your Canned or Jarred Salsa a Fresh Taste and Appearance

I'm a papercrafter, DIYer and this is a blog for those things, but a woman has gotta eat too. Yesterday, as I worked on this year's plan for crafting and blogging I decided to throw together a snack, but I didn't want to take a lot of time making salsa with all fresh ingredients and wait for the flavors to meld together and I'm not really a fan of salsa from a jar. 

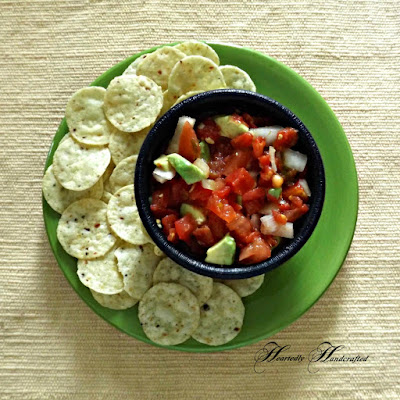
So I did what my son, The Salsa King (long story), does when we don't have enough fresh ingredients to make salsa from scratch. I grabbed a couple of cans of Diced Tomatoes with Green Chilies from the cabinet and just added some fresh ingredients such as a medium sized onion, a large tomato and an avocado. I also added a little powdered garlic and a tiny bit of Creole, but what you add is up to you and what your family likes. 

That's it! Voila! 

Delicious salsa that has a fresh taste for snacking or to serve with food that only takes a few minutes to make. 


A definite bonus to making salsa using canned diced tomatoes with green chilies is how inexpensive it is, but if you prefer pre-made salsa by the jar, yet want to give it some pizzazz for company, just add some fresh ingredients to that too. Jarred and canned salsas have a lot of salt so another benefit of adding fresh veggies is toning that salt flavor down and then you may choose not to add anymore seasoning at all. Enjoy!


Check out the tabs at the top of my blog for more projects and ideas and thanks for stopping by!

Sunday, January 3, 2016

Yarn Craft Project: Make a Sprang Satchel on Your Own Homemade Loom

 My first love is paper crafts, but over the years I have learned to do some fabric art techniques such as Card Weaving, Inkle Weaving, Stick Weaving and Sprang of which I really enjoy. Today I'll be sharing a satchel I made using the Sprang technique.

I had never heard of Sprang Weaving before the day I learned to do it. Some of my girlfriends and I just decided to take a class at a medieval event for the heck of it and it was a lot of fun. When the class ended I couldn't wait to make something and pictured below was the first thing that I made.

Sprang allows you to make a weaved item that will stretch big enough to accommodate what you need it to carry or contain, but sprang can also be used to make a gorgeous scarf, blanket, clothing, winter hat, and many other things. So if your looking for a new yarn craft, you may want to check out Sprang. 
"Sprang is an ancient method of constructing fabric that has a natural elasticity. Its appearance is similar to netting, but unlike netting, sprang is constructed entirely from warp threads. Archaeological evidence indicates that sprang predates knitting; the two needlework forms bear a visible resemblance and serve similar functions but require different production techniques..." (https://en.wikipedia.org/wiki/Sprang)  
A satchel for carrying and covering a soda or water bottle made from the Sprang technique.
Sprang stretched out to show the weave pattern.

Shell discs were used to decorate the front of the Sprang Satchel.
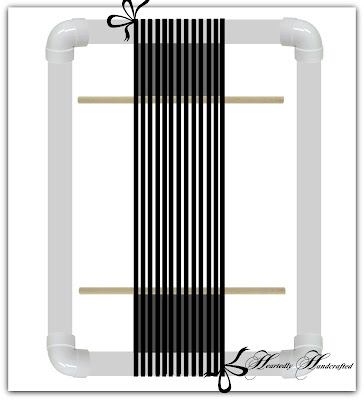
Sprang looms come in many forms. Below are examples of what two loom designs would look like made from PVC pipe. These looms can be built to stand on their on with some PVC pipe Ts.

PVC pipe Sprang Loom

PVC pipe Sprang loom.

I was excited to see the PVC pipe design instructions because building this loom is very inexpensive, easy to build and it's a very sturdy design. You can find one of the PVC Loom Building links below.

Braided yarn to make the satchel straps 

A satchel made from the ancient Sprang Technique holding a soda bottle to make it easier to carry, keep the soda cool and to keep this modern bottle covered/hidden when attending medieval events.

I'm not positive, but the instructor for making the loom may have been my instructor for the class I took. If you Google "Sprang Weaving" you can find a lot of information and videos on building a loom as well as how to get started.


Happy Crafting and stop by again for new projects!

post signature