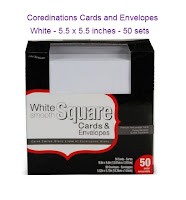
Today I have a greeting card made from the gorgeous Kirby Teesdale Paper Pack by The Paper Studio and Core'dinations Cards and Envelopes set. I have also included, a short tutorial to show how to make the 3D butterfly, and a materials list so that you can make your own card, but first things first.
 |
| Card measures 5.5in x 5.5in and is decorated with paper from Paper Studio's Kirby Teesdale Paper Pack |
To give the white cardstock and sentiment a little color I lightly sponged them with Tim Holtz Distress Ink in the colors Victorian Velvet and Tea Dye. Glossy Accents was used on the sentiment and on both large butterflies to further accentuate them.
Adhering a three dimensional butterfly and a swirl of adhesive pearls was the last touch.
Materials List
Kirby Teesdale Paper Pack by the Paper Studio
Core'dinations White, Smooth, Square Cards and Envelopes sets
Tools List
Paper-cutter
X-Acto Knife
Adhesive
Black Sharpie (fine tip)
Sizzix Thinlits Sentiments (660218)
Martha Stewart corner rounding punch
Glossy Accents
Card Assembly
White base card (5.5in x 5.5in)
Pink mat (Just 1/8 of an inch bigger than the front of the card)
Front of card (5.25in x 5.25in)
Instructions for Butterfly (This is your last step when making this card)
1) Use an X-Acto knife to cut out the same butterfly from another sheet of paper. You'll want to be careful to keep the butterfly's head intact, but there is no need to cut out the antenna. Just leave them behind.
 2) I decided to draw over the black lines of the butterfly's wings with a black Sharpie marker to make the lines darker and stand out more.
3) Keeping the body of your butterfly flat, bend the wings into the shape that you would like them to be in when your card is finished.
4) Now flatten out the wings a little bit so you can put your Glossy Accents on without it sliding off the wings. Bending the wings now will make it easier to move and shape them once the Glossy Accents is dry.
5) When the butterfly is completely dry go ahead and very gently shape the wings. Be careful not to crack the shiny coat by bending them too much.
6) Place adhesive only on the butterfly's body and adhere it right on top of the same butterfly that is on the front of your finished card.
That's it!
NOTE: There is another way to achieve the 3D look. Before assembling your card, just cut around the wings of the butterfly you want to stand out. Then shape the wings and add Glossy Accents. No need for a second butterfly. Here is a card that I did using that technique.
You can find this card here.
Happy crafting and thanks for stopping by. Stop back again for new projects!


No comments:
Post a Comment