Wednesday, September 24, 2014

Autumn Leaf Greeting Card

Happy Autumn everyone!
The air is getting cooler, the leaves are changing and I can't wait to get out and take some photographs of the spectacular color and views we get here in Pennsylvania. Today I decided to use a monochromatic color scheme for an Autumn themed card. I don't have any Fall themed paper or embellishments so it came down to using color and texture to give my card the right feel. The type of card I made is similar to a Criss-Cross Card, but does not have the continuation of the front angles which actually make the criss-cross.
 
Outer Card: Pocket
 I cut a piece of 12"x12" craft cardstock in half

Score the paper at the 3" mark and the 9" mark

 Fold the 3" flaps forward

 Fold the top inside corner of both flaps to meet and line up with the side of the card, making two triangles.

Cut away each triangle at the fold mark you made

Do not push anything together until all tape is in place.
To form your pocket - Run tape along the bottom edge of each flap. Tape a small strip of paper (same color is best, but not necessary) behind the flaps to hold them together. Sorry I forgot to take a picture of this and had to improvise with an existing photo.

You now have your pocket to decorate with patterned paper and embellishments. Below is a photo taken before I pressed the last flap down on the strip of taped paper connected to the other flap.

Cut the base of your card for your pocket just a little smaller than the 6"x6" pocket. Adjustments are easily made. Then mat and embellish. I used the Spellbinders Shapeabilites "3 Fancy Tags" die (S4-235) to make the little decorations that come over the top. The card is backed with paper from the DCWV Burlap Paper Stack
 
For the last steps I added twine as a handle to pull the card from the pocket and then I covered the back of the card with deep brown cardstock.
 
I used the Rubber Stampede Winter Woods (A2430F) stamp for the trees and an ek border punch to edge the top f the medium brown mat.
 
Then place you card in the pocket
 
I used the the Tim Hotz Alterations "Tattered Leaves" die (556927) for all my leaves and colored them with Tim Holtz Distress Ink in Vintage Photo and Olive, and Rubber Stampede ink in Orange and Yellow. The bow is made from some scrap material I had and I added a small orange button to the center.
 
  Happy Crafting!
 post signature

Thursday, September 18, 2014

Repurpose a Peanut Can for Gift Giving

Hello peeps! I've been working on a project that will take me at least through tomorrow to finish, but I want to share a little gift my daughter and I made together for her boyfriend from an old peanut can. I love to repurpose and recycle and I think that has rubbed off on my daughter. I also love that my daughter enjoys making handmade gifts for people.
 
 
This can is very similar to the can she began with.

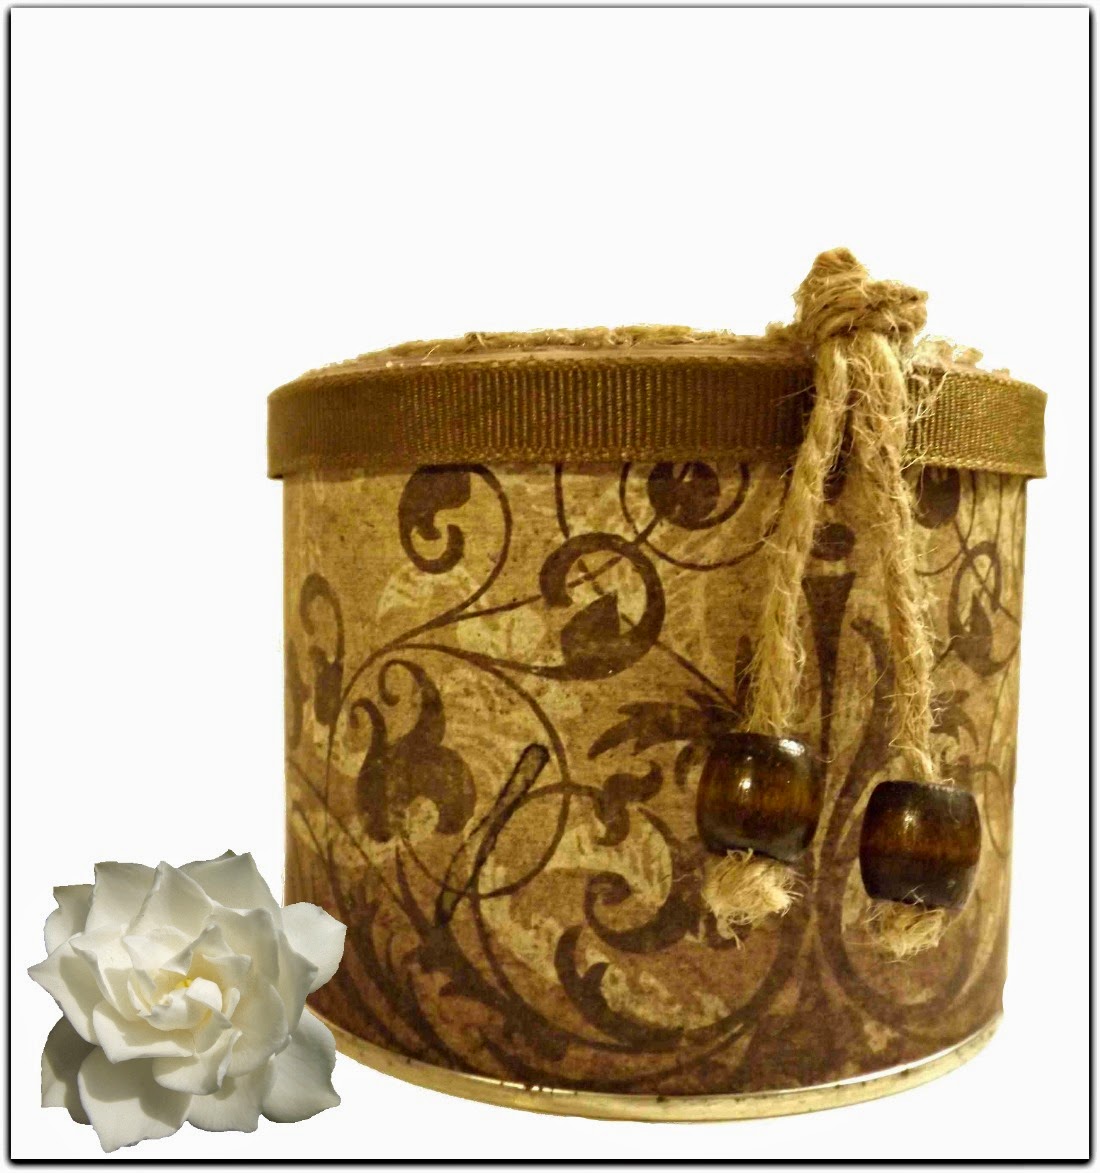
She used the Spellbinders Nestabilities Standard Circles die pack (S4-114) to cut out a round piece of deep brown cardstock to cover the top. The largest circle is the perfect size. Then she used Stazon ink in Timber Brown to color the edges of the lid that would not be covered and to give the paper a textured, leather-like appearance. To hide the edge of the paper circle and give the top of the can a little pizazz she hot glued twine around the inner lip of the lid.

For the exterior of her project she used Tattered Time cardstock by DCWV. I really like this paper and the colors are perfect for giving a project a masculine feel. To cover the outside she cut a strip of cardstock (approximately 3" tall by 12" wide) and wrapped it around while taping it into place. The 12" wide paper did not quite make it the entire way around the can so she took the plain brown cardstock she was using and filled the gap giving the point where it joined a clean, finished look. For the outer edge of the lid she used brown ribbon and then added some wooden beads on the twine.

Inside she lined the can with clear plastic by cutting a baggy into a strip and then added a circle of cardstock to cover the bottom. To finish her gift she placed a note in the can and then filled the can with one of her boyfriend's favorite treats. An easier way to do the inside would be to use a cute cellophane treat bag, but we didn't have any and had to improvise.
I think it turned out really cute and it only took about 15 minutes to throw together. 


Happy Crafting!

post signature

Sunday, September 14, 2014

Flowers For My Mom Greeting Card

Hello everyone!
It's been a little while since I've been able to post on here. Life is looking up and I'll have an update to that part of it in a couple of weeks. Thank you for the kind words that continue to come in, it really has helped me stay strong.

Today I decided to make a greeting card. Sometimes I like to use people for inspiration and this time I reflected on my mother who passed away 5 years ago tomorrow. Her favorite color was green, she had a colorful personality and had told me how much she liked all the flowers that line the highways in Virginia. I made the card simple because in daily life everything can be so hectic, but when you lose someone you love, everything that was hectic goes away and you simply just miss them.


I used Core'dinations celery green cardstock for the base of the card and flower stems and matted the front with Core'dinations white textured cardstock. 
 
 
The flowers are also made from the same white cardstock of which I used a Tim Holtz Alterations die called Mini Paper Rosettes to cut them out. I colored the paper with Tim Holtz Distress Ink in the color Tumbled Glass and Rubber Stampede ink in Fuschia. 
 
 
The banner was made from left over white cardstock and edged with the inks mentioned above. The sentiment is a rub-on transfer.
 
 
Supplies ListCore'dinations Cardstock
  • Textured white 
  • Smooth light green
Tim Holtz Alterations Die - Mini Paper Rosettes
Tim Holtz Distress Ink - Tumbled Glass 
Rubber Stampede ink - Fuschia
Plaid Mod Podge Rub-on Transfers 

Happy Crafting!
 
 post signature