
Tuesday, December 23, 2014
Friday, December 19, 2014
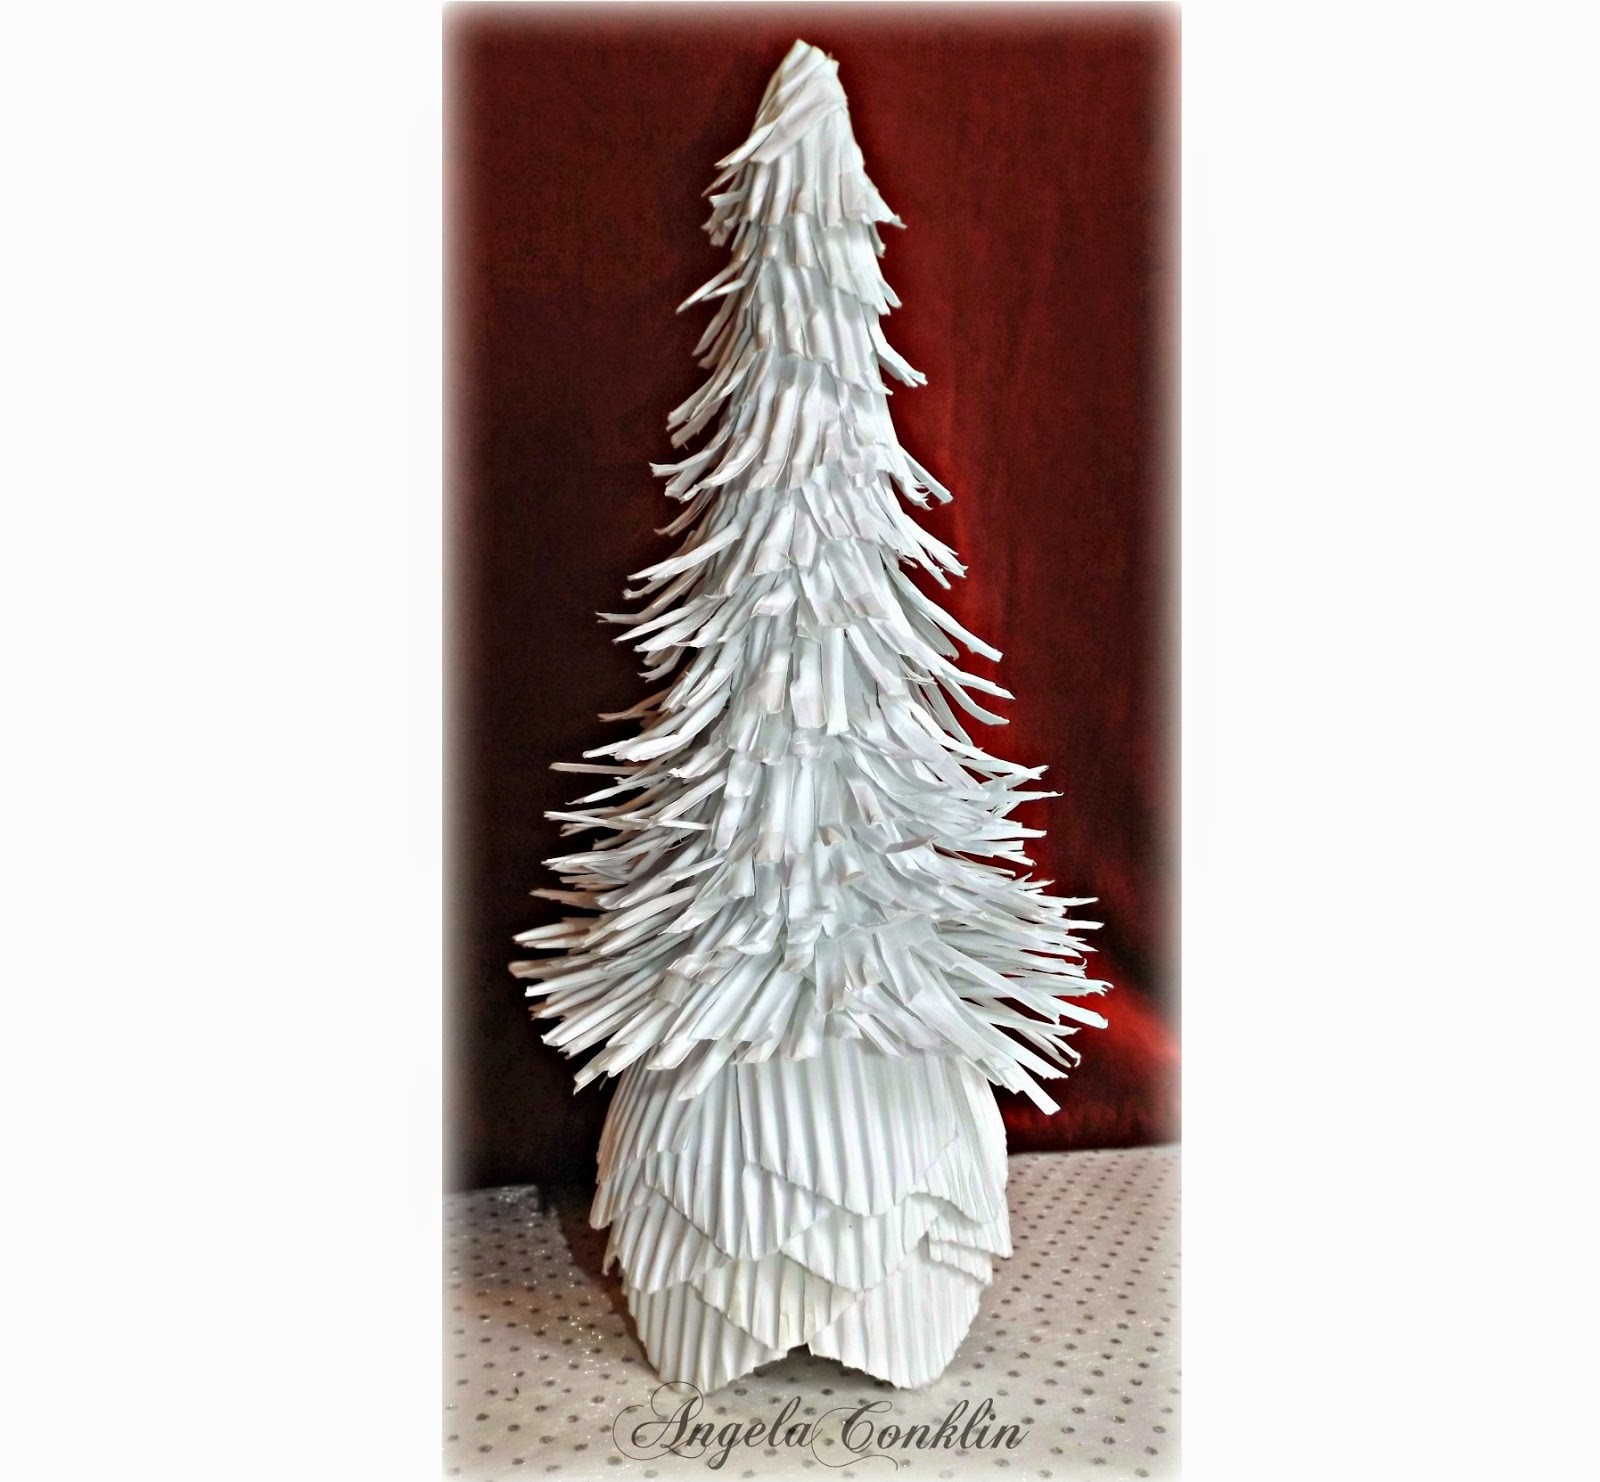
Winter Tablescape: Trees Made from Bordette Decorative Border Craft
Hello crafty peeps!
Today I'm having fun working on a winter tablescape. I want a snowy feeling with pine trees and rolling hills to set up my glass snowman collection. There will be some color, but because this particular decoration is something I will leave up throughout the season I don't want a Christmas scene, but instead just a winter one. Eventually I will be making a blue background with sparkles and snowflakes and then underneath will be white lights to light up the entire scene. The bottom of this particular tree will not be cut so the base will blend into the snow covered hills I will be making.
To make the core of my tree I used one 12"x12" sheet of Colorbok chipboard that I rolled into a cone shape. When I was done rolling it there were a couple of corners sticking out at the bottom and I just cut those away to make a flat surface. I used hot glue since I was concerned that any tape I have would not be strong enough.

To make the outside of my tree I used Pacon-Bordette Decorative Border. If you're unfamiliar with it, it's the scalloped border many teachers use in their classrooms around their chalkboards, posters and special class events to make them stand out.
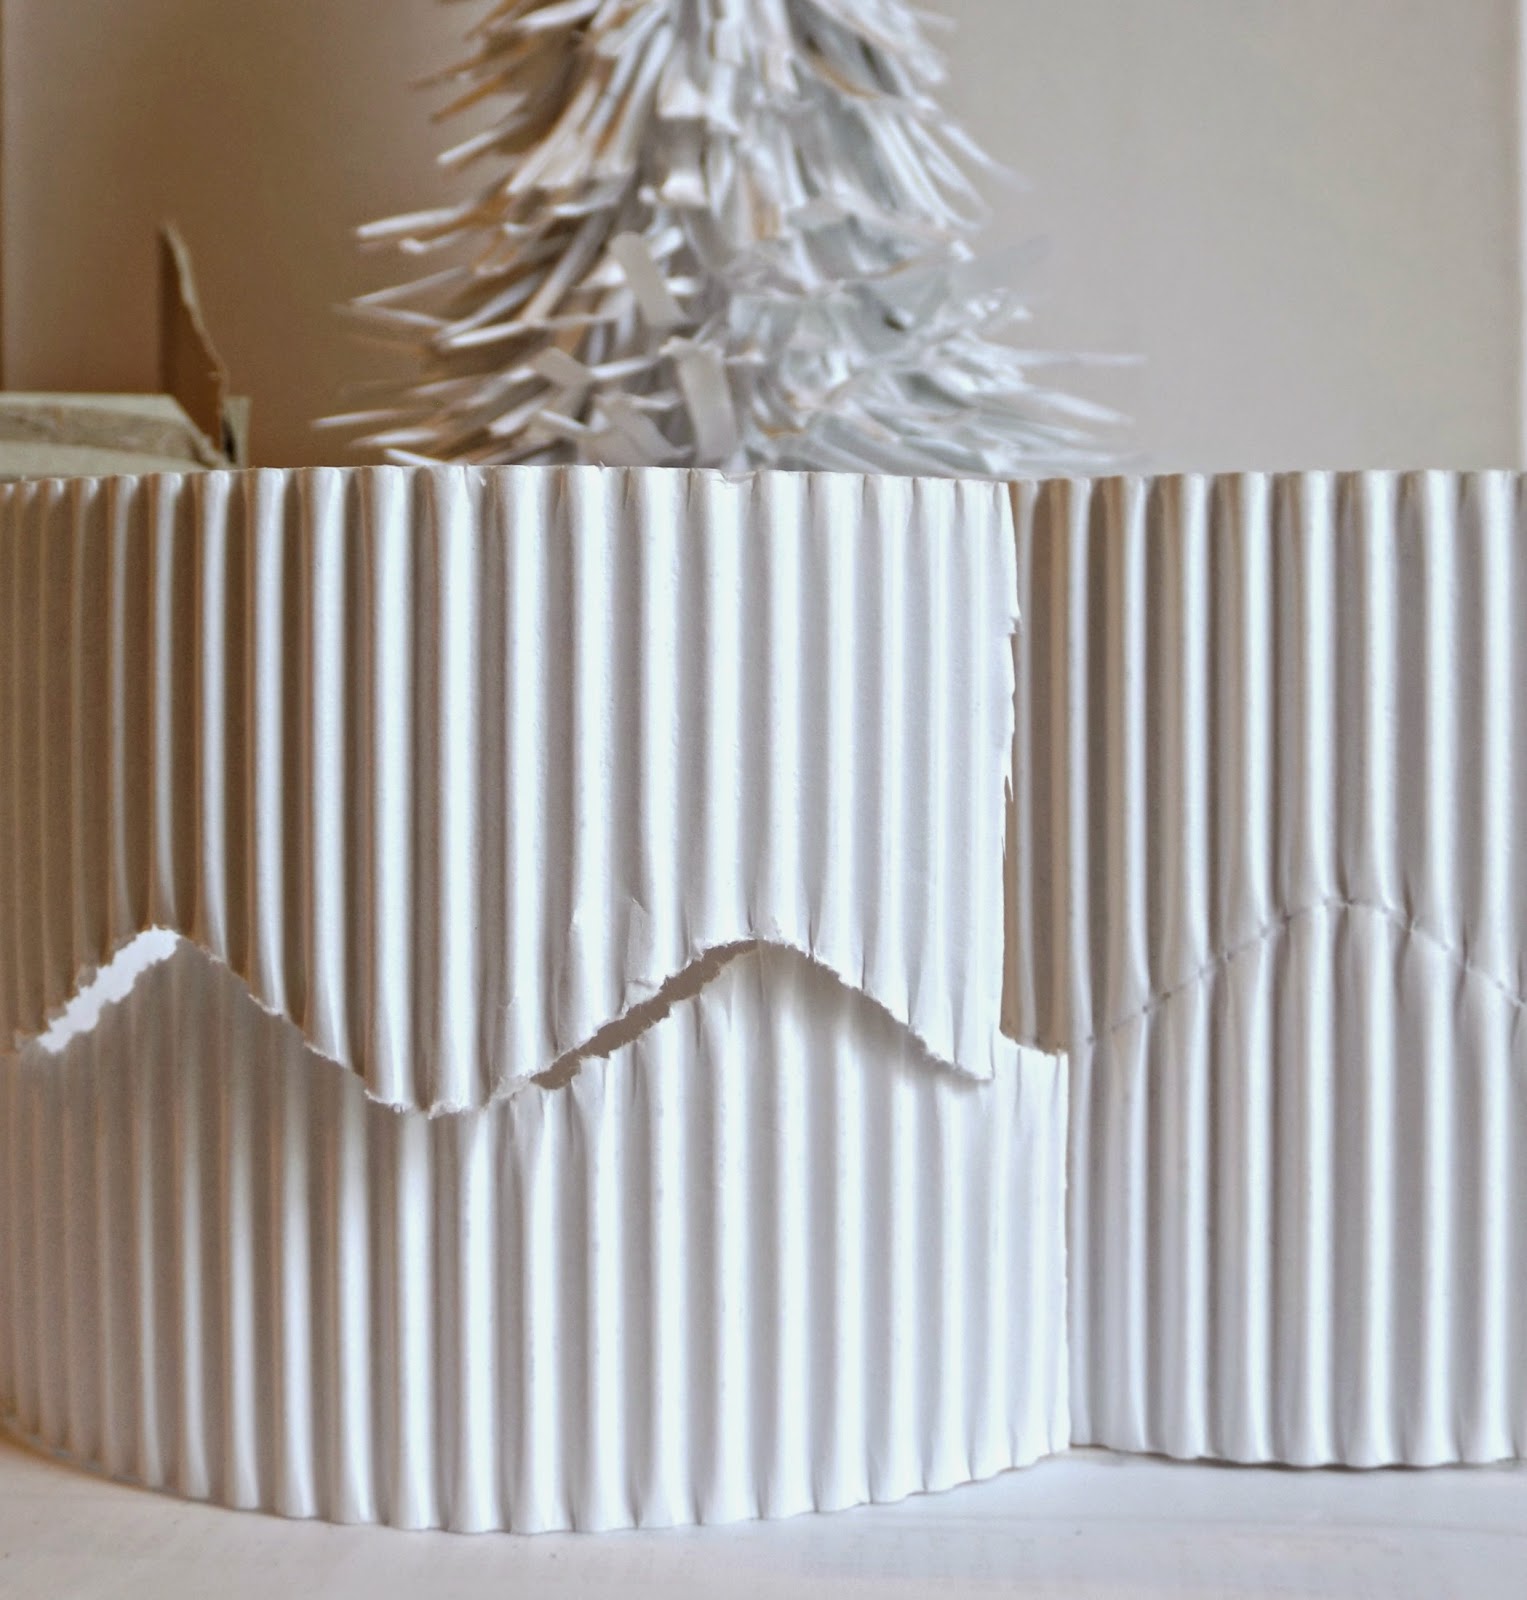
I separated the border at the pre-made scalloped line in the center and then cut between each scallop so I would have scalloped pieces to hot glue onto the core of my tree.
I wasn't very particular about how they went on my tree, but I would recommend staggering them the best you can. Similarly to what I show below and in the next photo. This will make your tree look more full by avoiding your pieces being in even rows. You will not be able to line the pieces up perfectly since the tree narrows as you get closer to the top, but just try to keep the pieces staggered and it's okay if they overlap sometimes.
I started from the bottom and worked my way up.
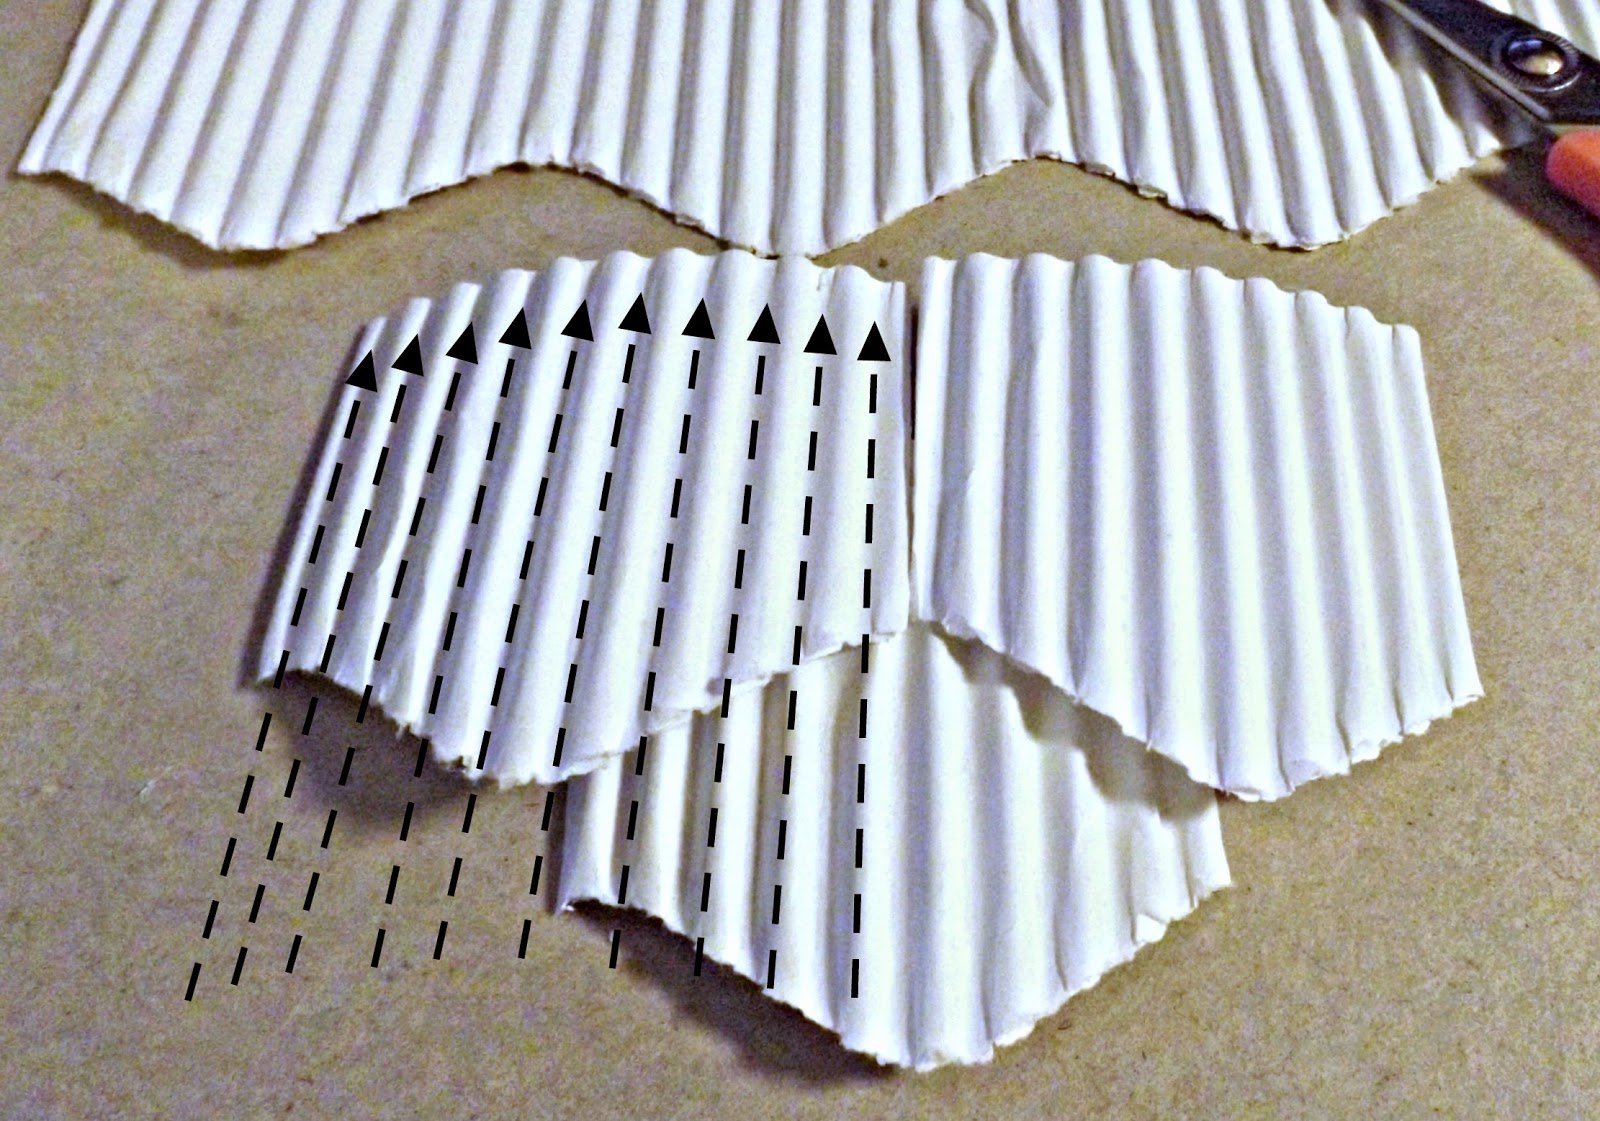
Note: Only add a thin line of glue to the very top edge of each piece so you leave plenty of room to cut your fringe.


Next, starting from the top of the tree and making my way to the bottom I cut in the creases of each corrugated piece. Shown below with the arrows.
Note: Don't cut the whole way to the top, although the dried glue will often stop you from over-cutting.

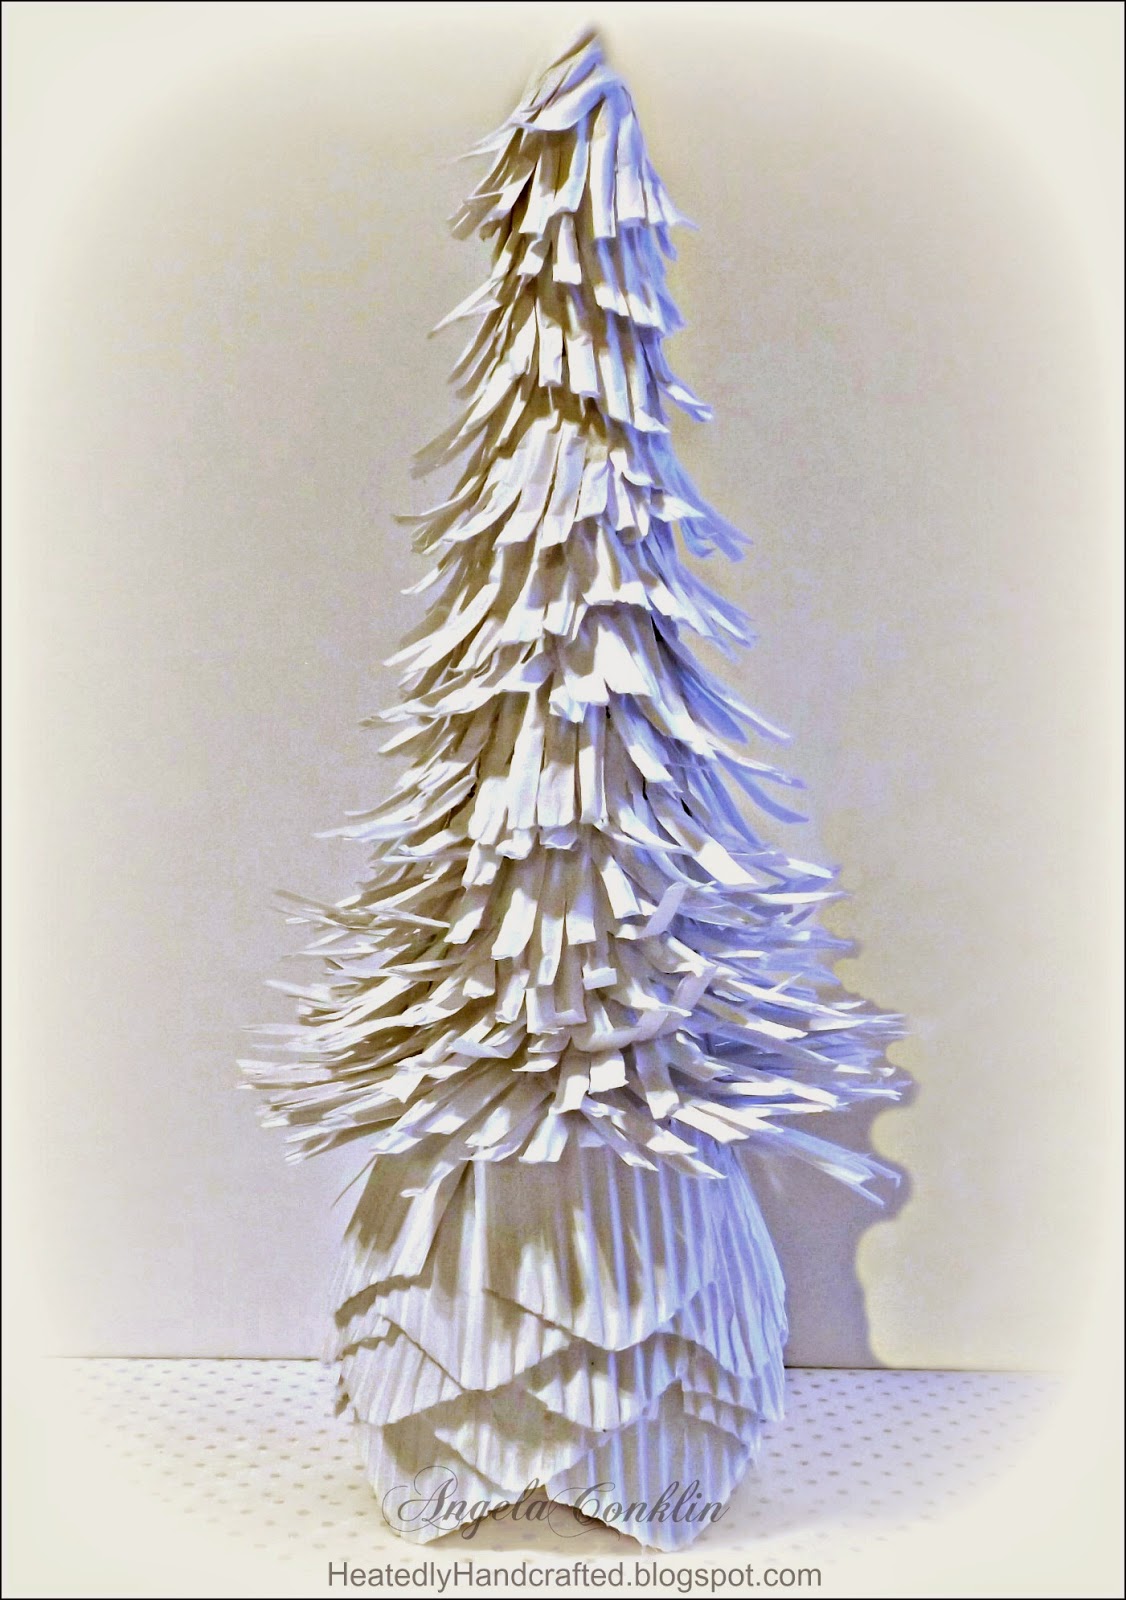
That's it! Now I have a couple more trees to make and I will have my snowman tablescape. I may decide to add something to my trees, like fake snow or a little diamond dust. I'm not sure yet, but there are plenty of choices out there.
Scissors

Wednesday, December 17, 2014
3D Bird Cage Ornament Using the Sizzix Caged Bird Die

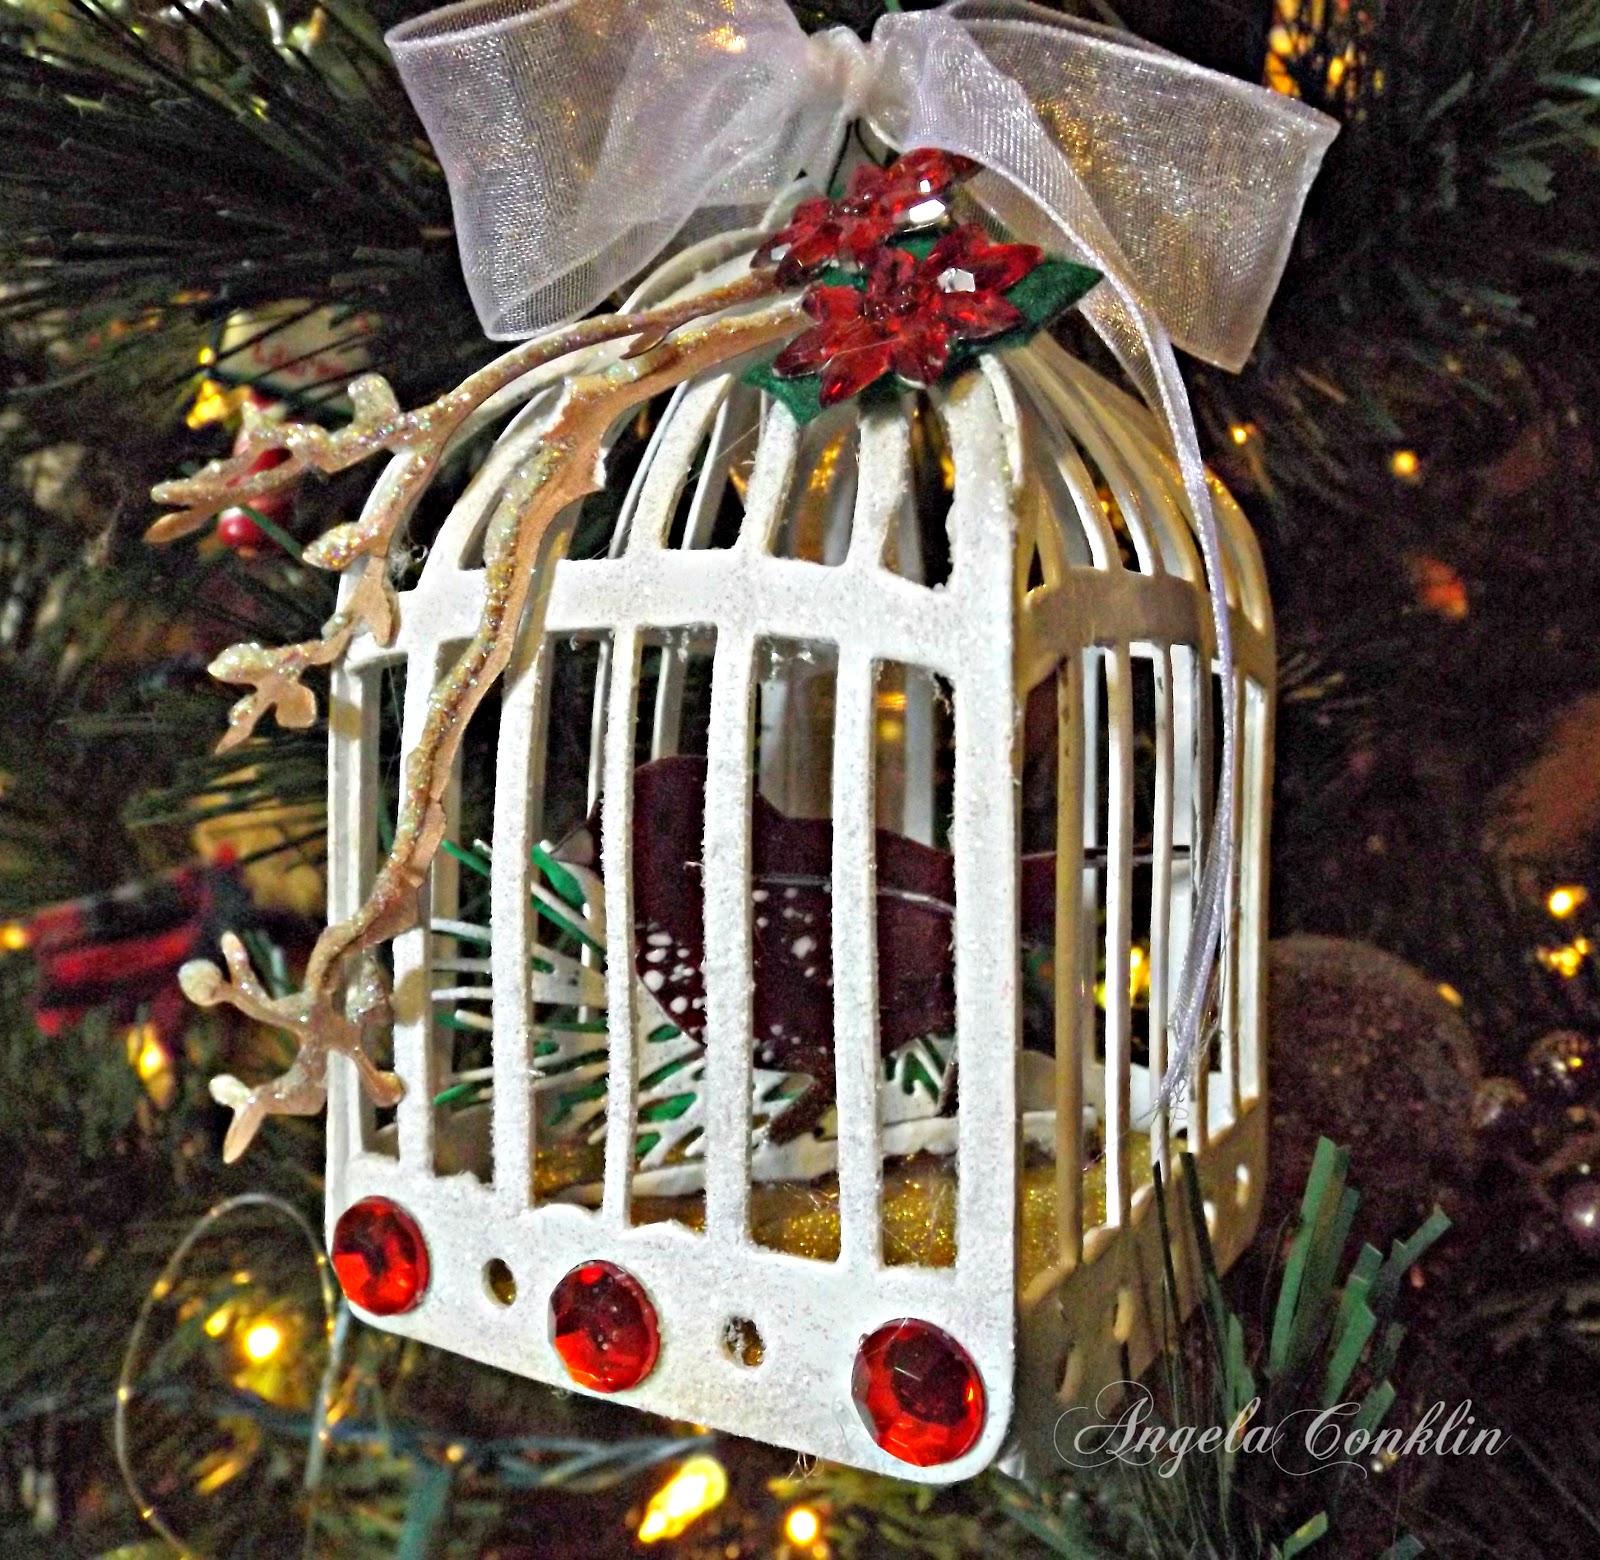
I learned the technique from the tutorial below by Brownbabycraftaholic. She shows exactly what she did to put them together
and there's another tutorial by her for ideas on how to decorate them. She did an amazing job. They're gorgeous.
Supplies I used for my Bird cage
- Colorbok brown chipboard
- Sizzix Bigz Die - Caged Bird
- White acrylic paint
- Martha Stewart Bone folder
- Glossy Accents to glue cage together and add Fabric Art glitter to branch
- Crystal Diamond white Glitter for outside of cage
- Sizzix Bigs Die - Bird Branch die
- Tim Holtz Distress Ink - Vintage Photo to color branch
- Offray translucent white ribbon
- Jewelry wire to hold top of bird cage closed and make hook for hanging
- Colorbok brown chipboard
- Sizzix Bigz Die - Caged Bird
- Hampton Art Embossing Powder - Metallics (Deep Red) for the bird
- White acrylic paint for the bird beak and spots
- Impression Obsession Pine Branch die
- Rubber Stampede ink - Green for the first pine branch
- Hampton Art Embossing Powder White with Glitter for the second (front) pine branch

Tuesday, December 16, 2014
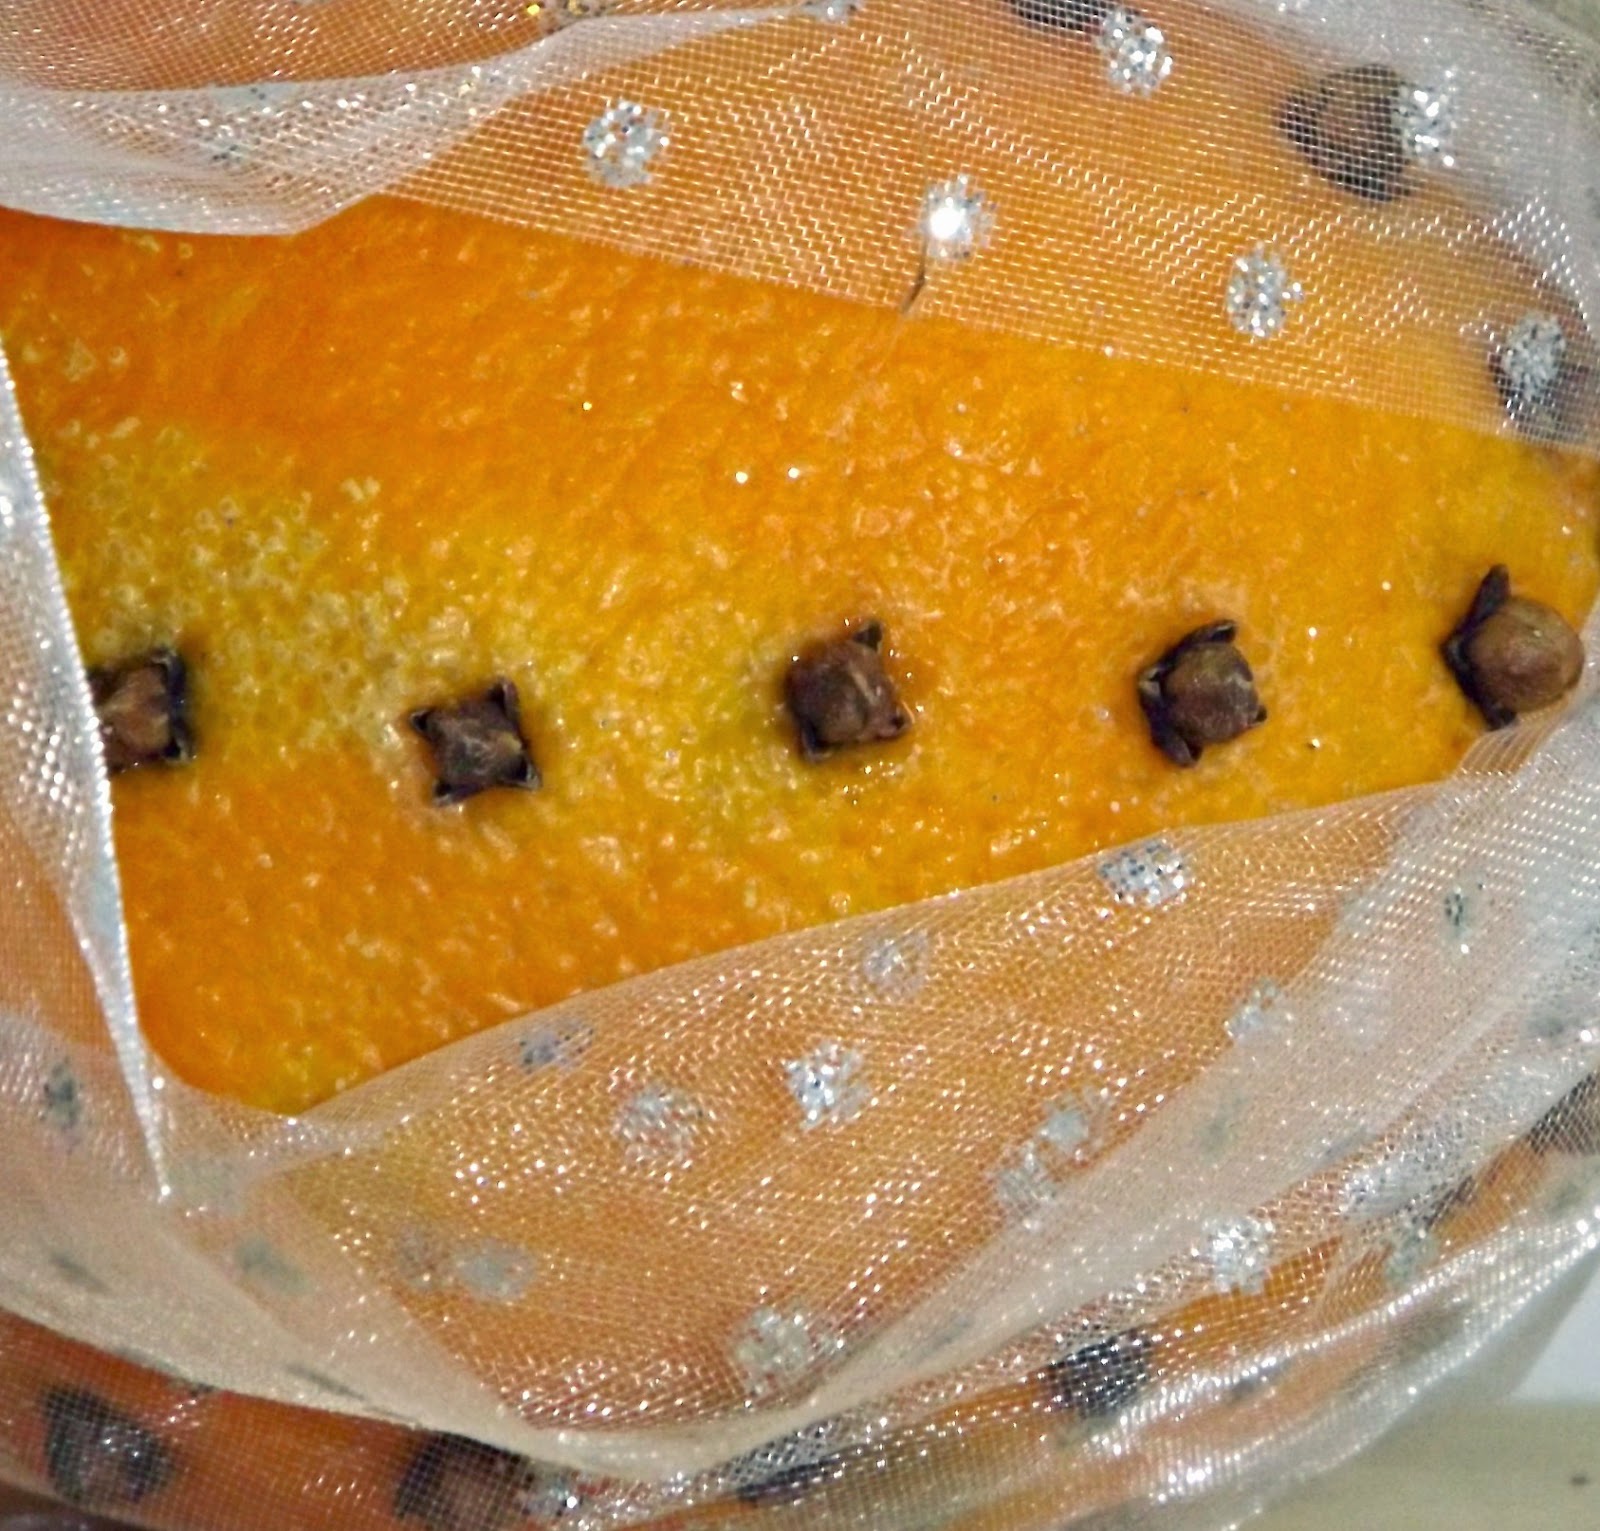
DIY Air Freshener: Orange and Clove Pomander Balls


Saturday, December 13, 2014
Handmade Christmas Card: Pink and Gray Peace
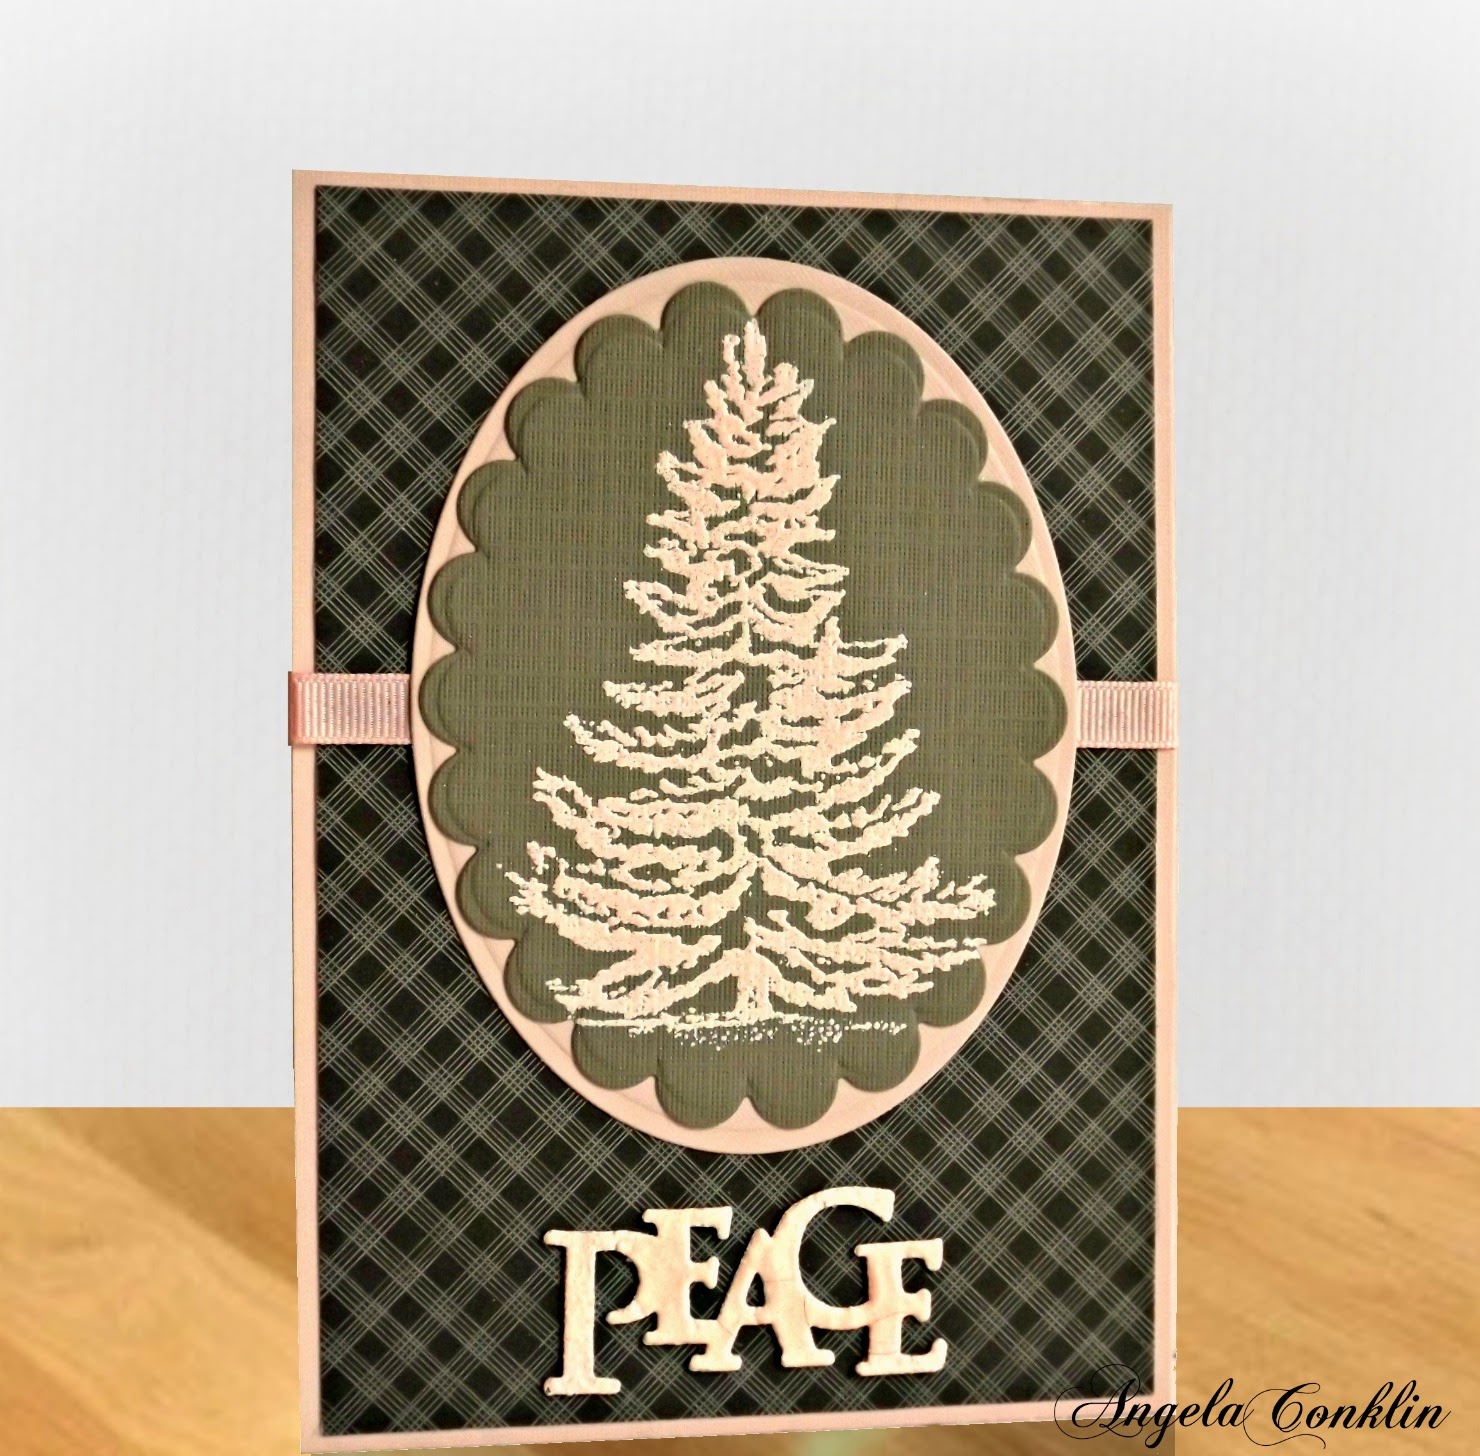
If you would like to make this card, here is a tutorial.
Cardstock preparation~Light pink~
10"w x 7"h (Fold card in half at the 5" mark)
5"w x 7"h mat
3 3/4" x 5" smallest die from Spellbinders Grand Ovals
~Plaid and brownish-gray solid~
4 3/4"w x 6 3/4"h
3 5/8" w x 4 5/8"h smallest die from Spellbinders Grand Scalloped Ovals
To make your tree
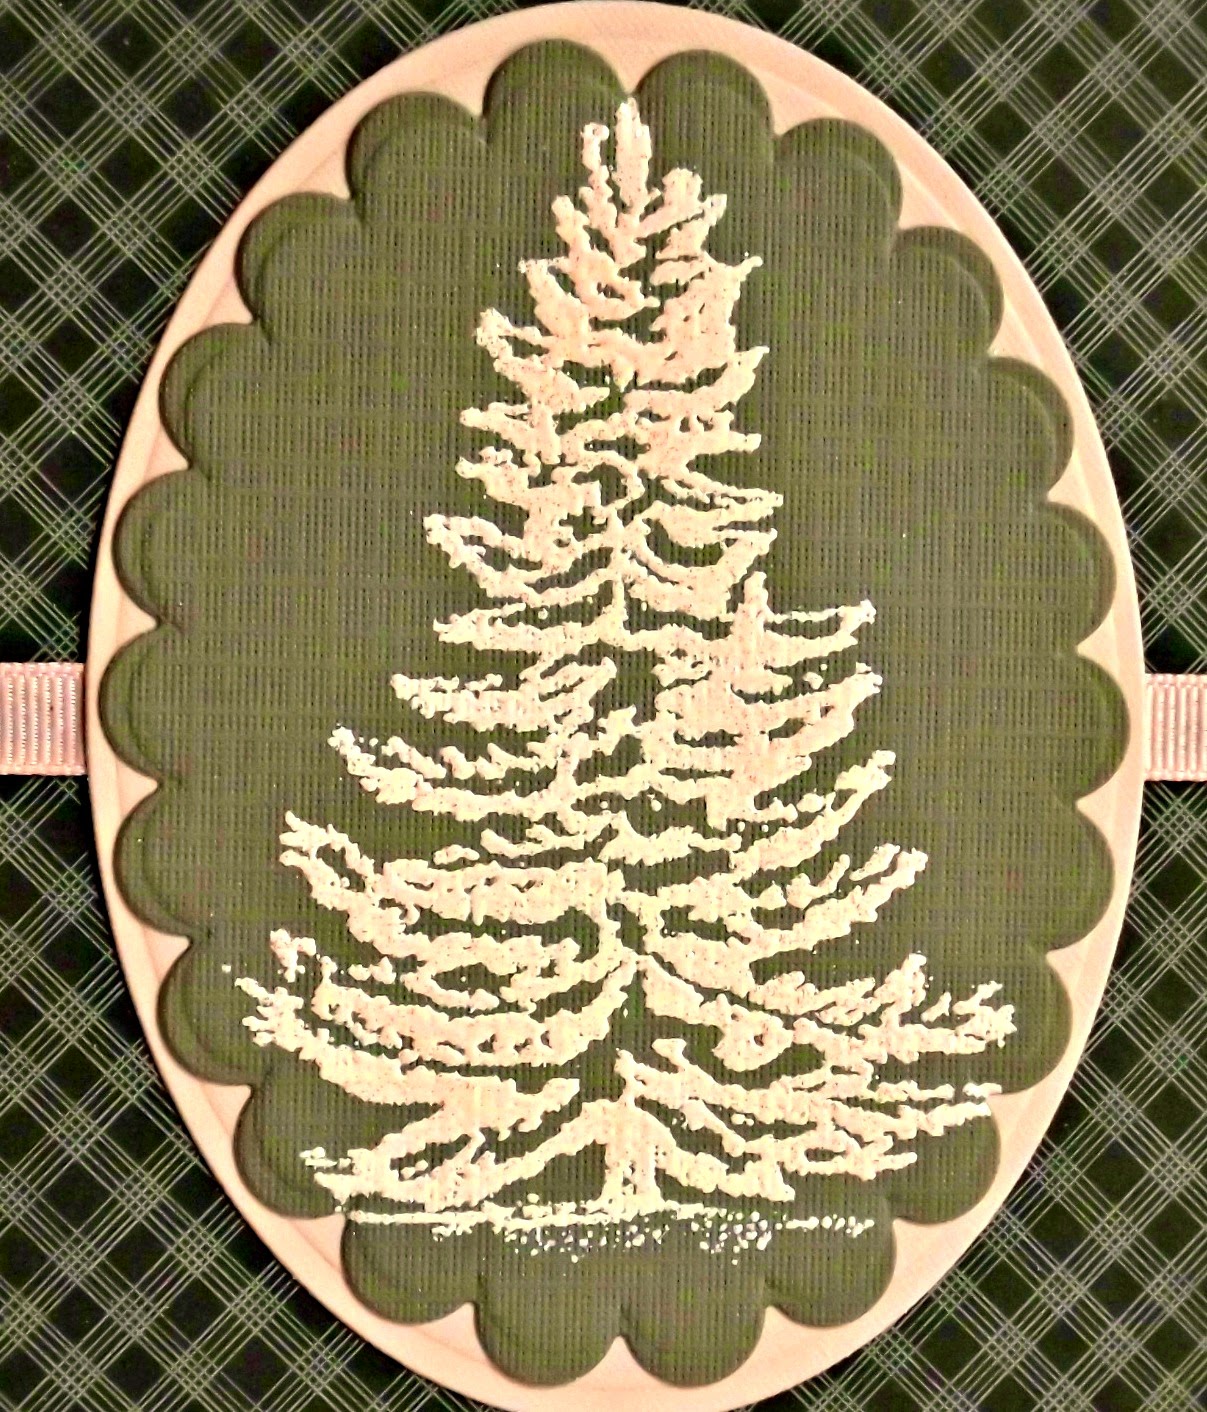
1. Stamp your tree image on your brownish-gray scalloped oval with VersaMark ink
2. Use the light pink Hampton Art embossing powder that has the sparkle in it
If you have never embossed before, the video below will show you how.
How to Emboss using embossing powders and a heatgun
3. Once your tree is done, place the scalloped oval die over it, center your tree and die cut it. How to Emboss using embossing powders and a heatgun
Note: I wanted the embossing powder to be thick on this card so as soon as I was done heating the first layer of powder I added two more layers of powder. There is no need to use ink in the additional layers because the heated embossing powder will be sticky for as long as it remains heated and will hold the new powder. If your tree cools down and some areas aren't sticking well, use your heat tool to heat it back up.
To make your card

1. Adhere your plaid mat to your pink mat
2. Adhere you scalloped oval onto the center of your pink oval
3. Place tape onto the back of your pink oval
4. Lay your ribbon on the back of the pink oval, centering it from top to bottom and making sure that you made it long enough to go around the back of the mats
5. Add tape to the back of your ribbon and adhere your ovals and ribbon to your mat.
Sentiment
For my sentiment I used the word from a Holiday Time Gift Tag since I have a bunch of them that I had gotten free. If you don't have these, you can use a die-cut sentiments. There are plenty of them out there and you can buy them from companies like Top Dog Dies and Spellbinders.
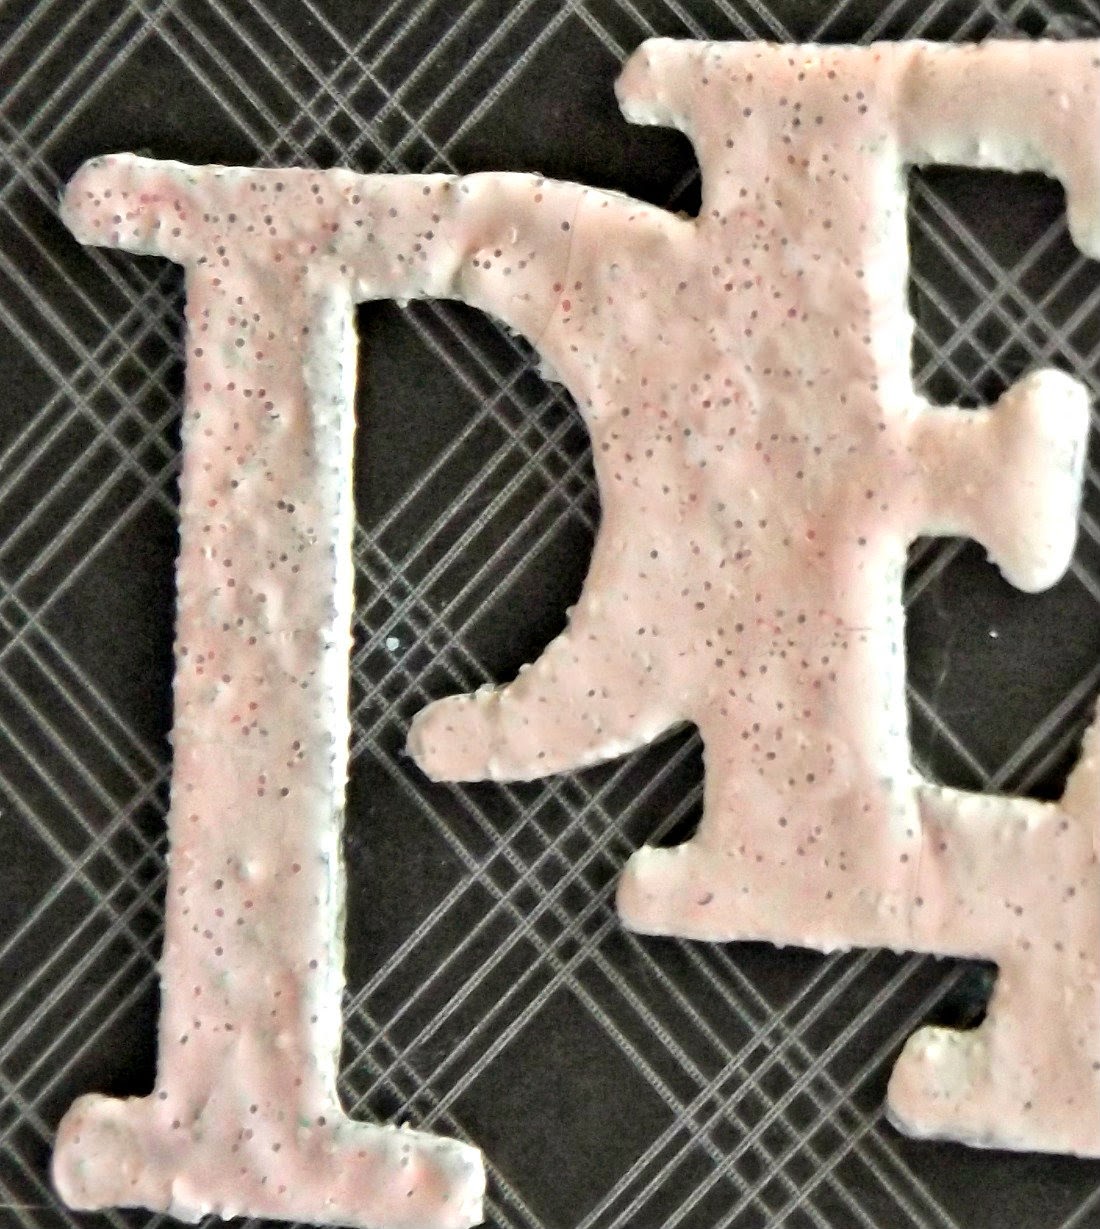
To make my sentiment match, I embossed it with the same embossing powder I used on the tree. I also added three layers of embossing powder because I wanted the letters to be thick and run together more.
You're finished!

Supplies List
 The plaid cardstock was bought as a single sheet at Joann Fabrics, but any gray, plaid cardstock will do. Unfortunately it did not come with a name or referral number on it.
Wednesday, December 10, 2014
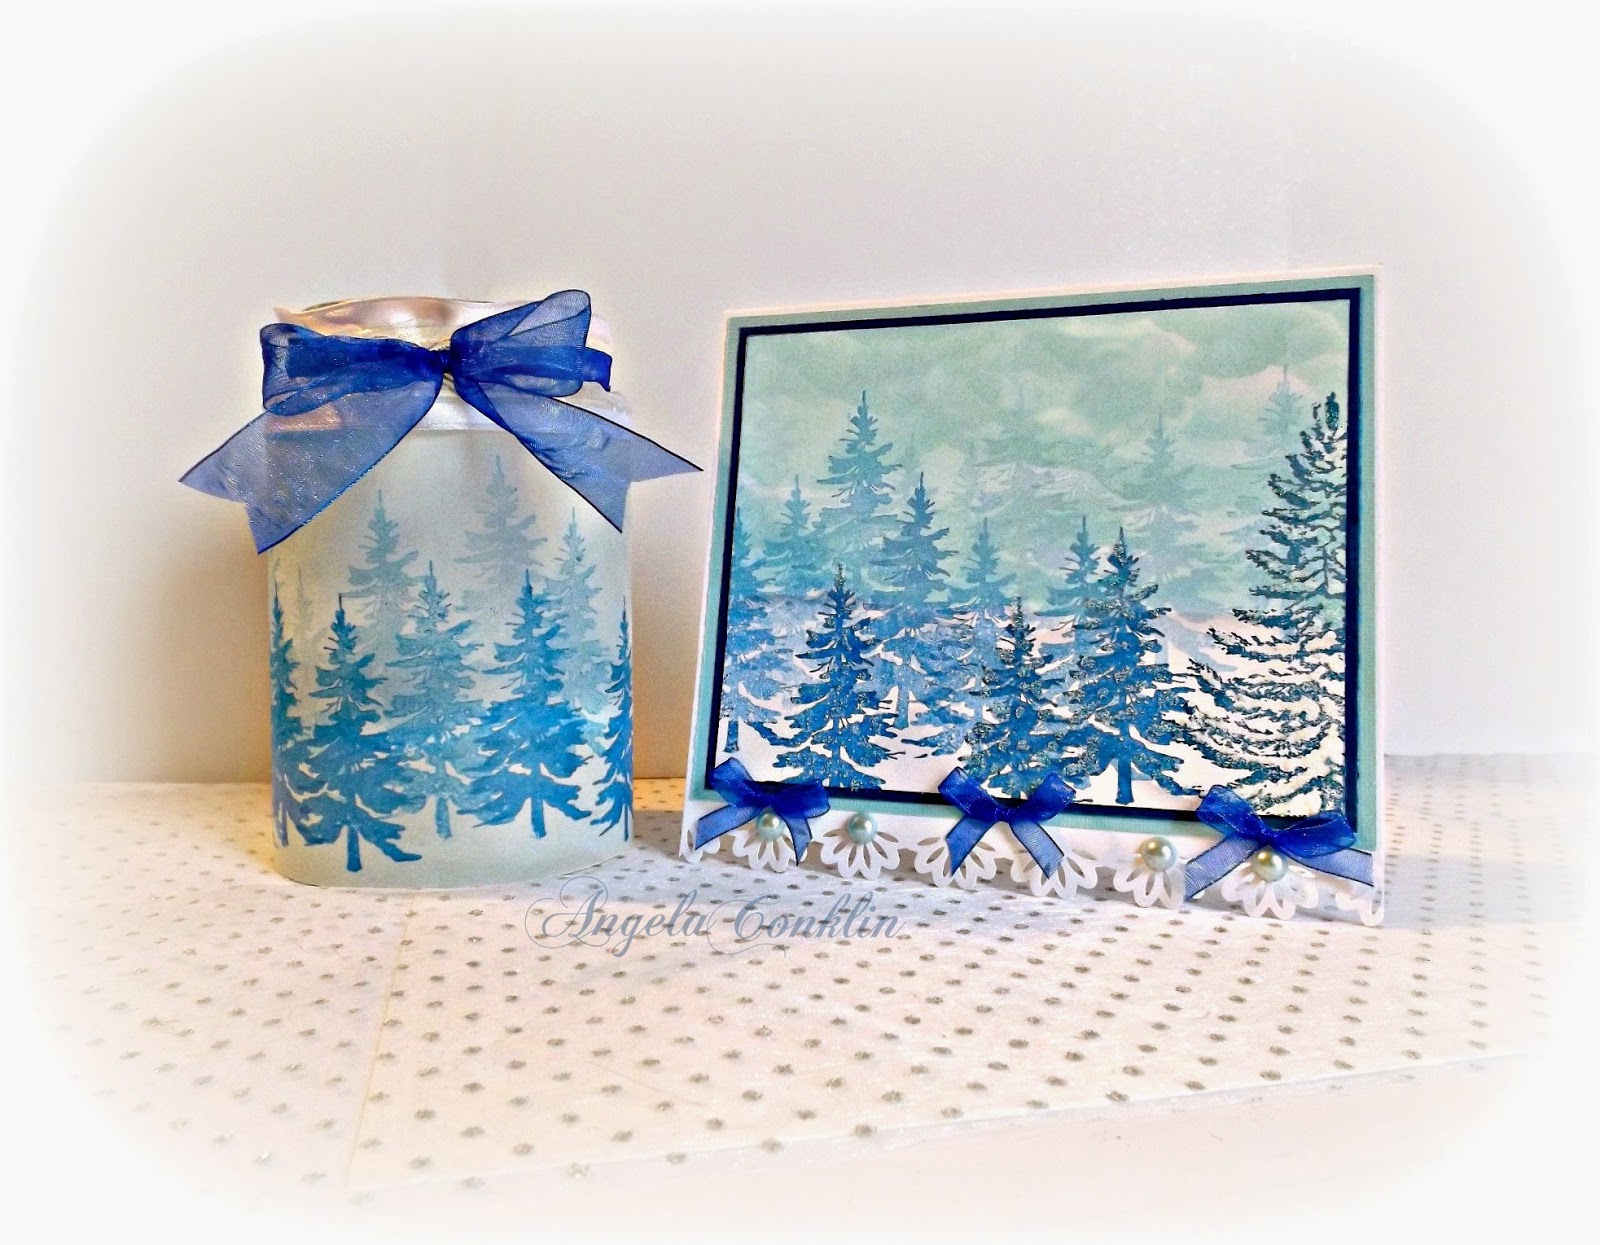
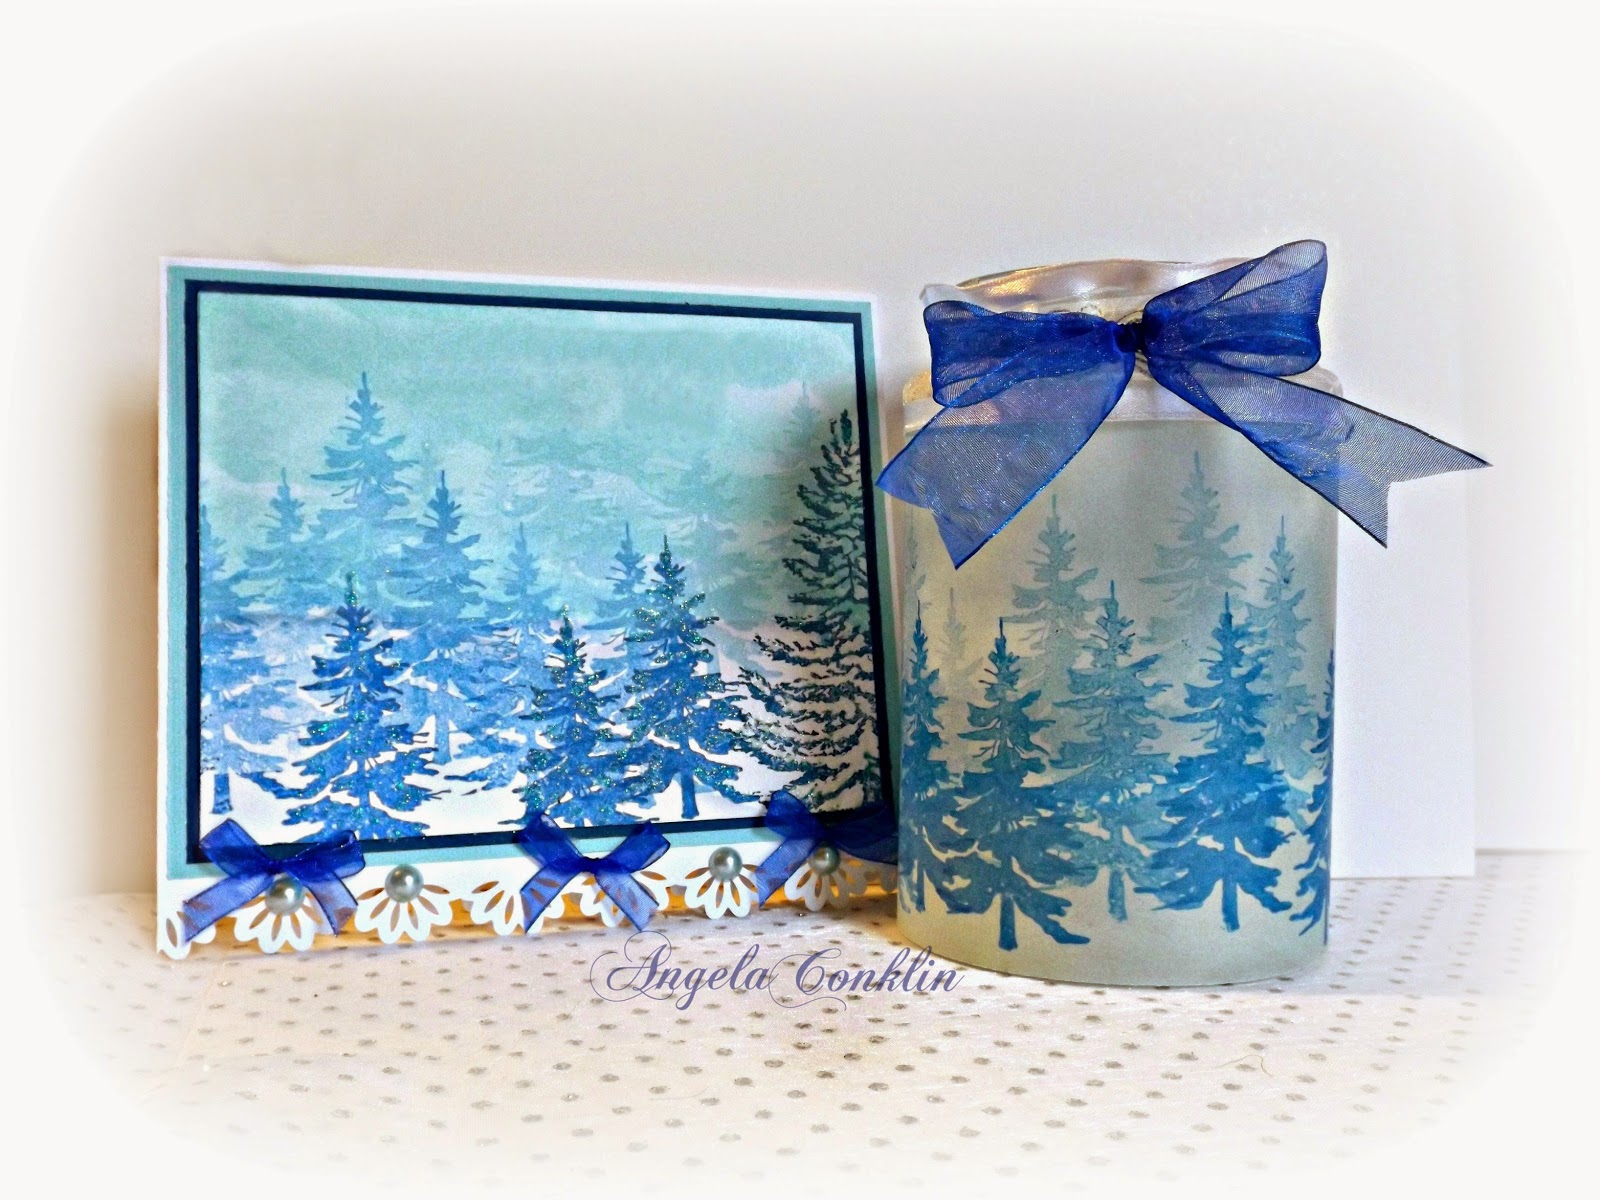
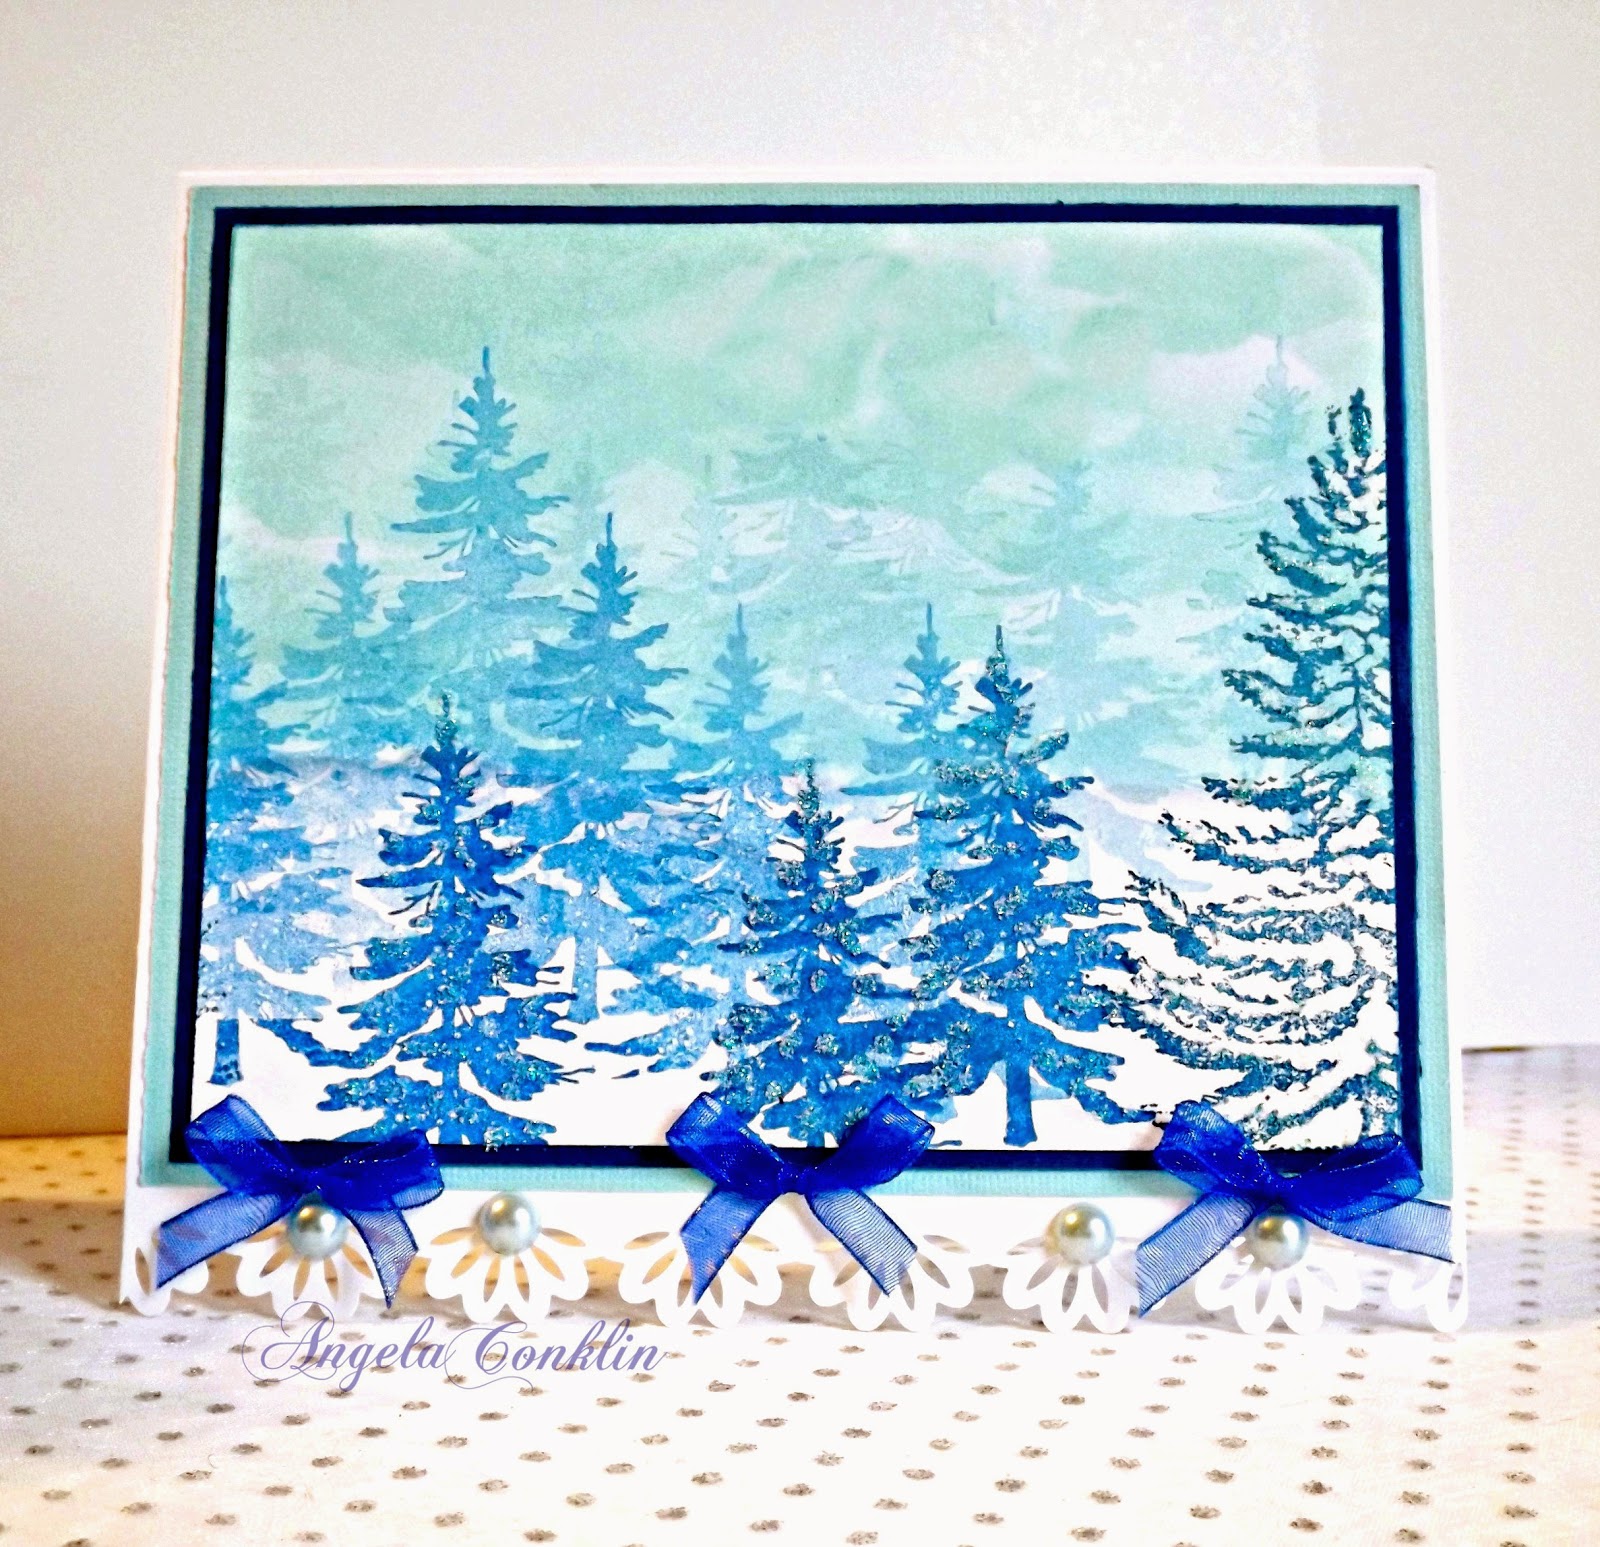
Repurposed Jar Craft: Winter Landscape Card and Candle Gift Set

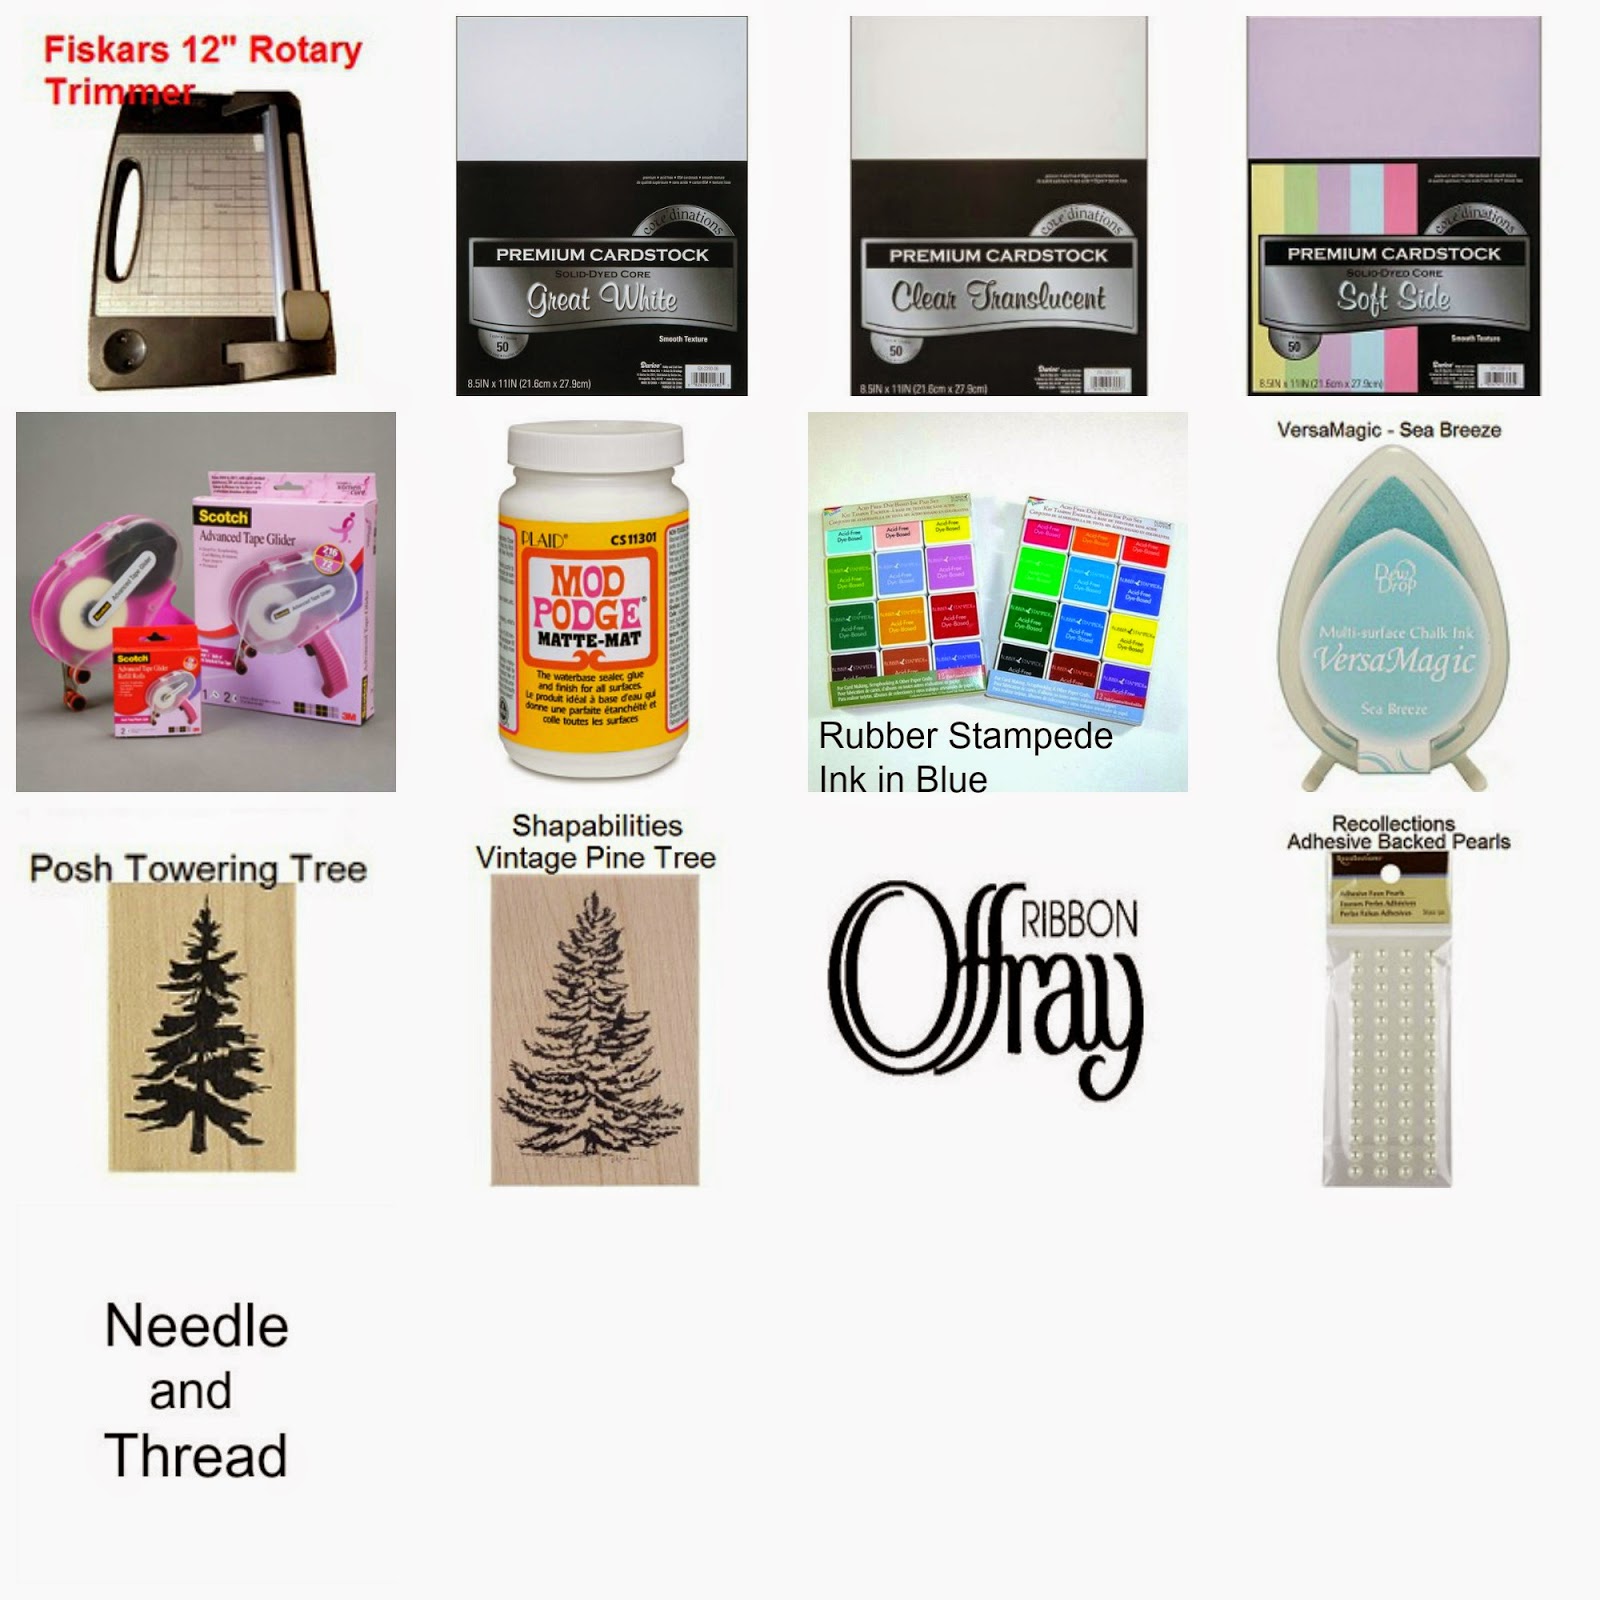
1. Gather your translucent paper, pine tree stamps, and blue ink.
2. Measure your jar and cut your paper to wrap around it.
 6. Once you have the correct size piece of ribbon cut, use a needle and thread to do a running stitch down the center of the ribbon leaving a couple inches of thread hanging out at both sides. The running stitch does not have to be even or neatly done. You will not see it in your finished project.
The extra thread you left hanging on each end of the ribbon is what you will use to tie your ribbon tightly to your jar to keep it in place. I decided to use ribbon in this way because it covers the top edge of the translucent paper and adds to the overall look of the candle.
3. Take your small tree stamp and perform Generation Stamping with your blue ink. If you don't know what Generation Stamping is, the videos below will show you how it works. Make sure to overlap your trees a little to give them
depth. To get the best look make your darkest trees closest to you
and toward the bottom of your paper and the trees should become lighter as
they move further away.
(beginning at 5:00 for the tree stamping)
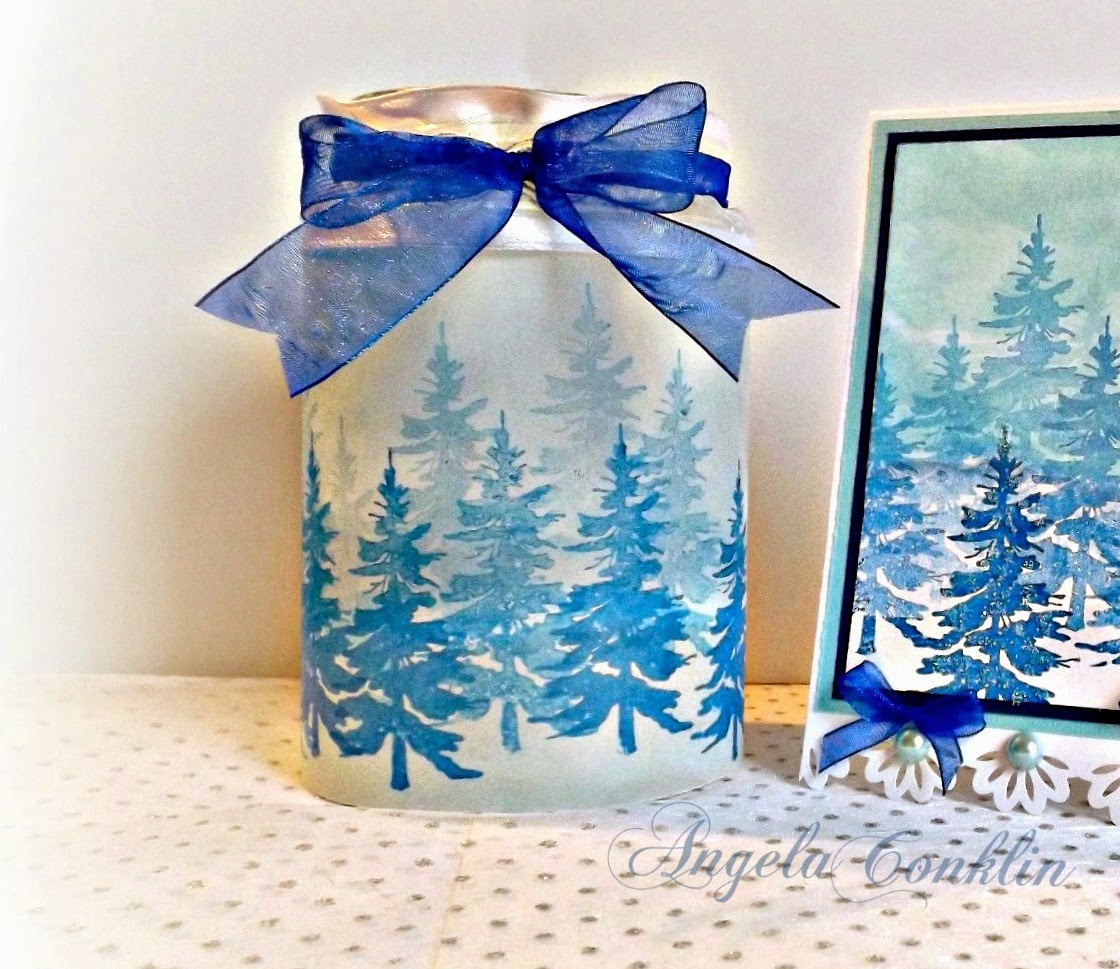
4. Adhere your finished paper to your jar. I used Mod Podge on the back of the jar right where the paper comes together to hold it in place.
5. Using (1 1/2" wide) sheer white ribbon with wire edges, measure to see how much you need to go around the neck of the jar.
6. Once you have the correct size piece of ribbon cut, use a needle and thread to do a running stitch down the center of the ribbon leaving a couple inches of thread hanging out at both sides. The running stitch does not have to be even or neatly done. You will not see it in your finished project. The extra thread you left hanging on each end of the ribbon is what you will use to tie your ribbon tightly to your jar to keep it in place. I decided to use ribbon in this way because it covers the top edge of the translucent paper and adds to the overall look of the candle.
7. Take your blue (3/4" wide) sheer ribbon, fold it in half, and tie it around the neck of the jar. You will unfold the ribbon just at the front to make the bow.
How to make your card
I made my card a size that is not common so if it were to be placed as a set on a mantel or table, the card would look balanced with the size of the candle. There are some odd measurements, but each measurement can easily be rounded to the nearest quarter inch.
1. Gather your white, light turquoise, and deep blue cardstock.
Measurments of Cardstock
White
6 10/16"w x 12"h
6"w x 4 12/16"h
Light Turquoise
6 1/2"w x 5 1/4"h
Dark Blue
6 3/16"w x 5"h
2. You will be using the same blue ink for the trees that you used on the candle as well as a light turquoise ink for the sky.
3.Start by taking a scrap piece of cardstock and ripping two pieces from it. Mine were about 6 inches wide. Don't try to be neat about it since these will be used as your mask for sponging your sky and clouds, therefore hills and valleys are good.

4. Using your 6"w x 4 12/16"h white cardstock, take your ink and sponge, and make a swirling motion along the edge of the paper. Always start on your ripped piece with your sponge and work into the actual image your making. This will keep you from getting gobs of ink that are too dark on your card. Repeat, changing the position of your paper and leaving some lighter spots that will become the clouds. Take the sky about half way down your paper.
The video shows how to make snowbanks, but it's the same technique I used to make the sky.
5. When your sky is done it's time to start placing your trees. Refer to the directions above for the candle on how to utilize Generation Stamping.
6. Once you're finished with your trees, place little dabs of Glossy Accents on your darkest trees in the front and then add some glitter to them to make them stand out.
7. Fold your 6 10/16"w x 12"h white card base in half (6" mark).
8. Border punch the front and back bottom edges of your card.
9. Adhere your light turquoise mat on your white card base then your dark blue mat on top of the turquoise one.
10. Add your new image centered on your dark blue mat.
11. Add flat back pearls to your scalloped edge and blue bows

Supplies
Happy crafting and thanks for stopping by!
Monday, December 8, 2014
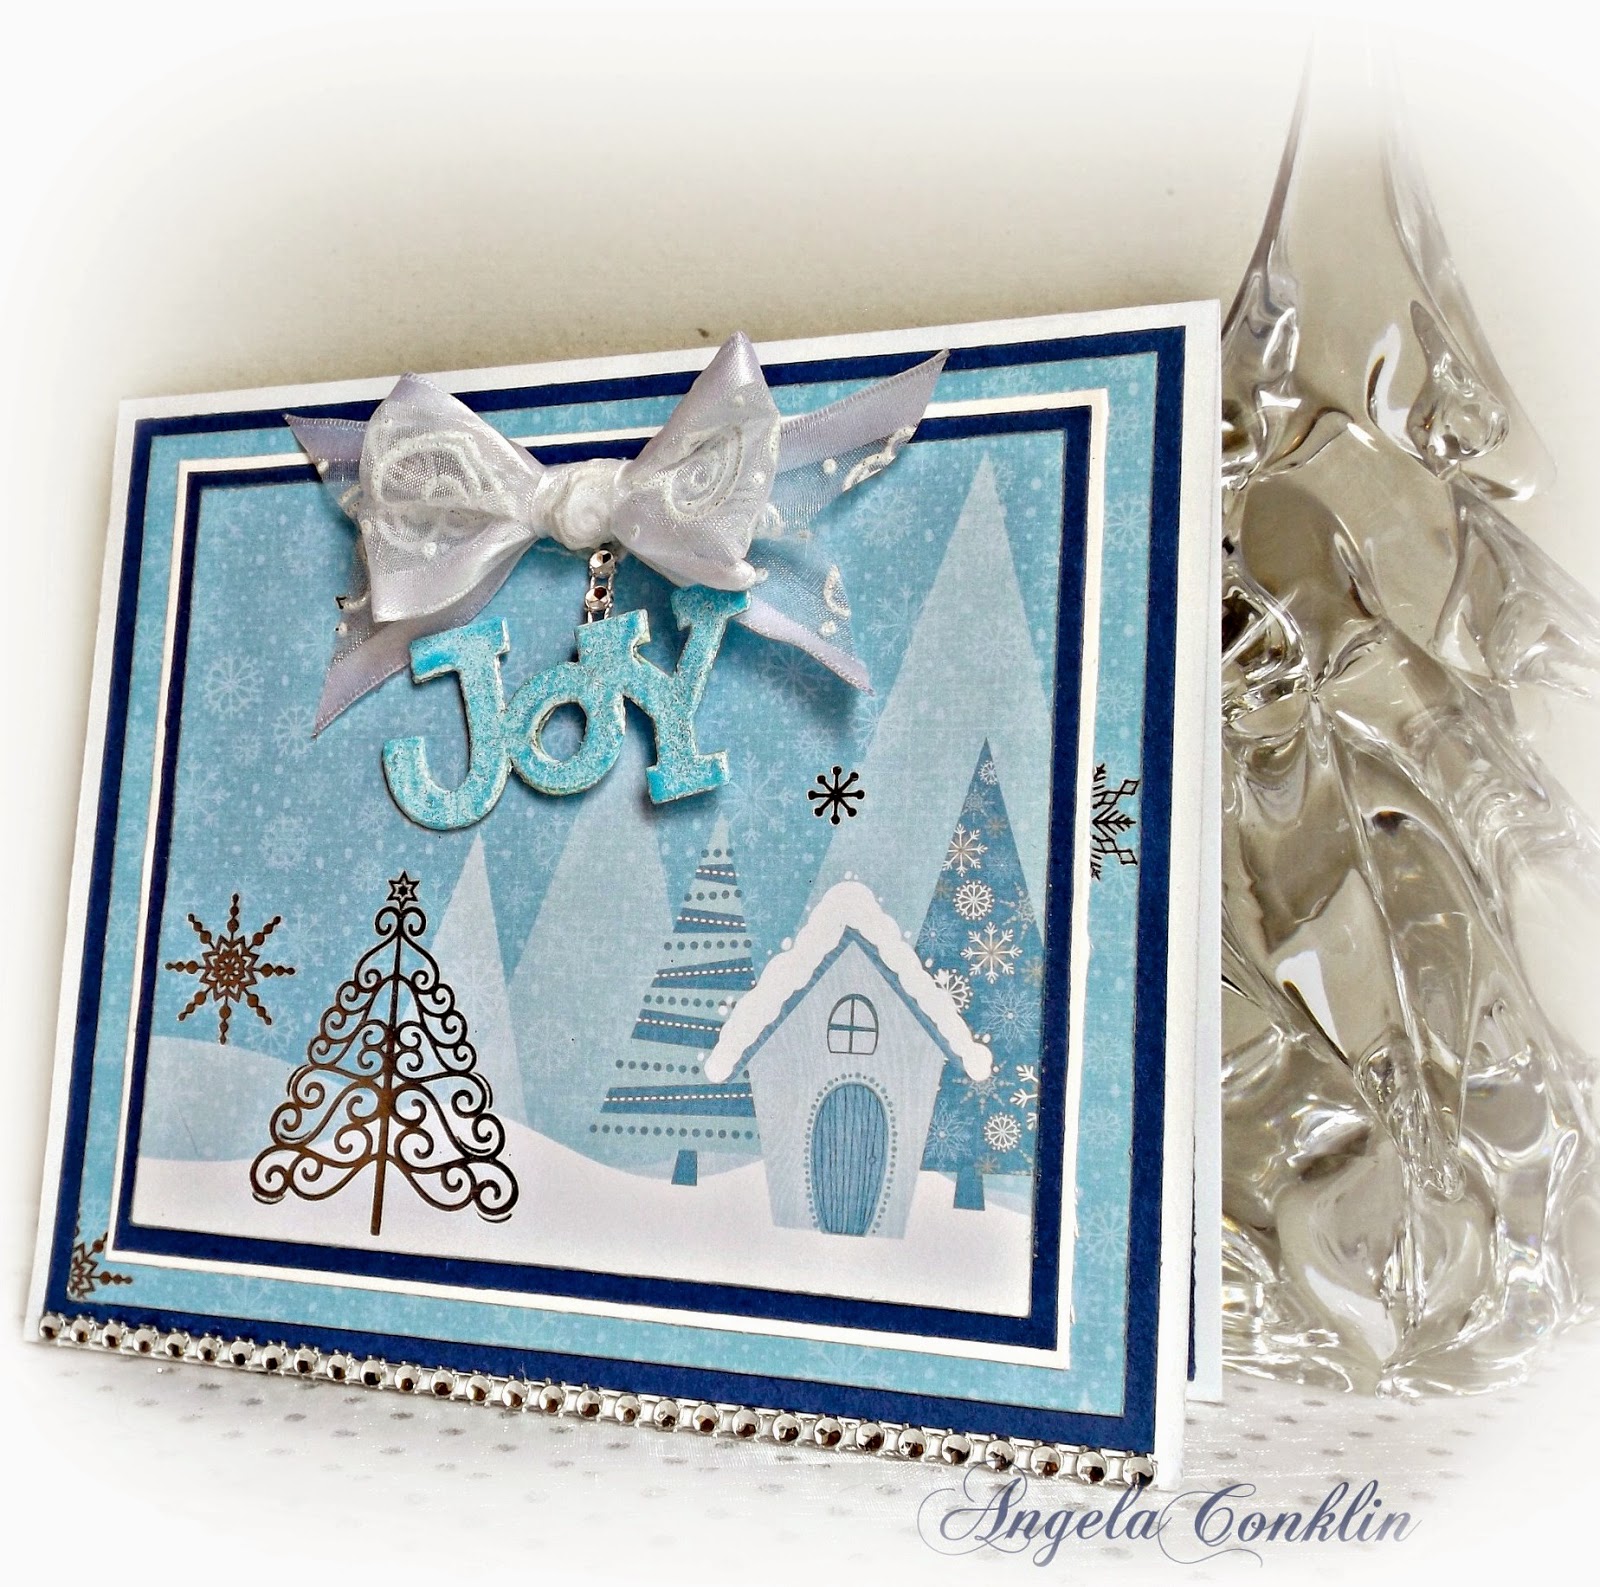
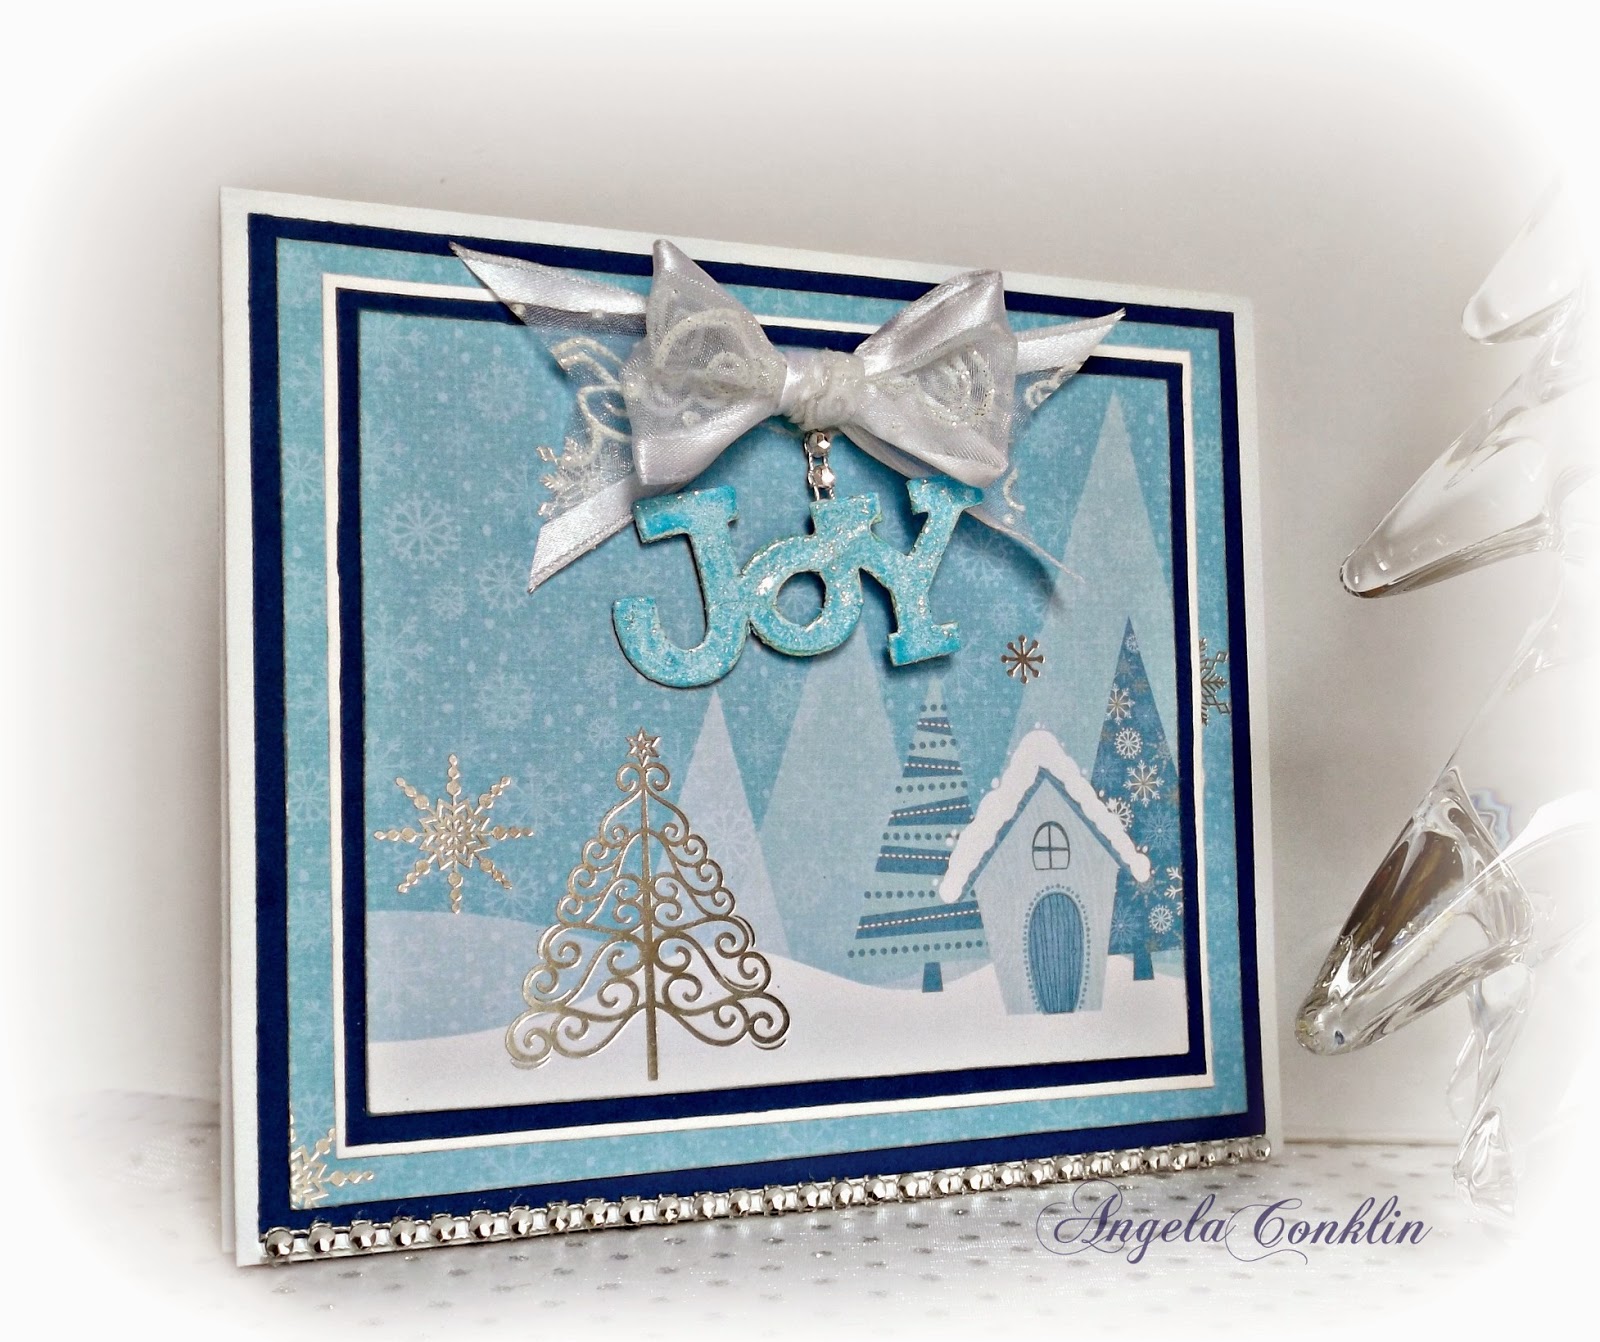
Handmade Card: A Joyful Blue and Silver Christmas
Well today I bit the bullet and you will probably notice that I left this card quite plain compared to my norm.
The scene is just too cute and the on rest of the 12'x12" sheet that this came from is a snowman with a sled. He's being used to make another card as I try to produce them quickly.

Instructions to make this card:
1. Cut your paper
Two pieces of white cardstock
- 6 1/2"w x 11"h (Fold at 5 1/2")
- 5 1/2"w x 4 3/4"h
Two pieces of dark blue cardstock
- 6 1/4"w x 5 1/4" h
- 5 1/4"w x 4 1/2"h
Two pieces of decorative cardstock
- 6"w x 5"h
- 5"w x 4 1/4"h (Cut out the area that you want as your scene)
- 6 1/2"w x 11"h (Fold at 5 1/2")
- 6 1/4"w x 5 1/4" h
- 6"w x 5"h
- 5 1/2"w x 4 3/4"h
- 5 1/4"w x 4 1/2"h
- 5"w x 4 1/4"h
- Bow - I used hot glue to attach my bow)
- Rhinestone Mesh - One strip of rhinestone mesh at the bottom of the card (I used Glossy Accents to glue this into place)

- Cut a small piece of the rhinestone mesh to hang your sentiment from. I hot glued mine in place just at the very bottom of the center of the bow.
- Sentiment - I made my sentiment by using a pre-made cardboard sentiment from an old gift tag I got on clearance, but you can use a die, make a small label, or stamp your sentiment on. The sky's the limit. To color my sentiment I used light blue embossing powder that has a little sparkle in it.


Supplies

Happy crafting and thanks for stopping by!
Saturday, December 6, 2014
How to Get More Out of the Cutting Dies You Already Own: Making an Assymetrical Die-cut, Symetrical
How to Make Die-cuts a Different Shape to Match Your Image
This time I will make an asymmetrical shape symmetrical using the large die from the Spellbinders, Card Creator Reflective Moment pack as the example. This specific die is the basis for many beautiful cards all over the web, but one thing you don't see, at least I haven't, is the die turned sideways or upside down. It just looks odd.
Cut them in half

The upper shape is using the bottoms and the one below is using the tops.
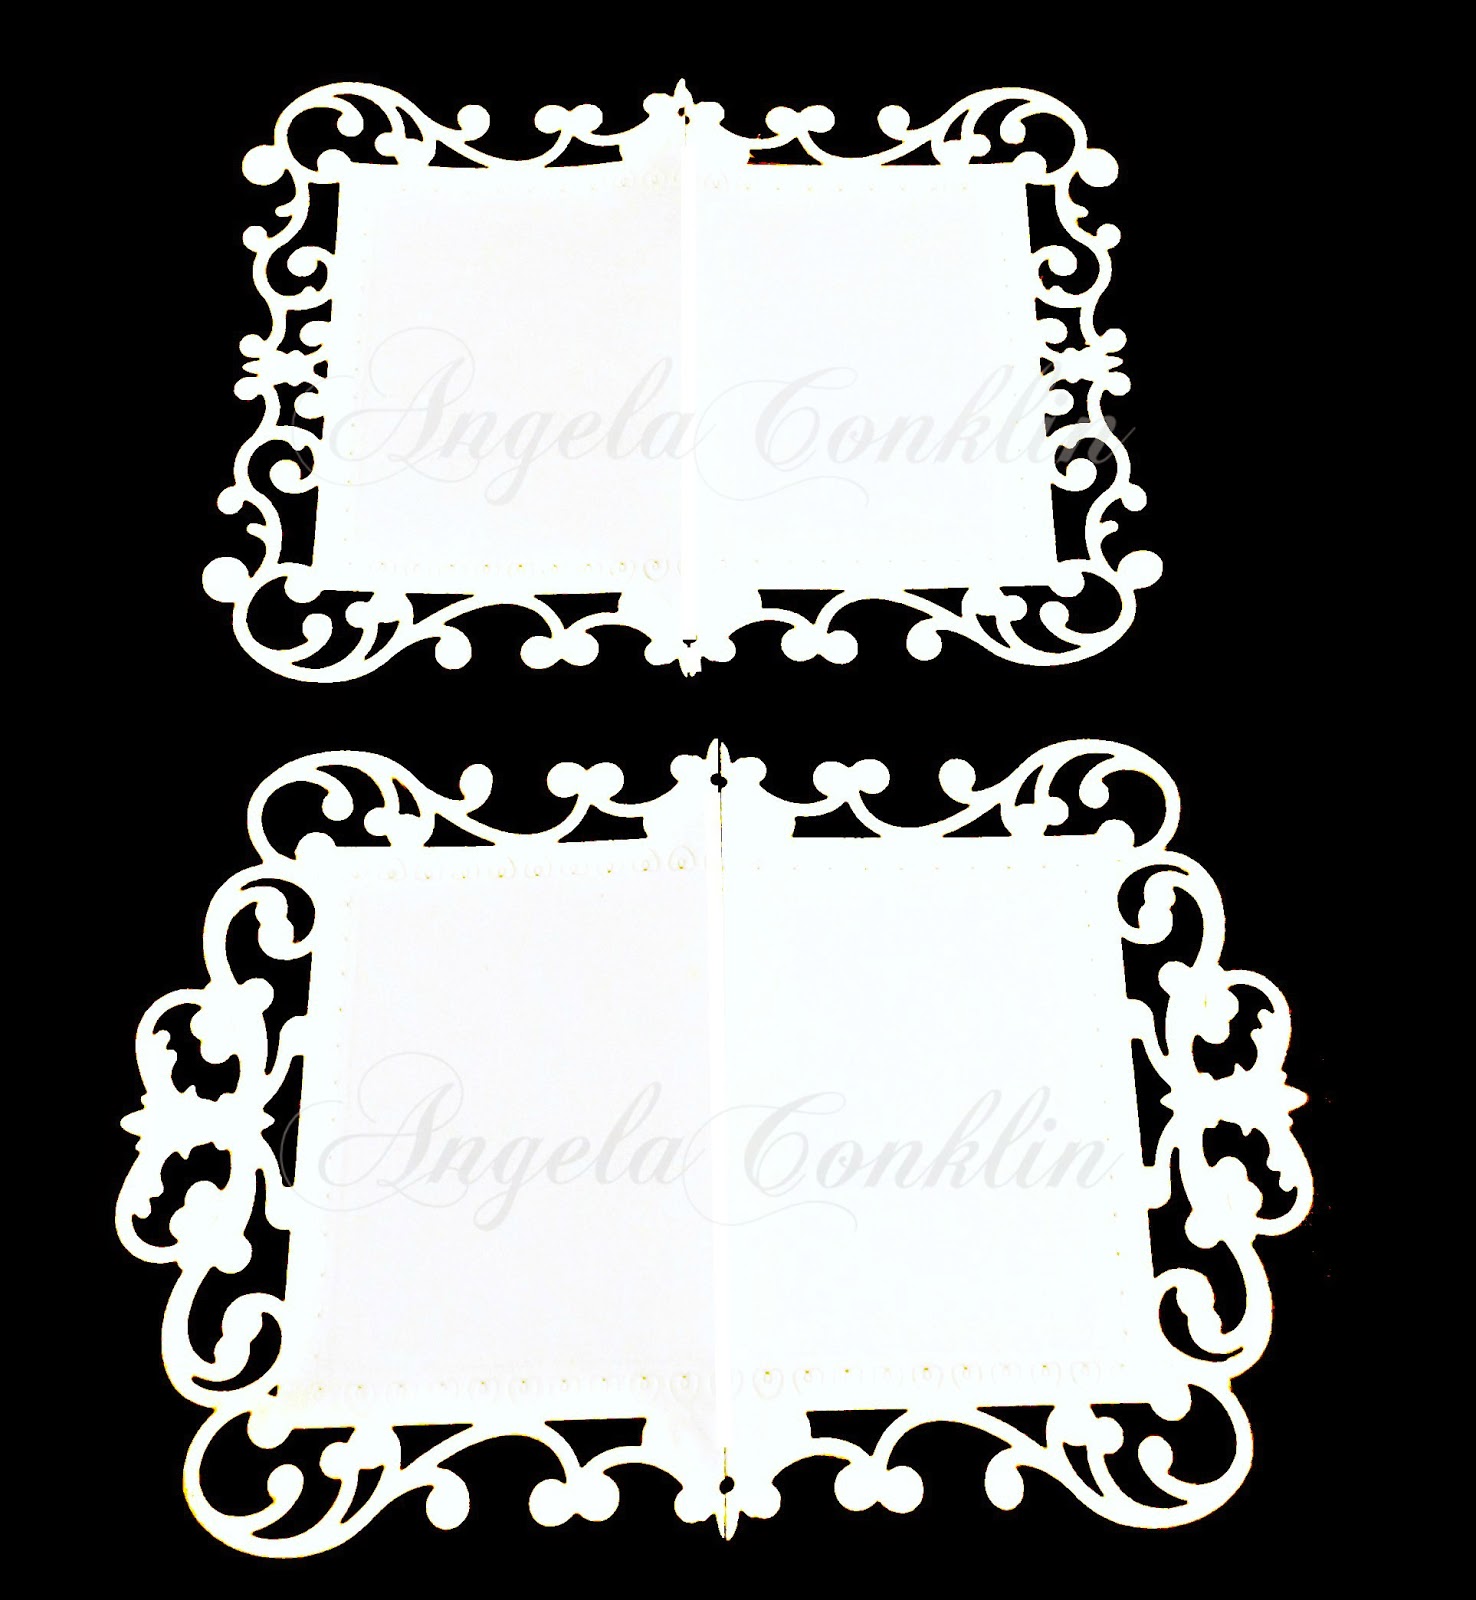
Now you not only have your gorgeous original shape, but two beautiful new shapes to work with :)

Thursday, December 4, 2014
Repurposed Can - Winter Wonderland Tree Ornament Card and Clothespin Candle Gift Set
 |
| Thank you Sketches4All |
Hope all of you are doing well as many made the mad dash for Black Friday shopping this past weekend and continue the shopping frenzy this week. I've only been out during one Black Friday and that was because I worked in retail that Christmas. I was standing guard at a pallet of Baby Cabbage Patch Dolls and after a few customers peaked under the plastic, before I knew it I was surrounded by people who were determined that their child was going to get one.
Shortly before it was time to allow customers access the crowd had gotten so large that I had to hold my arms out in front of me just to make room to breathe and a few in front of me were protecting me by making people back up.
It was a crazy early morning, but kind of fun too.
The next thing I knew my husband approached me and said that a woman had found him in the store to give him a Baby Cabbage Patch Doll that she had snagged for me when she got hers. It wasn't imperative that I got one, but what a sweetheart. Not only did she get me one, but she went to the trouble of hunting down my husband. She knew who he was because he had stopped in the store to see how I was doing and he was curious about what Black Friday was like.
That was our first and last. Now we do any needed shopping earlier in the year and online. In fact I shop online more and more these days and only really go out to see the Christmas decorations and get stocking-stuffers. I hear about people waiting in line for 2 days just to get the latest cell phone or game console. Now those are serious shoppers!


How to make the candle holder
Supplies
A package of wooden clothes pins
5 wooden snowflakes (1 extra for the card)
4 small wooden snowflakes
Burlap
Lace
1. Before assembling your candle holder. Paint your can, clothes pins and snowflakes with white acrylic craft paint. I just used a thin layer of paint and didn't worry about full coverage for a more white washed look.
2. Stamp your script onto your large snowflakes.
3. Ink the edges of your large snowflakes so they stand out from the white of the clothes pins.
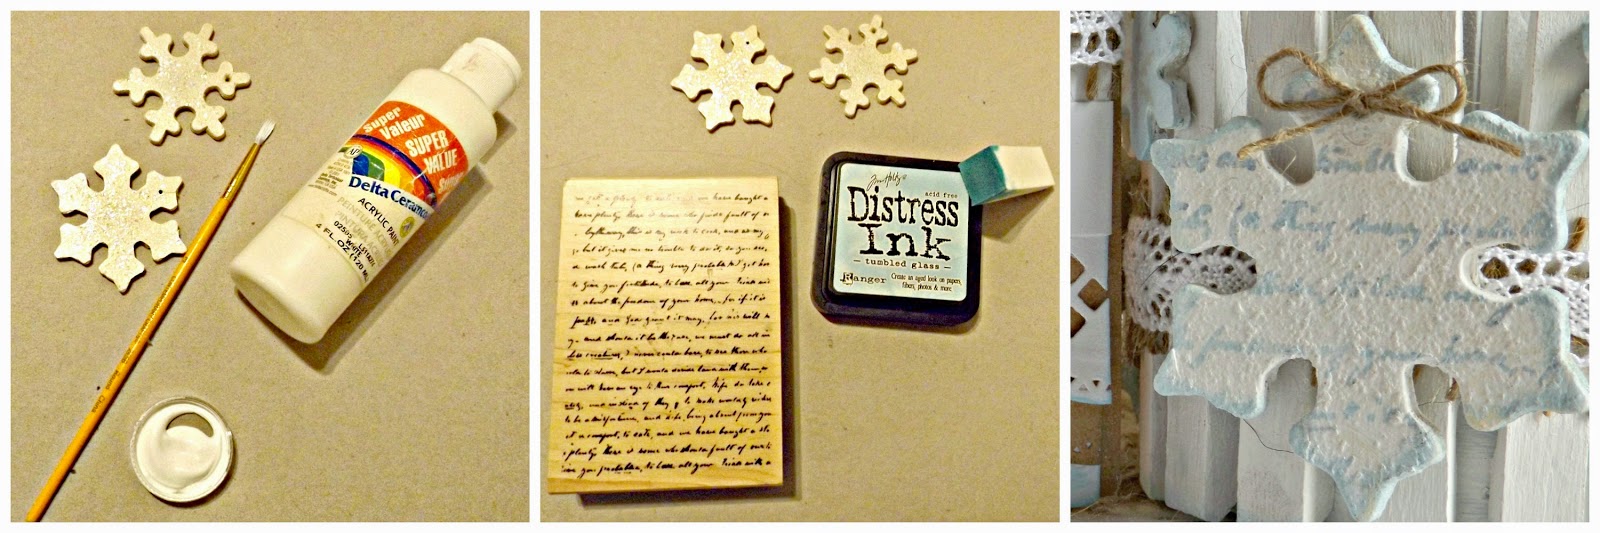 4. Use ink to cover your small snowflakes
Supplies
A package of wooden clothes pins
5 wooden snowflakes (1 extra for the card)
4 small wooden snowflakes
Burlap
Lace
1. Before assembling your candle holder. Paint your can, clothes pins and snowflakes with white acrylic craft paint. I just used a thin layer of paint and didn't worry about full coverage for a more white washed look.
2. Stamp your script onto your large snowflakes.
3. Ink the edges of your large snowflakes so they stand out from the white of the clothes pins.
5. Stamp an image of a snowflake onto the front of the small wooden snowflakes.

Assembling and decorating your candle holder
6. Clip your clothes pins on the side of your can. I placed mine together as closely as I could.
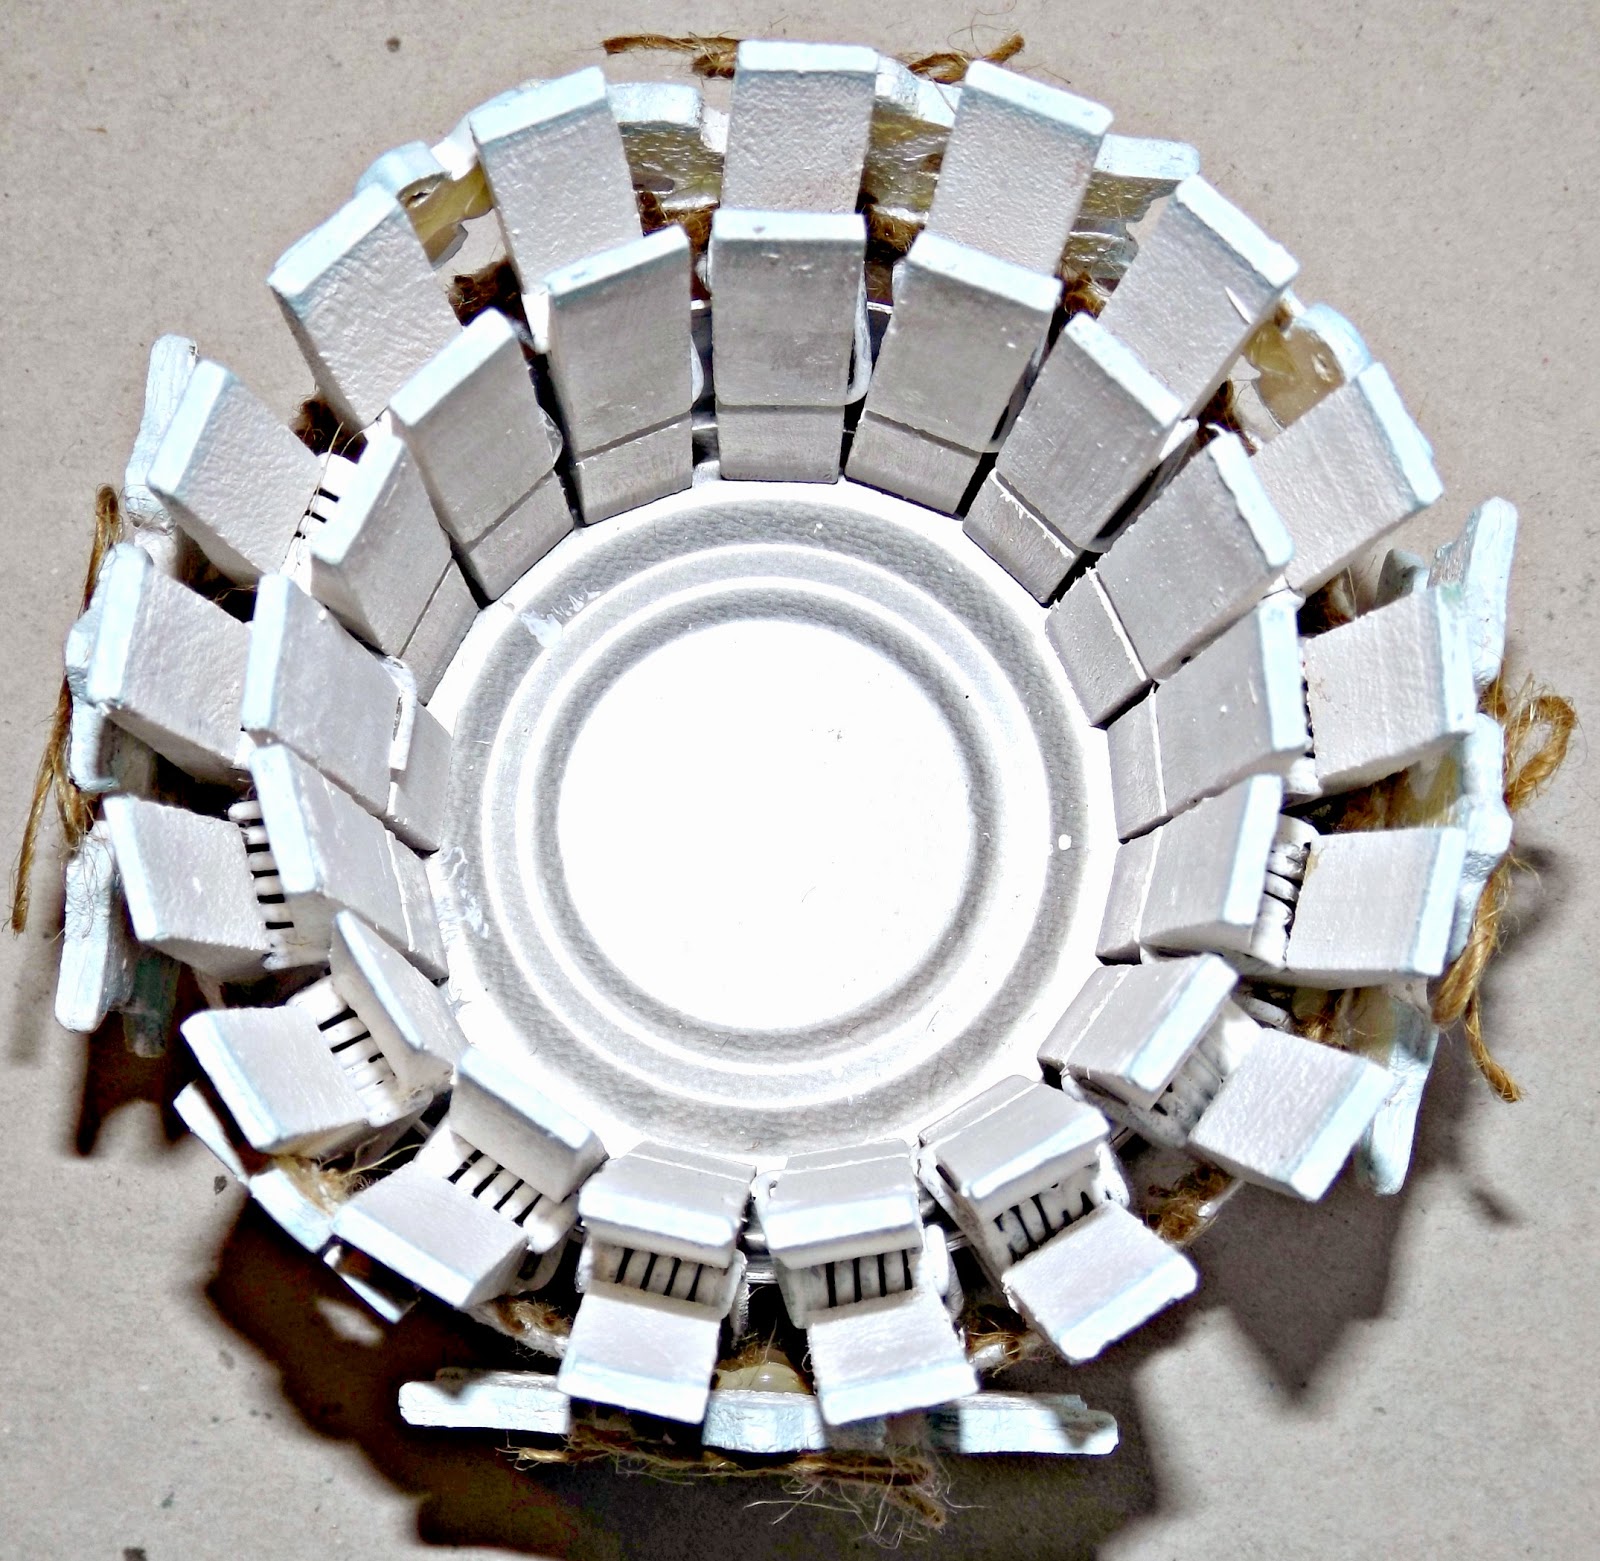 7. Wrap your clothes-pinned can with a strip of burlap
Assembling and decorating your candle holder
6. Clip your clothes pins on the side of your can. I placed mine together as closely as I could.
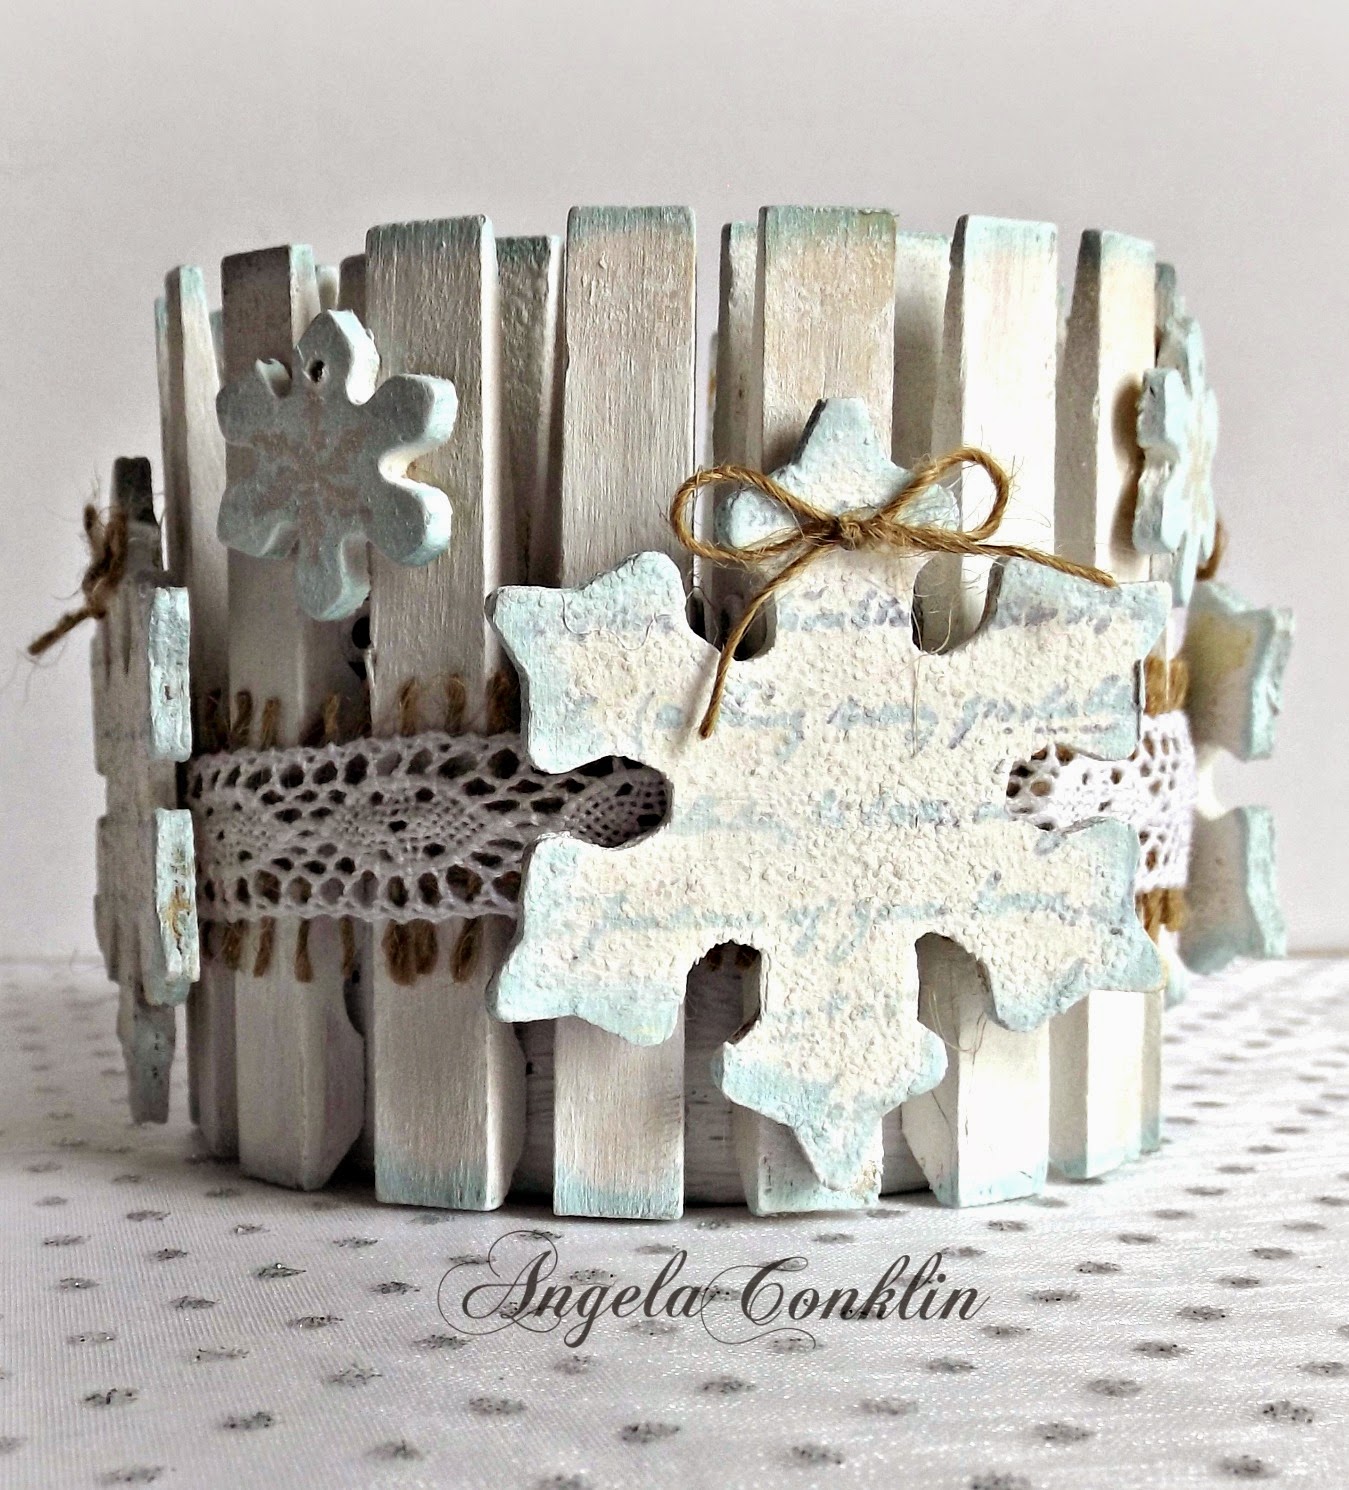
8. Center lace ribbon on the burlap and wrap it around the candle holder
9. Hot glue your large snowflakes in place on four side of your can (one across from another)
10. Hot glue your small snowflakes in place (center between the large snowflakes, but higher up)
11. Add bows to the top of your large snowflakes. I just pulled string from the burlap I was using to make my bows.
10. Hot glue your small snowflakes in place (center between the large snowflakes, but higher up)
11. Add bows to the top of your large snowflakes. I just pulled string from the burlap I was using to make my bows.
How to make your card - Completed card measures 5 1/2"w x 5 1/4"h
Supplies
Cardstock
Wooden Snowflake (directions above for snowflake)
Embossing folder
Dies
Ink
Burlap
Lace
Sentiment
Light Brown Cardstock - You will need two pieces
Cut another piece at 5 1/4"w x 3"h (This will be used for making your decorative bottom piece)
White Cardstock - You will need 3 pieces
Cut at 5 1/4"w x 5 1/2"h
Cut at 5 1/4" x 2 1/4"h
1. Emboss the 5 1/4"w x 5 1/2"h piece with your snowflake embossing folder.
2. Apply ink to the edges of your embossed paper and the bottom half inch. This is the turquoise color you see at the bottom of the card.

3. Die cut the long edge of your 5 1/4" x 2 1/4"h white cardstock with two dies from Spellbinders Bracket Borders One. Choose one that will just punch out a pattern in your cardstock and one that will shape the edge.
4. Die cut your 5 1/4"w x 3"h brown cardstock along the long edge with the edge die you used on your white cardstock. Not the one you used to punch-out a design).
5. Line the two smaller pieces (brown under white) and adhere them together
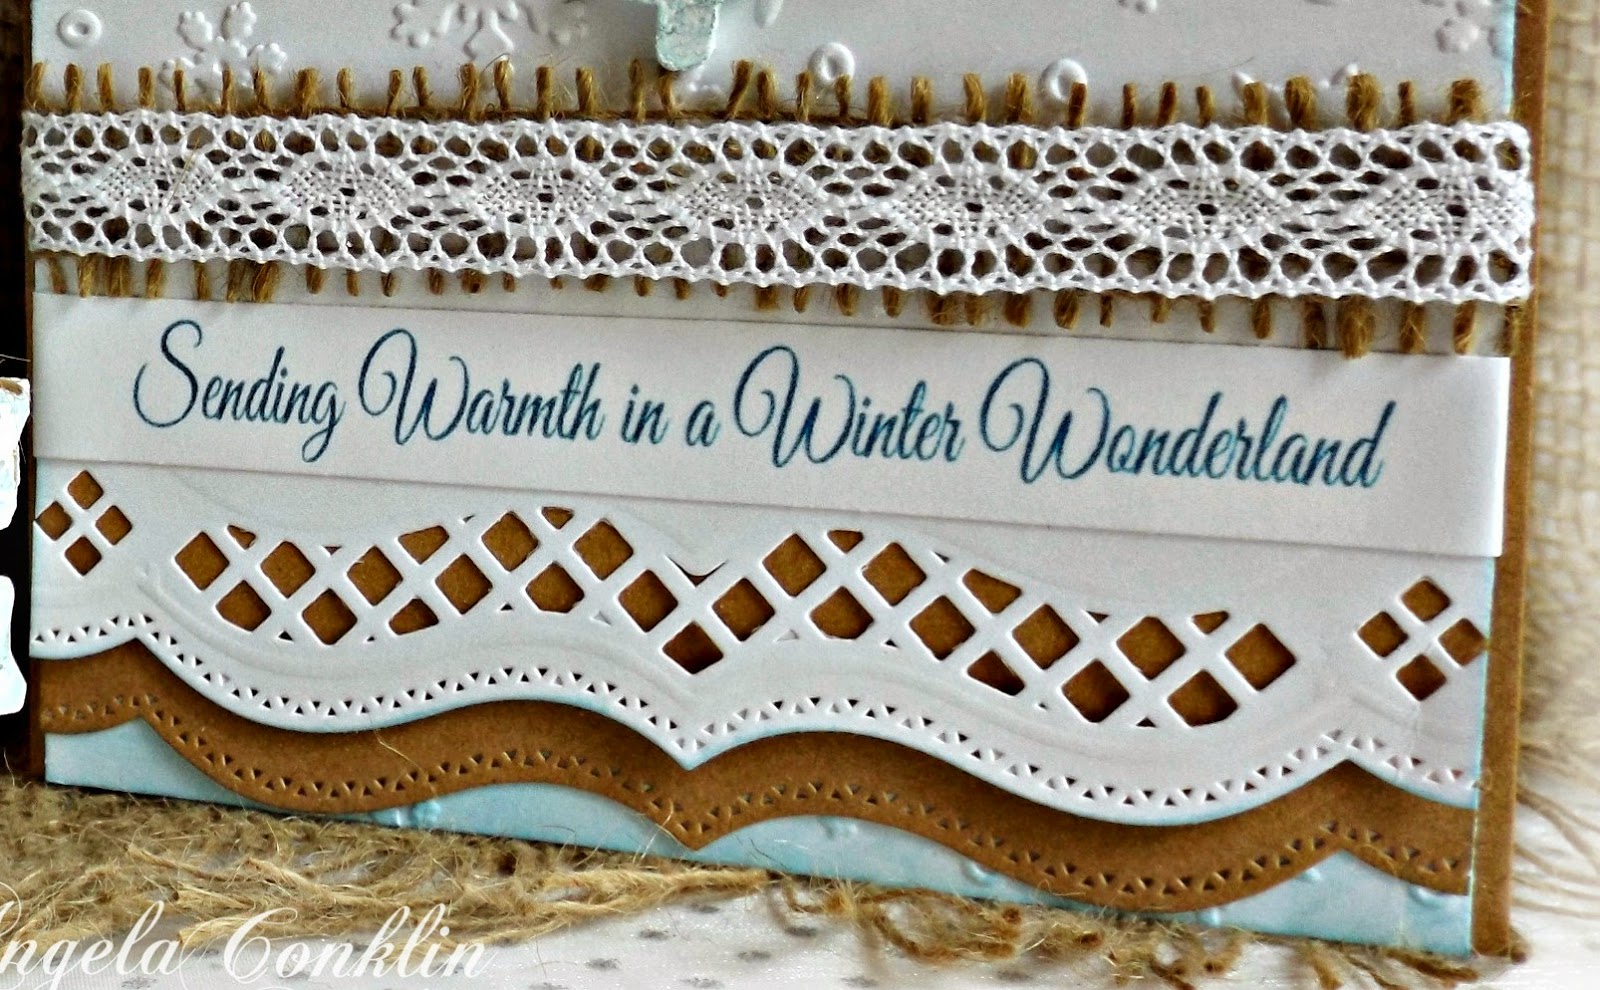
7. Wrap your burlap and ribbon over the area where the fancy cut pieces end (about the center of your card)
8. I chose to print out a sentiment I made at Picmonkey.com and then wrap that sentiment like a ribbon around the card, but you can just stamp your card with a sentiment if you wish.
9. Add your wooden snowflake ornament to the top of your card. I used a spot of Hot Glue so it could be removed without tearing the card to pieces.
You're done!

Supplies List


This project has been featured at S4All
Happy Crafting and thanks for stopping by!
Subscribe to:
Posts (Atom)