Showing posts with label Papercrafts. Show all posts

Monday, February 2, 2015

Handmade Valentine's Day Card: Love is in the Air

Happy Groundhog Day!

Today I'm sharing a Valentine's Day card and a link to the challenge I made it for, then on to what Punxsutawney Phil had to say this morning.

First things first. There's a lot of inspiration over at Sketches4All. I made the card below for the February DT Challenge from a sketch. If you prefer to do scrapbook layouts, there's a sketch for that too, so come join us and have some fun. 

There's nothing that says Valentine's Day to me more than seeing the colors red and pink together and roses and hearts together. So once I saw the sketch I wanted to incorporate those ideas as well.  

To get that pink striped paper to look like it's part of the white paper beneath it I used a border punch on the bottom edge of it and then taped it in place before embossing it with the heart embossing folder.

The red stripe is made from the same red cardstock I used to mat the front. To dress it up I placed silver, vine shaped, tape on it.

To make the pink border on the doily heart I cut off the edge of a pink colored heart and glued it onto a white one. 

Supplies List 

Punxsutawney Phil says we have 6 more weeks of Winter. From the way it looks right outside my front door and all the snow coming down I would have to agree with him this year.

Pictured below is right out my front door. There should be a sidewalk and a road. You can see where my husband shoveled the sidewalk recently and it's being covered back up, but the road has vanished and has been gone for quite a while. My home is marked as a historical house and the wooden sign out front is half under snow. Love it!  
 
Happy crafting and thanks for stopping by!
post signature

Friday, January 30, 2015

Handmade Valentine's Day Card with a Modified Border Punched Edge

TGIF craft lovers!
I'm sharing a card with a modified border punched edge. I decided to bring attention to this simple modification because it opens up new possibilities that I didn't even realize I had until I needed to change the size of my card border. As I sit here studying the rest of my border punches, I see that I can cut them to not only make them my own, but to make new things. The modification description can be found further down in this post.
To make this card I used two border punches, one embossing folder and some ready-made Valentines Day themed embellishments. Oh, and I can't forget to mention those cute little foam flower stickers made to decorate flip flops, but found their way to my house during a clearance sale one day. 

To make this card...

NOTE: After cutting all of your cardstock pieces and BEFORE adhering the pieces together remember to border punch your edges and add your ribbon.

Special NOTE: I modified one of the border punched pieces, details below.
Paper Measurements
5" x 7" White base card
5" x 7" Pink plaid mat
5" x 8" White cardstock mat
5" x 6" Pink with white polka-dot cardstock mat
5" x 4" White cardstock mat

Border Punch - the modification
5" x 8" White cardstock mat - Use the Martha Stewart Crafts Around The Page Double Arches Large Punch. After punching the top and bottom of the cardstock, cut the two outer rows of arches off, leaving only one row of arches remaining. 
Cut where you see the red lines
5" x 6" Pink with white polka-dot cardstock mat - Use the Ek Success Pointed Flower Border punch on the top and bottom and then attach your ribbon.

To complete your card
Place a doily heart on the back of your foam glitter heart and a couple of flat backed adhesive pearls on the top and bottom and your finished!

 Supplies List
Happy crafting and thanks for stopping by!
post signature

Saturday, December 6, 2014

How to Get More Out of the Cutting Dies You Already Own: Making an Assymetrical Die-cut, Symetrical

Hello everyone!
 
Just a quick tip as I race the clock to get Christmas gifts made. I hope this post finds you well and enjoying the season.
 
 Today I'm sharing how I used my die-cuts for a card a few weeks ago and one I'm still working on currently, which may help you look at your dies a little differently.
 
In past post I've mentioned how much I love my Spellbinders Card Creator dies and showed how to make a fancy symmetrical rectangular shape into a square to fit an image.

How to Make Die-cuts a Different Shape to Match Your Image

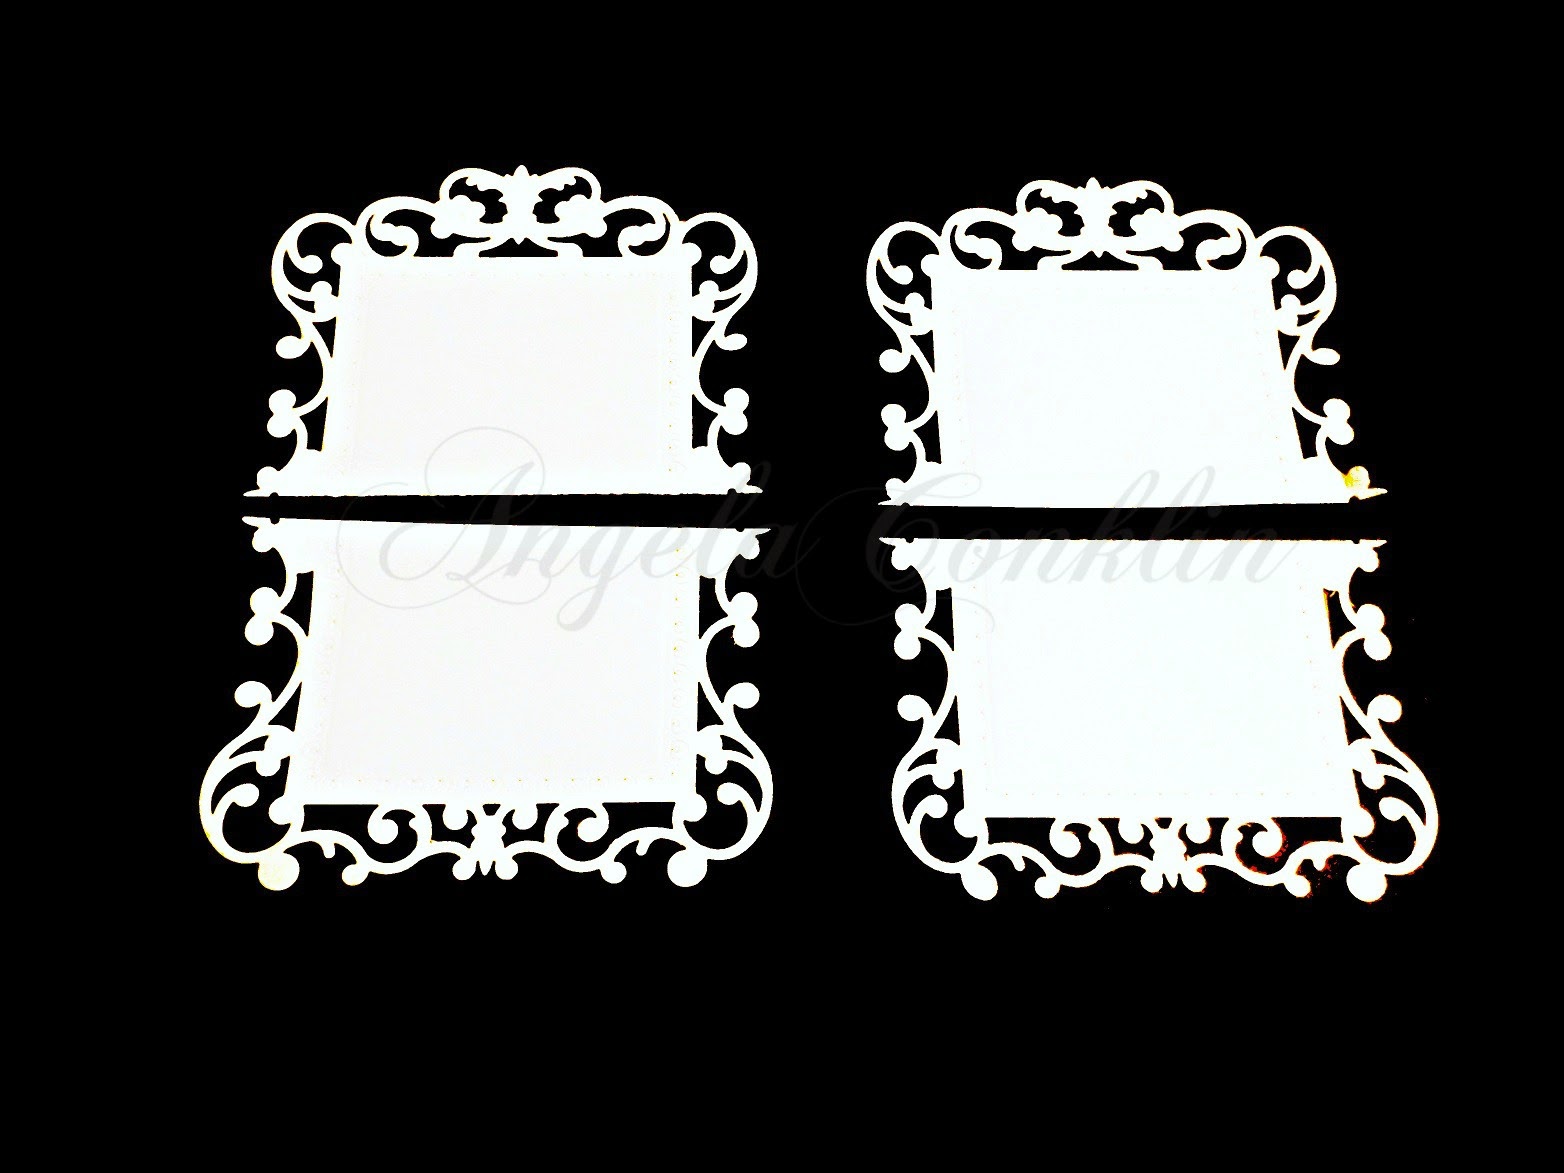
This time I will make an asymmetrical shape symmetrical using the large die from the Spellbinders, Card Creator Reflective Moment pack as the example. This specific die is the basis for many beautiful cards all over the web, but one thing you don't see, at least I haven't, is the die turned sideways or upside down. It just looks odd.
 
So if you're feeling stuck with it always going one direction there is a way to change it. 
 
You can get at least 3 totally different die-cut shapes from this one die.
 
Here's how:  
Make two die-cuts of the same shape.
 
Cut them in half

To finish, match the bottoms together and the tops together to make symmetrical shapes and then run tape down the back of the seams.
The upper shape is using the bottoms and the one below is using the tops.

Now you not only have your gorgeous original shape, but two beautiful new shapes to work with :)

Here is an example when the bottoms were used to make a card a few weeks ago.
There are many ways to use your dies, you just have to play with them to see what you can come up with. This latest discovery left me pleasantly surprised and excited about the options I have from a die that I initially thought would only go so far.
 
Happy Crafting!
post signature