Showing posts with label DCWV Winter Solstice Stack. Show all posts

Monday, December 8, 2014

Handmade Card: A Joyful Blue and Silver Christmas

Hello everyone!
 
I'm working with one of my favorite papers today from the DCWV Winter Solstice Stack. I was constantly skipping over this particular sheet of paper because I love it so much that I didn't want to use it. I just like looking at it. That probably sounds ridiculous, but since I usually add a lot of layers to my cards or at least a lot of die-cuts and embellishments, I didn't want to cover this paper up.

Well today I bit the bullet and you will probably notice that I left this card quite plain compared to my norm.
The scene is just too cute and the on rest of the 12'x12" sheet that this came from is a snowman with a sled. He's being used to make another card as I try to produce them quickly.
 
Instructions to make this card:
1. Cut your paper
Two pieces of white cardstock
  • 6 1/2"w x 11"h (Fold at 5 1/2")
  • 5 1/2"w x 4 3/4"h
Two pieces of dark blue cardstock
  • 6 1/4"w x 5 1/4" h
  • 5 1/4"w x 4 1/2"h
Two pieces of decorative cardstock
  • 6"w x 5"h
  • 5"w x 4 1/4"h (Cut out the area that you want as your scene)
2. Tape and stack your cardstock (biggest to smallest piece) centering each on the one below it.
  1. 6 1/2"w x 11"h (Fold at 5 1/2")
  2. 6 1/4"w x 5 1/4" h
  3. 6"w x 5"h
  4. 5 1/2"w x 4 3/4"h
  5. 5 1/4"w x 4 1/2"h 
  6. 5"w x 4 1/4"h 
3. Add your embellishments 
  • Bow - I used hot glue to attach my bow)
  • Rhinestone Mesh - One strip of rhinestone mesh at the bottom of the card (I used Glossy Accents to glue this into place)
  • Cut a small piece of the rhinestone mesh to hang your sentiment from. I hot glued mine in place just at the very bottom of the center of the bow.
  • Sentiment - I made my sentiment by using a pre-made cardboard sentiment from an old gift tag I got on clearance, but you can use a die, make a small label, or stamp your sentiment on. The sky's the limit. To color my sentiment I used light blue embossing powder that has a little sparkle in it.


Supplies


 Happy crafting and thanks for stopping by!

post signature

Sunday, November 16, 2014

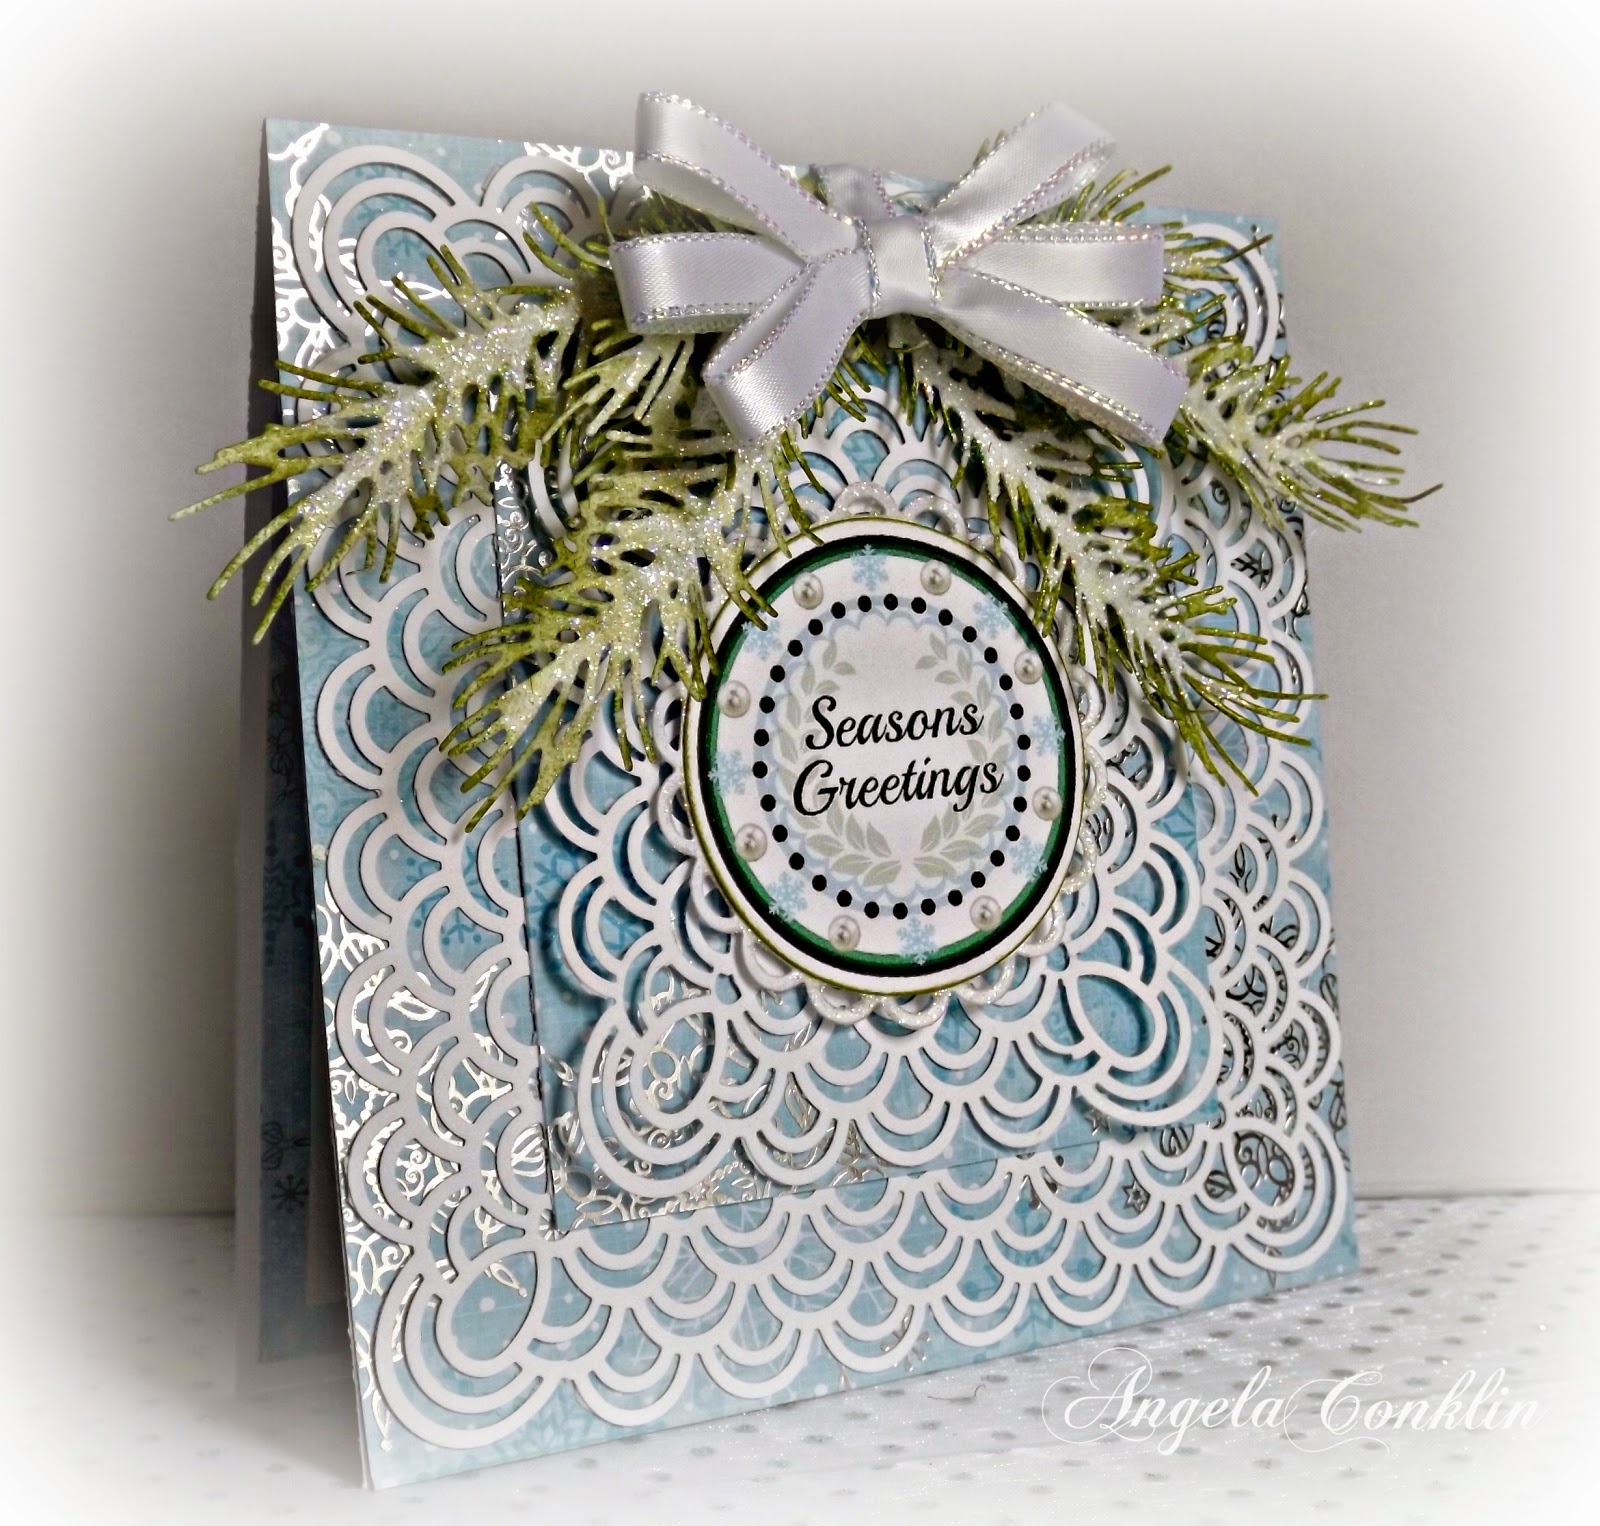
Handmade Greeting Card - Pine Branch Icy Winter

Hello everyone!
 
I think the greeting card I made today is one of my favorites. Now I'm getting to the point of having to decide who gets what Christmas card and honestly that's the hardest part for me. I want to send everyone the best one :)   
 
For today's card I used the DCWV Winter Solstice Stack. I love this paper stack and this particular paper with its silvery snowflakes on an icy blue background is gorgeous.
 
To start my card I cut from my patterned blue paper a 6x6 inch piece and 4x4 inch piece. 
 
I did the same cuts (6x6 inch and 4x4 inch) from white cardstock. Then I used a corner and border punch set to make my lacy paper. 
 
If you don't know how to do this I've included a tutorial video from YouTube here that I learned the technique from.
 
Once I had all four pieces of paper (2 blue, 2 white) I adhered them together using blue as the base for each.
To make my sentiment I used Picmonkey to design it and then printed it out and made the circular cut with a round die. 
I decided I didn't just want a circle so I cut a lacy circle to place behind it.

I used glitter on the lacy circle to make it stand out from the background.
 
I used an Impression Obsessions die to make the pine branches and then colored the branches with ink.
 
To give the appearance of snow I used white puffy paint and glitter.  
NOTE: I ran into a problem and had to start over again. My green ink bled into the white puffy paint. So to keep this from happening I used a clear embossing powder over the ink to seal it and then applied the paint and the glitter. This worked perfectly.
 
After the branches were dry I attached them to my card with hot glue.
 

I then added a bow and when my card front was finished I added white cardstock for the base of the card and that was it :)
 
I would love to see your results if you decide to make one!
 
  Supplies


Happy crafting and thanks for stopping by!

Wednesday, October 29, 2014

Fancy Christmas Joy Easel Card

Hello everyone!

Yesterday it rained all day here in western Pennsylvania so I got a lot of crafting done, but no photos. Don't you hate it when you want to take photos and it's so dreary you barely get any natural light through your windows. I love the rain, but not the overcast sky.

I just got new cutting dies in the mail yesterday so today I'm sharing a Christmas card that I made with them. I love the dies and can't wait to show you my card, so let's get right to it :)

I made my sentiment in Picmonkey, opened it in Paint, copied it into a document where I could resize it for the label I was going to use and it was worth the time. It turned out great!
 
My card is an easel card, surprise surprise, right? I wasn't sure how to make an easel card with intricate edged die cuts and couldn't find any tutorials on it that showed an easy way of doing it. So after some messing around I figured it out and I only had to use one piece of paper. No extra measuring, folding, joining, nothing. Yeah!

When folded for mailing the designed edge of the card and easel line up perfectly.

I will be making a tutorial, How to Make an Easel for the Spellbinders Card Creator - Reflective Moment Die Cut) and sharing it soon.

 
To make the inside fancy rectangle I used a die that comes in the Spellbinders Card Creator die set called Valiant Honor. I also used this set to make my sentiment die cut.
 
To make the snowflake I used the Sizzix #3 Snowflake die and white cardstock. Then I used a mix of Hampton Art embossing powders in dark blue, light blue, dark teal, and cream sparkle to color it.

I added a note-card to the easel base that can be used for a personal message, gift card or whatever you like.
 
I had to run back and take a quick photo because, of course, I didn't remember to do that the first time. Oh well. Don't you just love the background color? It looks like baby, ummm, food. Ya, baby food.

The lacy cut out edge of my card is not very strong so to make it stand more solidly I added a support piece to the bottom center. Then all that was left was to embellish it.

I used a lot of pearls and some white sparkly edged ribbon for the bow.
The printed paper for this project is from the DCWV Winter Solstice Stack. 

Happy Crafting!

Wednesday, October 15, 2014

Christmas Card: Happy Winter

Hello Everyone!
 
Today as I was making my Christmas card it dawned on me that I've been blogging for a year now. It's my Blogging Anniversary! It was a year ago when I discovered paper crafting too and I was so new to it I didn't even share any of my Christmas cards on here.  So this year I get to change that. It's been a wonderful journey of trying new things, growth and meeting so many talented and fabulous people. I've truly and thoroughly enjoyed it. Today's post is short and sweet as I've run out of time, but wanted to share my card. Hope everyone is having a great day.

There are 5 layers of cardstock. The base card is from the DCWV Neutrals Cardstock Stack and the blue printed paper and front snowman tag are from the DCWV Winter Solstice Stack. I usually don't use the pre-made tags from my stacks, but these ones are too cute to pass up. Other materials are white feathers, Sizzix Flourishes #10 (556538), Sizzix Snowflakes #3, white adhesive pearls, Martha Stewart Corner Punch, flat backed adhesive gems, white glitter and Glossy accents.


Happy Crafting!