Showing posts with label Birthday Card. Show all posts

Saturday, January 17, 2015

Handmade Birthday Card: Pretty in Pink

Hello everyone!
Amidst some recent life challenges I've managed to get back to crafting and make a card. What more can we do but move forward when hit with something and what better way to do it than relaxing with some pretty paper and embellishments. :)
I wasn't sure what I wanted to do for this months challenge over at Sketches4All and I was preparing to make a Valentines Day card when I got sidetracked by the floral paper my daughter bought me for Christmas. As soon as I saw the paper, I knew what I wanted my challenge to be and what I wanted to make. I love those moments of inspiration. Now I have a beautiful card to give someone or sell in my shop.

I only have two 6" x 6" sheets of this particular floral paper and want to use it for multiple projects so I used it sparingly as accents on my card.

I don't own an embossing folder to make a lattice background so I used my Martha Stewart Scoring Board to make a lattice look. 
I took a 6" x 6" piece of white cardstock and lined up the top left corner and bottom right corner on the 6" line on my scoring board and made lines every inch to the right and left of that center line. Then I turned my cardstock, lining up the top right corner and bottom left corner on the 6" mark and repeated the same process. 

I then cut the cardstock in half, saving the other half for a later project. 

To make my pink dots I dipped a knitting needle into light pink acrylic paint and lightly touched my paper where the scored lines cross.

I made my sentiment using a Sizzix die and white cardstock of which I used ink to color. 

Note: I've only used my phrase die on paper and only about five times and not once has it cleanly cut out the phrase for me. I'm not sure why, but even shimming it and running it through my die cutting machine multiple times before removing the paper has not worked. I end up having to cut my phrase out with an X-acto knife and that does not make me happy at all.
To make the corner a little fancy I lined the underside of the striped paper with the floral paper by just cutting a small triangle and taping it in place. Underneath, I used a piece of a die-cut shape cut from white cardstock.

Aside from a couple of bumps in the road this was an easy card to make and worthwhile.

Materials List
American Crafts Dear Lizzy's Polka Dot Party 6x6 inch
DCWV The Basics Stack (double sided) 6x6 inch
Core'dinations White Cardstock
StudioG pigment ink (WM0813)
Sizzix Phrase Happy Birthday #3
Spellbinders Die D-Lites Flutters
 Jolees Boutique Bling Stickers - Pearl Flower Gems
Cricut Cuttlebug Flourish Emblem 2002208
Offray translucent ribbon
Lace Trim
Happy crafting and thank you for stopping by!
post signature

Monday, June 23, 2014

Sweet Sixteen Birthday Card

A Sweet 16 birthday card made for a friend of the family. I had to make two cards, because the first one was given to the birthday girl and as usual, I forgot to take photos of it. So today I made a similar one. This card was a bit difficult for me because I don't use glitter that often and the style is somewhat outside of what I'm drawn to make, but that's how we grow as artists and I think it turned out cute.


Materials
 
 Basic inexpensive glitter in black and pink.
Self adhesive pearls.


 Happy Crafting!
 post signature

Monday, May 26, 2014

Greeting Card - Butterfly Kisses

Hello everyone! 

We're having beautiful weather here in Pennsylvania for Memorial Day today. Nice of the sun to come out so I could take some photographs. :)

I'm still in the midst of a craft room makeover, but I had to fit a little crafting in since I'm really missing it. I'm finding some great little items to use in crafts as I open boxes I had stuck in a corner months ago. Many of the things I've found have inspired me to get back to doing some mixed media canvas collages, layouts, and altered items that I also miss doing. For today though, with my room still in disarray, I decided to do a simple card with my border punches.

I've never done a card before with just black and white. I always had to stick a little color in somewhere, but this time I decided to stop, and strangely I struggled with that a little. I used white card stock to punch the borders out and then placed them on a black card stock mat. I then attached the mat to a white base-card and used a border punch on the back page to give it some interest on the inside.
 
I used a butterfly stamp that I only applied ink to once for the darkest butterfly and then kept stamping to create ghost images so the sentiment would show up. One of these days I'm going to have to get all my stamps and ink out and start designing my own craft paper.


Materials:

  1. Rangwer Archival Ink in black
  2. Premium Cardstock by Core'dinations (Great white and Black Cat)
  3. Martha Stewart Crafts Punch Around the Page - Double Arches
  4. Martha Stewart Crafts Punch Around the Page - Blooming Vines
  5. Sizzix Stamp and Die Cut - 657773
  6. Fiskars Border Punch - Double Bubble
  7. Spellbinders Nestabilites Eleven -S4-246
  8. Fiskars Clear Stamps - Butterfly Magic
  9. Ek Success Border Paper Punch - Pointed Flower


Happy Crafting!

Copyright © 2014 Angela Conklin - Heartedly Handcrafted
All Rights Reserved

Monday, May 12, 2014

Make Your Own Blog Photo Gallery in Blogger

Hello everyone! I'm very excited about my new Photo Gallery page!
You can find it in the top tab menu of my blog.

   I had put making my photo gallery off for a couple of months because it looked a bit overwhelming. Although it was time consuming going back through all of my posts, once I got the hang of it listing my projects went much easier. It took me a few hours from beginning (learning) to end (posting), but it was well worth it. Now that I'm all set up, posting future projects should be a breeze.
 

I'm so happy that a visitor to my blog can go directly to the photo gallery and click on an image that will take that person straight to what he/she wants to see.

   Having a photo gallery is essential for craft blogs, because it provides easy navigation to all of your projects. I know when I visit blogs it can be frustrating to have to go through archive menus or page by page (older posts) looking for things I like. I have Popular Posts listed in the sidebar of my blog, but that just means many people may not see something they would really like.

   So here is a quick screenshot of part of my new gallery. I also have scrapbook layouts listed and will be adding new categories for other projects. One option I didn't use was cropping my photos to make them all the same size. I didn't like the idea of doing that for cards and layouts, but there is a way to make sure you don't end up with a large photo in the middle of a row of smaller ones and that can be done after you have placed them in your gallery.
If you decide to make your own photo gallery please feel free to ask me any questions as I finally have the hang of it now.
  

The information I used to make my Photo Gallery can be found at Sweeter than Sweets

 Happy Crafting!

Tuesday, April 22, 2014

Embossed Greeting Card

Good evening everyone!

Have another card to share today.

I made this one as well from craft card-stock in light pink and light teal. I used a Darice Embossing folder and then colored the image to accent the design in Victorian Velvet and Peacock Feathers, Tim holtzDistress Inks and added a little bit of Gold colored ink by ColorBox.

For the teal colored design under the pink ribbon I used a Martha Stewart border punch and punched both sides of an inch wide strip of paper.


I stamped an image of a butterfly on white card-stock then cut it out. Afterward I colored parts of the design with a pencil, added Glossy Accents and then sprinkled some glitter on them before the Glossy Accents completely dried. I also added antennas for the butterfly by cutting some strands of a wedding flower spray.

Happy Crafting!

Copyright © 2014 Angela Conklin - Heartedly Handcrafted
All Rights Reserved

Tuesday, April 8, 2014

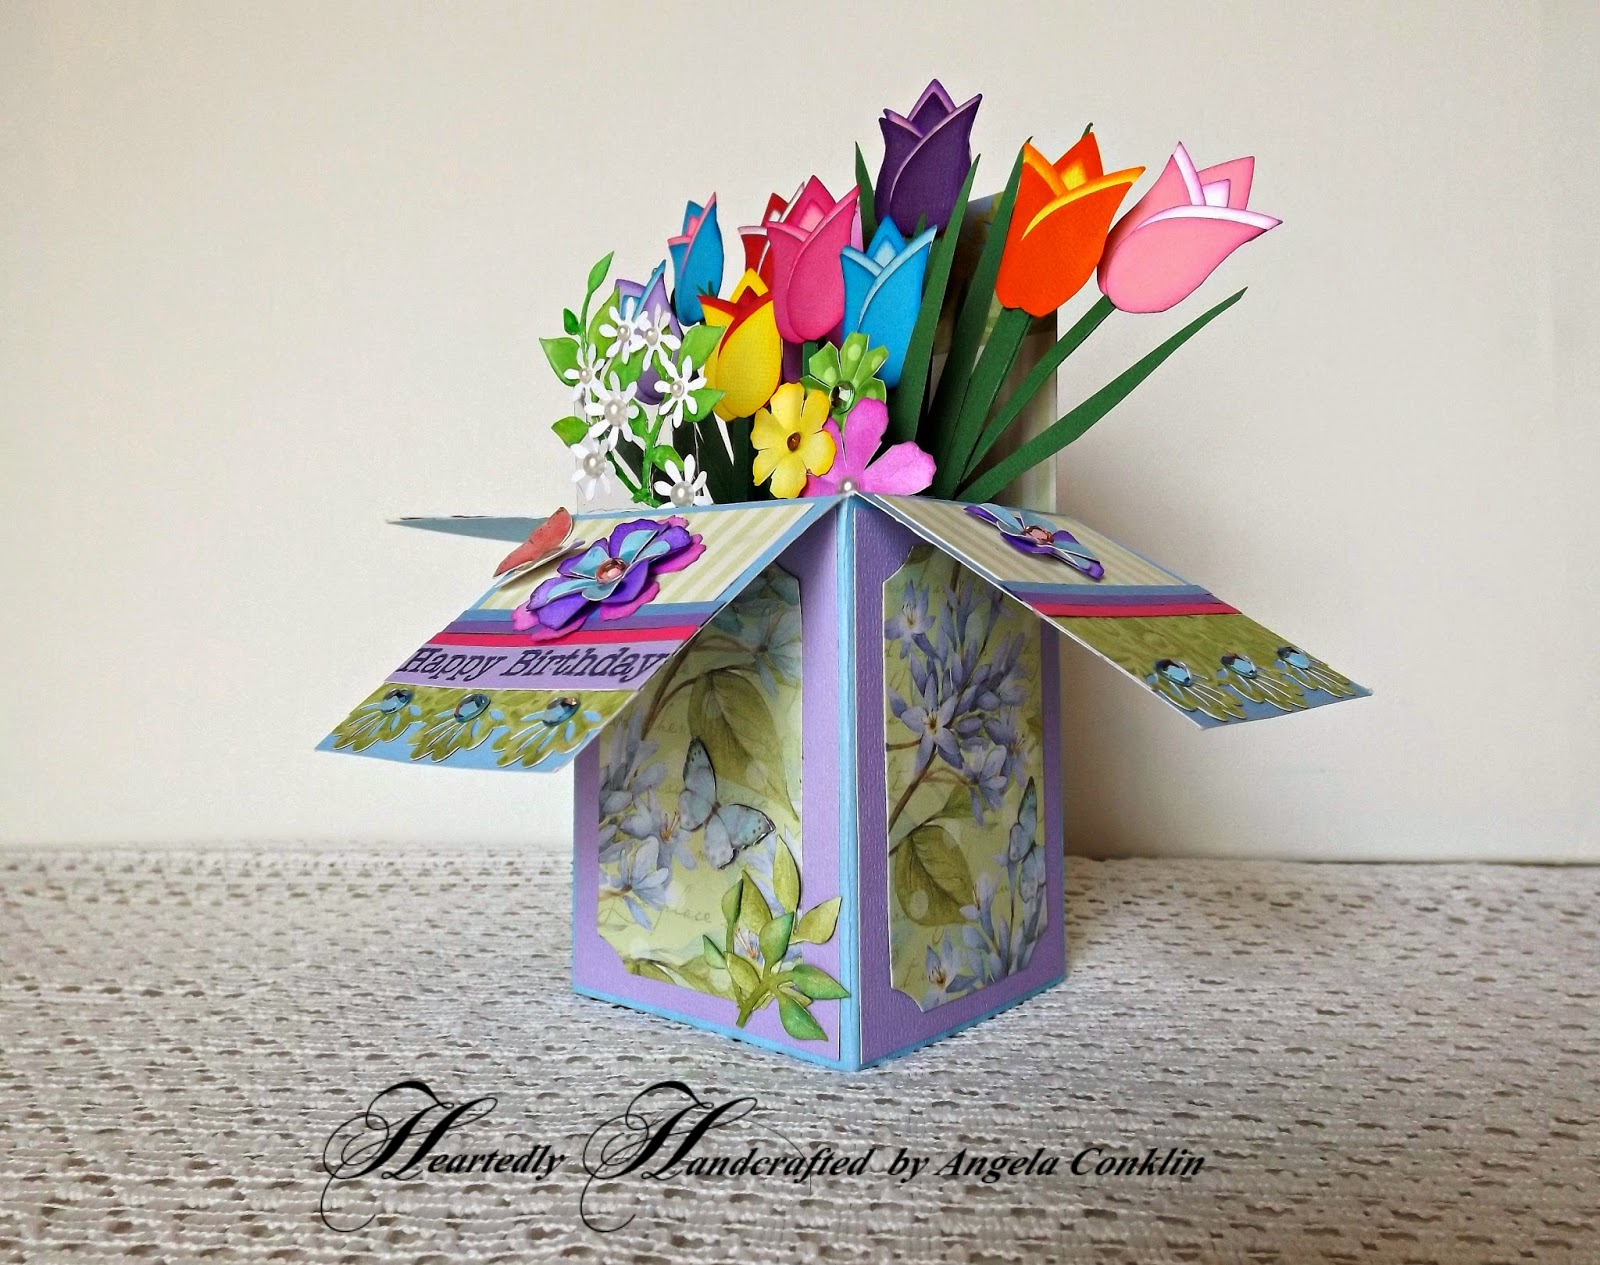
Tulip Birthday Card

Hello peeps! It's a gorgeous day outside here in western Pennsylvania. Just got done teaching my son to drive and I have to say although I'm excited for him and he's doing very well I can't help the need to make my seat belt a little bit tighter.

Today I want to share a card I've been working on over the past week. Each tulip has 6 petals and was hand inked. It was honestly more work than I thought it would be, but definitely worth it. I like the results of the two colors of paper used together and they're very sturdy flowers. I cut an 11 inch strip of paper and then folded them in half to make the stems. I also placed an extra inner layer of paper inside the box, basically a box in a box, so it's very solid. I free-hand cut the leaves for the tulips since in nature they would be turned different directions and would not all be the exact same shape when viewed from one direction. I wanted to place the sentiment in the bouquet, but because the flowers have stems they stick up quite high so I found that there was no where to place it without covering up flowers. My solution was to place the sentiment on the front flap which worked out quite well. This was another fun card to make and I can see myself doing quite a few more in the near future. 


#birthdaycard #cardinabox

Happy Crafting!

Thursday, January 23, 2014

Hippie Birthday Card

Hello everyone! Birthday card time!
A friend of mine is a nature girl. She likes greens and browns so I kept her in mind when designing this card.

I incorporated a wood-grained deep brown mat and a textured tan mat for that woodsy feeling. For the colorful embossed flowers on the front, I used white cardstock, a Darice embossing folder and 4 colors of ink that I allowed to smudge together as I went. I didn't do a lot of embellishing so the colors and patterns are front and center on this one. To make the large green flowers on the base card I used an old paper that I had punched flowers out of as a stencil.