Showing posts with label Scrapbook Layout. Show all posts

Friday, November 14, 2014

Join the Celebration! Sketches4All 5th Anniversary Blog Hop Challenges November 14th- December 31st


Welcome to the Sketches4all
5th Year Anniversary Party!!!
I’m so glad you could join us on the first day of our 5th Year Anniversary Party blog hop!  You will have until December 31, 2014 to hop around and comment on all the awesome projects our Design Team made with gorgeous Christmas digi’s from The Cutting Cafe
We hope hopping around will inspire you to then come to Sketches4all and join in on all of our 5th Year Anniversary Party Blog Hop Challenges!   We will be offering a new challenge every Monday and Friday until December 12th.  

You will have from November 14th – December 31st at midnight (PST) to complete the Anniversary Party Blog Hop and the Anniversary Party Blog Hop Challenges and upload your projects on the individual challenges in the Special Events section of the Forum AND in the Photo Gallery at Sketches4all to qualify to win  There will be a First Place Prize, Second Place Prize and a Grand Prize.
Winners will be announced on January 3rd in the Winner's Circle at Sketches4all.  

The 2nd place winner will receive a $10 gift certificate to   The Cutting Cafe!  
To qualify for this prize you must EITHER take part in the blog hop OR do 1 or more of the challenges

The first place winner will receive:

 1- 4pack of Tim Holtz Mini Distress Ink Pads
1 - MME Sleigh Bells Ring Paper Accessory Pack
1- package MME Decorative Tape
To qualify to win the first place prizes you must comment on all the blogs on the blog hop AND complete at least of the Anniversary Party Challenges.

And what is the Grand Prize you ask?!  How about a $50 gift certificate 
to the awesome online scrap store, 
A Cherry On Top
and
The title and bragging rights:
Queen of the Sketches4all
2014 Anniversary Party!!!!

Now I know you are asking, "How do I win the Grand Prize?!?!"  Here is how:

1.  Hop around to all of the blogs of our design team members.  Follow them and leave a comment.  
Right away that will get your name in the hat to win this awesome prize!!  
2.  Join ALL the Anniversary Party Blog Hop challenges at Sketches4all.  
These challenges will be posted in the Forum under Special Events.  (HERE) every Monday and Friday until December 12th.  This will get your name thrown in the hat to win the Grand prize.

Here is the order of the hop so you don't get lost along the way:
Stacy - http://scrapwithstacy.blogspot.com (you are here)

I decided to do two projects, a layout and a card to help you get inspired! I used a sentiment digi from the Cutting Cafe as the title for my layout and another Cutting Cafe digi for the theme of my card :) 

I love this sentiment. 

My card is made from medium turquoise cardstock with an overlay of vellum. I colored the back of the vellum with Tim Holtz Distress Ink in the color Peacock Feathers. I then used an embossing folder to make the small white snowflakes. I love the way vellum turns white when embossed. It doesn't even matter that I had inked the back of it.
The large snowflakes are also made from cardstock with an overlay of inked vellum.

Now it's time to hop on over to Karen's blog.

Thanks for stopping by for the


post signature

Monday, October 27, 2014

Homecoming Dance Scrapbook Layout

Hello everyone!

Just a quick post to show a layout I did for
The Memory Nest Challenge (Make it Monday No. 27)
.
My daughter and her boyfriend are seniors in high school which makes this homecoming dance the last one. They looked so adorable together with their matching bright red clothes, that I felt inspired to do a LO again. It was also a very convenient color to work with since I have all of my Christmas colors for making cards on my desk currently. I showed it to her this morning and her face lit up. She loves the big gaudy flowers. She is a very eclectic person. She likes bling, but she also loves things like aged-paper and soft lace too. So I tried to use elements that would best represent her.
 
 
This was a fun sketch to work with.
 
 
 When you don't feel like sewing there is always markers :)

 
Happy Crafting!
post signature

Saturday, March 1, 2014

Lov(in') the Photo Booth - Scrapbook layout

My daughter and her boyfriend have been together well over a year now. Although as a parent you hope that your daughter doesn't get too serious at a young age, he has been nothing but wonderful to her and for her. She smiles more. Her grades are awesome (honors) since she started spending time with him. She's just happy and of all the young men he's definitely one of the good ones. So how can I not support that? :)

I made this for the Memory Nest February Challenge, but I also wanted to make something special for my daughter. I left space on the booth so she can do some journaling if she wants to. I also decided, since going to the mall and getting their photos taken in the photo booth has become "their thing", that I should recreate the photo booth for their pictures.


Happy Crafting!


Thursday, February 6, 2014

Valentines Day Zentangle Scrapbook Layout

Hello Everyone! I wanted to take a break for the day from cutting and pasting and decided to relax with some Zentangle. The nice thing about learning many arts and crafts from Youtube videos and so forth is that you can begin to overlap the different things that you've learned. If you've ever been interested in Zentangle you should really try it. Basically it's just doodling. There is no need to plan ahead. As you go along you'll automatically know where you need light areas and dark areas. If you have trouble thinking of shapes to make, there are plenty of how-to sites that will show you how easy it is to make different designs. So give it a shot and remember it's suppose to be a relaxing art form. Anything goes.

 I used a black, Sharpie marker and a fine point marker for the smaller areas.
To make the center oval and surrounding circles I used Spellbinders Nestabilities dies to trace around.
Copyright © 2014 Angela Conklin - Heartedly Handcrafted
All Rights Reserved

Make a Photo Appear Larger for a Scrapbook Layout Design

Hello! Just a quick tip that may help you out one day when you want to do a layout of which your photo peeks out in different spots or is just too small for your design.

Sometimes the design of a layout calls for a larger photo (one that encompasses a wider or taller background view). When I made my layout I was using an inspiration piece (below) to design it from. In the inspiration piece there are three cog-like decorations on the wall. I wanted to incorporate these somehow into my layout.


I decided to use them on the blind of my window.


The actual photo stops where I have drawn the red line.

This caused a problem. I had already cut three holes out of my blind. I wanted the cogs to surround them and since I had the blind partially covering what was suppose to be the continuance of a glass window there was nothing behind the holes but white paper. 

Sure I could have ignored it or filled the holes, but there was another choice that was as easy and would allow me to get the look I wanted. I printed the same photo again and then just cut three small portions from it that I felt would look realistic behind the holes. The trickiest one was the hole on the left that would still show the tree so I just cut a piece with smaller branches on it (since branches get smaller at the very top of a tree) and made sure the branches were faced in a realistic direction when I glued the piece into place. 

So if you decide to do a layout that will require your photo to "appear" larger, there is a way to do it.

Happy crafting!

Thursday, January 30, 2014

Scrapbook Layout - blog Challenge

Hello everyone. Another snowy day here in Pennsylvania, but the sun is shining. Today I'm submitting a layout for a color challenge with The Memory Nest. Working off an inspiration piece and coming up with something of my own is right up my alley. I decided to use a picture for my layout showing how the snow blanketed everything and when I looked out across my front yard I could no longer see the road and the sidewalk. Untouched, the snow just looked beautiful. So here it is. Hope you like it.

I took my photograph looking out my window somewhat at an angle, so the grills aren't straight up and down like I would like them to be, but no big deal. I decided to place my photograph in a window frame and add a fancy blind to capture the same feeling I had looking out.

Inspiration Piece


To make the window I used chipboard covered with brown textured card-stock and then cut a hole in the layout for the frame to fit and glued it in place. The trim on the window overhangs the frame which gave me some play when cutting the hole. I didn't have to be perfect about it.


Happy Crafting!

Tuesday, January 28, 2014

Inspirational and Colorful Layout Challenge New Year 2014

Hello fellow crafters! I'm very excited because I just took part in my first blog challenge. 

Being a newbie to the craft scene here online I recently stumbled across Creative Embellishments and quickly became a fan of their chipboard, wood veneers and stamps which have amazing detail. Check out this next link to see one of their products which is definitely on the list of my favorites Feathers.

So here it is! My first challenge layout and wow is it colorful!
I made this inspiration piece to represent my love for and dedication to crafting. I no longer work outside the home and my youngest is almost an adult. Now, I finally have time for ME. The small star rests and pushes down the C which represents crafts. The pulled back triangular pieces of black glitter paper that make a sun shape represent that I've broken out of my past routines and I'm now fully pursuing my dreams; a bright sunny future. "Reaching for the Stars" means to me that I will pursue my dreams uninhibited. I wanted the look of celebration because that's is truly how I feel. I'm doing something I love and it's good for my personal growth.

The challenge piece (below) is so colorful with so many details to work with. As my handmade inspiration for the rest of the year I wanted to capture the colors and glittery shine. I like things that sparkle. The black glitter card-stock that I used in my piece is absolutely gorgeous.


Creative Embellishments
January Challenge Inspiration Piece


The back of the glitter card-stock is white so I used Adirondack Alcohol Ink in Butterscotch, Stream and Wild Plum to make it colorful. To get the ink to spread I placed a drop on the paper and then blew on it through a straw. I placed some loosely quilled circles underneath the words.


For the scalloped edges I used a Martha Stewart border punch and then placed blue ribbon over it. To give the flowers a glittery center I cut circles out of foam Valentines Day hearts. Each triangular piece was glued down and then a bead was glued to it.


To give my layout a celebratory feel I used quilling paper to make the springy curls. The large star is chipboard covered with white textured card-stock and the small star is the leftover card-stock cut from the center of the large star.

Happy Crafting!


Tuesday, January 21, 2014

Flower and Vine Scrapbook Layout

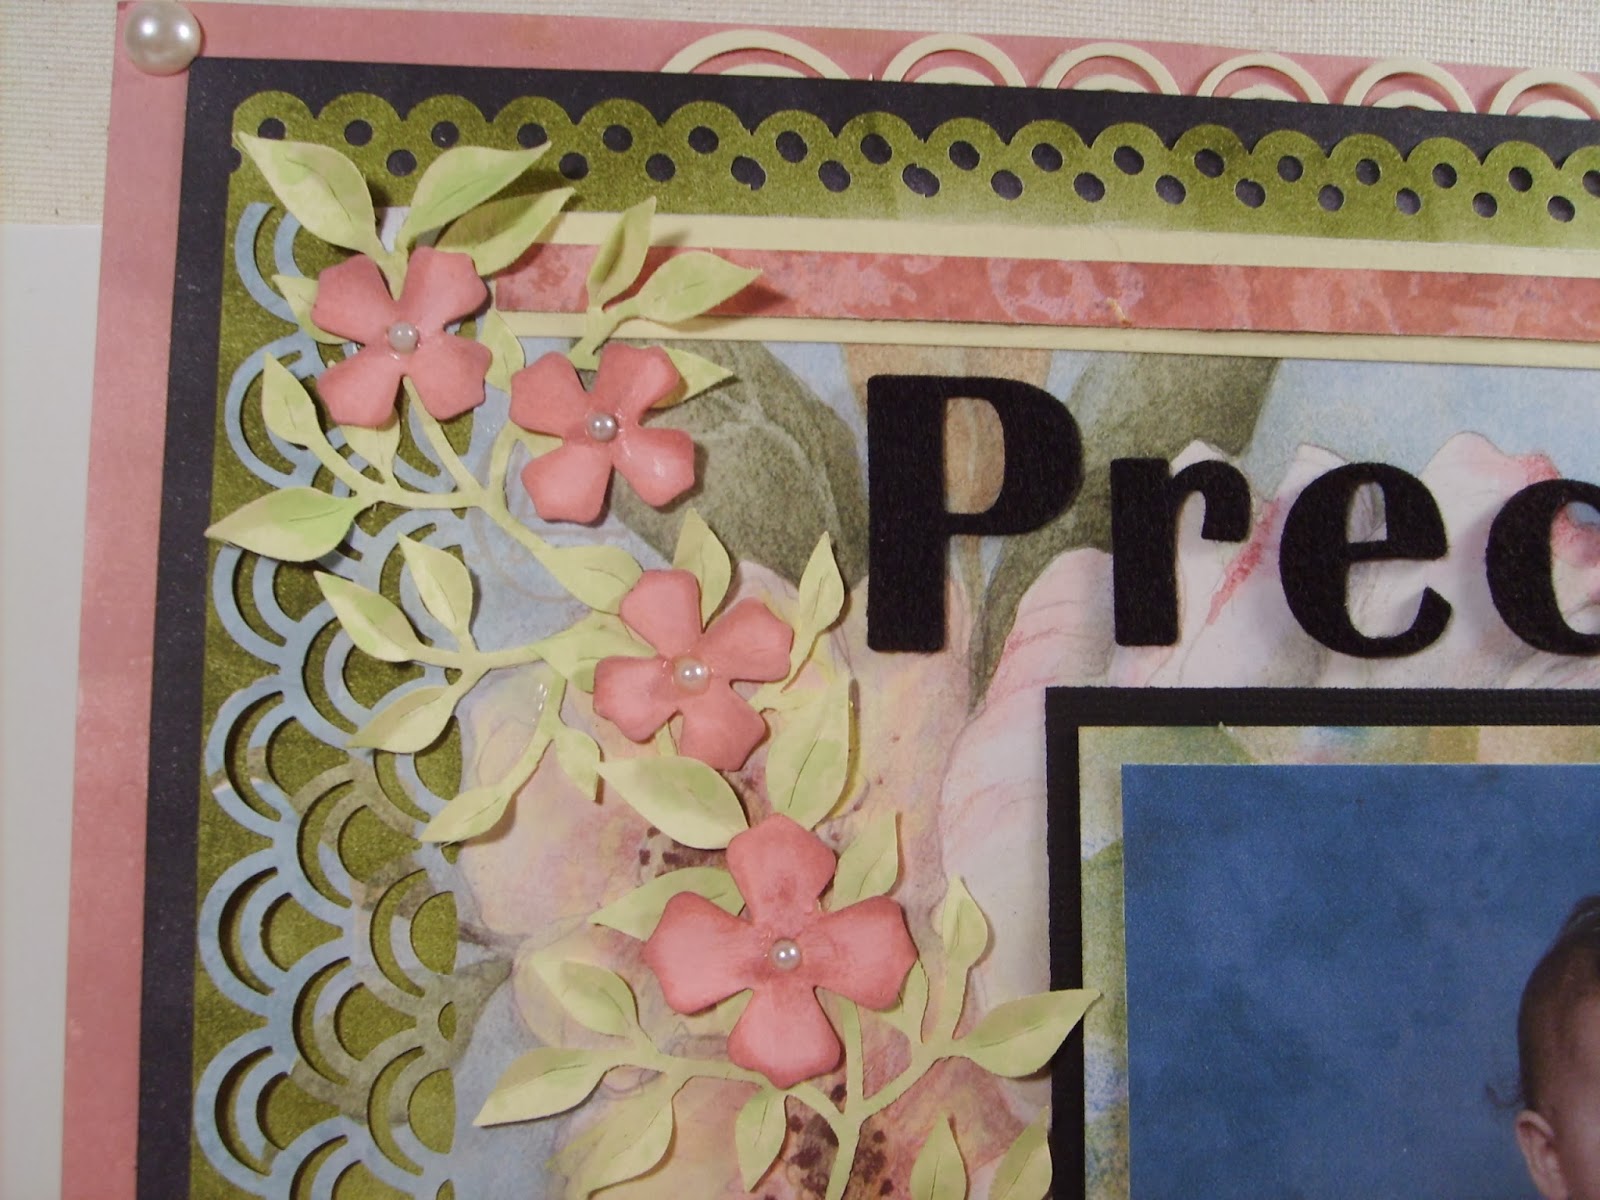
Hello everyone! Time goes by too fast! This is a picture of my daughter from 17 years ago in her little pink, green and white, flower dress. I grew up with only brothers and I was the oldest so spent a lot of my young life caring for boys. When I had my daughter I was so excited. She is absolutely precious as she is my only girl and also my youngest.

It was time to get her photo out of the old wooden frame that housed it and do something new. I did not use the original photo, but scanned it and printed a copy on matte white card-stock. I considered using a baby theme and baby colors, but who wants to do normal things? Not me. So not only did I use grown up floral papers, I threw some black in there too to make the colors pop.


 I used a Martha Stewart corner and border punch set and a Fiskars border punch to do the edges. Then did a lot of layering of different papers for interest.

Layers
  • Base - heavy white card-stock (edged with Tim Holtz Distress Ink "Victorian Velvet"
  • First Layer - lightweight cream card-stock
  • Second Layer - lightweight black card-stock
  • Third Layer - lightweight white card-stock (edged with Tim Holtz Distress Ink Peeled Paint"
  • Forth/Top Layer - K&Company floral card-stock
  • The photo is matted with black card-stock and floral print paper to make it stand out


Embellishment

Scrap pieces of the cream colored paper were used to form the two vases in the lower corner and the leaves coming out of the smaller vase. 

To make the twists I wrapped strips of floral paper around a pencil.  

Once the vases and flowers were finished I embellished the vases with pink ribbon and flat-backed light green gems.


The butterfly in the top corner was cut from the K&Company floral paper 

Strips of cream card-stock and pink from the backside of the double-sided floral paper were used to make an inner border.

Sizzix dies "Build a Lilac" and "Branch with Leaves" were used to form the vines of leaves and flowers. Each flower has a flat back pearl as it's center and was colored with Tim Holtz Distress Ink in "Victorian Velvet". The leaves were colored with Tim Holtz Distress Ink in "Peeled Paint".


Happy Crafting!

Monday, December 23, 2013

Scrapbook Layout Zipper-Pocket

Hello Everyone! I just took my pictures and it's almost 9 o'clock at night so they're a little dark, but I couldn't wait to share. This was a very fun project. I've seen zippers used in other types of arts and crafts and pockets for tags and photos in scrapbooks, so why not combine the two. Fun part; the zipper actually works.


Friday, December 20, 2013

Scrapbook Layout

My first scrapbook layout. I love this picture of my daughter and decided to do something special with it. I didn't have paper to bring the purplish-pink paper and blue together so I mixed up some paint and painted the flowers and stripe. Of course there are a couple of things that didn't go quite as planned, but I'm happy with it.