Monday, October 27, 2014

Homecoming Dance Scrapbook Layout

Hello everyone!

Just a quick post to show a layout I did for
The Memory Nest Challenge (Make it Monday No. 27)
.
My daughter and her boyfriend are seniors in high school which makes this homecoming dance the last one. They looked so adorable together with their matching bright red clothes, that I felt inspired to do a LO again. It was also a very convenient color to work with since I have all of my Christmas colors for making cards on my desk currently. I showed it to her this morning and her face lit up. She loves the big gaudy flowers. She is a very eclectic person. She likes bling, but she also loves things like aged-paper and soft lace too. So I tried to use elements that would best represent her.
 
 
This was a fun sketch to work with.
 
 
 When you don't feel like sewing there is always markers :)

 
Happy Crafting!
post signature

Friday, October 24, 2014

Christmas Holiday Card: Poinsettia Christmas Cheer


Hello everyone!

Today I'm sharing a Christmas card. With all this Christmas crafting I'm getting excited about decorating. When I asked my family if I could put the tree up this week they laughed at me and looked at me like I'm crazy. I was just kidding, kind of.

I'm enjoying working with the rich, vibrant, traditional Christmas colors and wow do they pop on camera! My card is just a simple 6x6 inch card, but the fun thing was making my first Poinsettia out of red ribbon and I think it turned out pretty good.

Due to the small size of my flower I found it difficult to get my fingers in there to tie off each set of petals, but I got it done and I'm glad I tried it. To make the center of my flower I put a dab of hot glue in the middle and then dipped my flower into some tiny beads. There is a tutorial included below.

I really like DCWV Holiday Cheer Stack paper.

To embellish my card I used flat-backed gems and pearls and to soften the look I incorporated lace and ribbon.
 
Poinsettia Tutorial
How to Make a Christmas Poinsettia Ribbon Flower

I cut my flower petal shape a little bit different than she shows in the video and I started out using wire as she does, but decided to finish up my petals with thread instead.
 
I found the free digital sentiment at 
Aud Sentiments Challenge Blog

The sentiment is black, but I added some red to it.
To cut the sentiment I used Spellbinders Nestabilites Labels 17.
I just got this particular die set and I love the shape.

Well, back to making cards. Time flies when you're having fun :)

Happy Crafting!

post signature

Sunday, October 19, 2014

Shaker Easel Card with a Note: Merry Christmas

Hello crafty peeps! Hope you are enjoying your day :)
 
I have continued to work on getting Christmas cards done and would like to share another one with you today. Shaker cards are so adorable and I'm already a fan of the easel card so I combined them. The shaker card does not open, but there is a card for a message on the easel itself.


 A place for a message, gift card, or small photo.

I made both of my scenes digitally and then printed them out on cardstock. I added white glitter with silver flecks to give it that snowy shaker feel and to build out the back for the shaker window I used two layers of thin craft foam of which I hot glued together.
 
 I like this card so much that I sat shaking it to make snowdrifts this morning. So much fun :)

I shared a tutorial in my previous post on how to make an easel card. I didn't look/watch any tutorials to make my shaker card, but I know there are plenty on YouTube if you would like to make one and don't know how to.
 
Happy Crafting!
 post signature

Friday, October 17, 2014

Christmas Easel Card with a Couple of Surprises

Hello crafty peeps!
Today I'm sharing my first easel card and boy was it a journey! I decided to try making my card with just a pair of scissors, an X-acto knife, a ruler and two paper punches and although it took me a little longer, you can make this card if you don't have any special crafting equipment such as a paper trimmer and Sizzix Die Cutting machine. I have to say though, having the tools to make a card makes it MUCH easier.

I made some mistakes, one still shows, but some mistakes and getting carried away with layers led to new ideas.
 
I used paper from the DCWV Holiday Cheers Stack.
 
 
There is a place for a wallet sized photo or gift card that can be added with a little dab of removable/temporary adhesive or you can make it a pocket for cash or a tag.


The easel card opens to reveal a section of which you can write a personal message, add a larger photo, place a stamped image or whatever you want. 

The back of my easel looked too plain so I added some color.

There are no large embellishments inside my card, so it folds flat for ease of mailing. I added a bow to the front, but it won't deform the card as easily as adding something to the inside.

  I recommend the video tutorial below for making the basic easel card. Michael of Notefolds.com tells you the exact sizes of paper you will need for construction of the easel and matting. He made it so easy I had to make one.

Video Tutorial
 
Out-Take
My background took off, dead pine needles and leaves continued to drop into the photo area and my card kept blowing shut. In fact I couldn't keep my card completely open for any shot. Funny!
Nice Fall color in the background though :)
  Happy Crafting!
 post signature

Wednesday, October 15, 2014

Christmas Card: Happy Winter

Hello Everyone!
 
Today as I was making my Christmas card it dawned on me that I've been blogging for a year now. It's my Blogging Anniversary! It was a year ago when I discovered paper crafting too and I was so new to it I didn't even share any of my Christmas cards on here.  So this year I get to change that. It's been a wonderful journey of trying new things, growth and meeting so many talented and fabulous people. I've truly and thoroughly enjoyed it. Today's post is short and sweet as I've run out of time, but wanted to share my card. Hope everyone is having a great day.

There are 5 layers of cardstock. The base card is from the DCWV Neutrals Cardstock Stack and the blue printed paper and front snowman tag are from the DCWV Winter Solstice Stack. I usually don't use the pre-made tags from my stacks, but these ones are too cute to pass up. Other materials are white feathers, Sizzix Flourishes #10 (556538), Sizzix Snowflakes #3, white adhesive pearls, Martha Stewart Corner Punch, flat backed adhesive gems, white glitter and Glossy accents.


Happy Crafting!


Monday, October 13, 2014

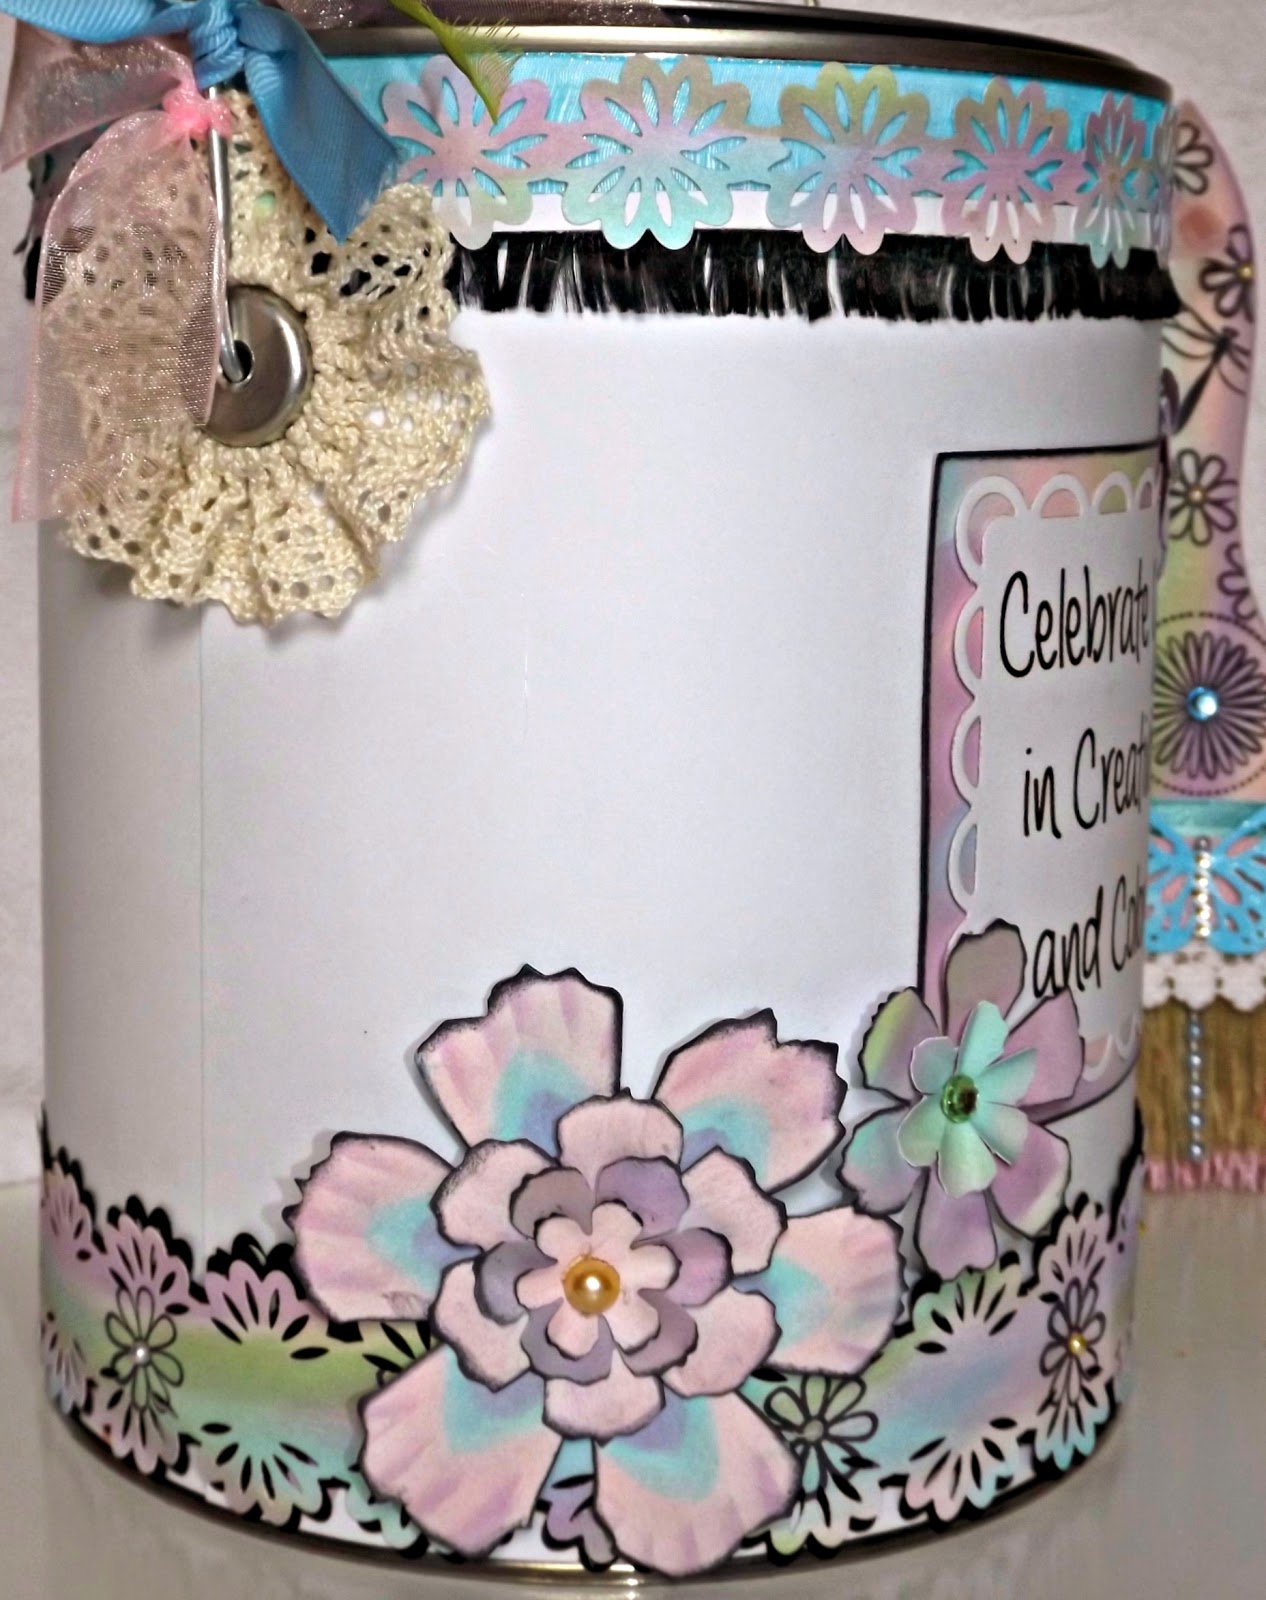
Altered Paint Can with Altered Paint Brush for Gift Giving

Hello Everyone! Hope you're all having a good day.
 
For a while now I've wanted to alter a paint brush. There are so many beautiful brushes on the web, but I kind of hit a wall as I like the things I make to have a purpose other than collecting dust. So I decided to add a paint can. I was constantly seeing them separate and thought it would be cute to do them together.

Once the idea hit me, I thought this would be an adorable gift for a beginner, paper crafter filled with little stamps, inks, paper punches and so forth.

As I decorated the can I decided to keep it somewhat plain with a lot of blank, white space (especially on the sides and back) for the new crafter to add her own touches. I left the lid untouched as well, although I may add a white circle with a personalized note should I decide to give it as a gift or sell it. 

A gift package to be filled with items that inspire creativity.


The Brush
 
I dragged the ink pads (VersaMagic in Spring Pansy, Aloe Vera, Sea Breeze and Pixie Dust) across the surface making sure the edges of each color blended into the next. I love this particular ink for the soft colors and chalky finish.

For the flowers, butterfly, and dragonfly I used clear stamps and Ranger Archival Ink in Jet Black. 
 
Then all that was left was to embellish my brush. I chose gems, pearls, lace, ribbon and a paper butterfly punch to top it off. For the hanging pearl strands I just hot glued the top bead to the brush bristles. To make the butterfly firm and shiny I used a light turquoise embossing powder over the entire butterfly.

Once my paint brush was finished I had an afterthought and decided to dip the bristles in pink paint. This step should be done before you decorate your brush and left to dry. Fortunately it worked out okay for me.
The Paint Can
I bought my empty paint can at my local hardware store for about $3.50.

Honestly I had difficulty getting started with this. Trying to measure the paper correctly that wraps around the can was a real pain. Well at least until I said, "Heck with it", grabbed a couple of pieces of eight and a half inch by eleven inch cardstock and made a front panel and a back panel.

I'm not a measuring kind of gal, but I did measure from the bottom ridge of the can to the top ridge so I could use my paper cutter to get a precise cut. If you will be putting a border on your can as I did you don't have to worry about this cut being perfect either since it will be covered.

Then I held my cut paper up to the can and made a mark where the handles were located. In the end, my holes for the handle were a little too big and not round, but it didn't matter since I was going to be covering that area up with lace flowers.
 
Using small sections of coordinating paper may be easier than trying to cover the whole can at once like I did.
 
To make the lace flowers I did a running stitch in lace ribbon with jewelry wire. Then I hot glued them to the can.

The rest was easy as you can add anything you want to decorate it.

If you have any questions please feel free to ask :)

Happy Crafting!
post signature

Sunday, October 12, 2014

Halloween Card: Sometimes Spiders Aren't Quite as Scary

Hello Everyone!
Today I'm sharing a very simple card I made for +Consuela Gomez's challenge, Create a "Scary" Halloween Card. Her challenge was a lot of fun, because I had never made a Halloween card before and had no idea where to start to make it scary. I started by finding a face for my pumpkin.

My card can be made quickly with very few special materials and craft machines needed. I used my Sizzix Die Cutting machine to make the ovals and to emboss the center oval, but ovals can be printed out and then cut by hand and a paper with a design on it can be used instead of embossing plain paper.
 
The main challenge once I decided what I wanted to do was coming up with a way to keep the eyes from moving.

I wanted them fixed to one side as if the pumpkin is looking at the spider.

It was easy. I cut a small triangle in the back where I wanted the pupils of the eyes to be and placed some glue in there. I used hot glue so I could do this quickly, but any glue can be used since you won't see it. Once your glue is dry just make sure the pupil is centered over the glue spot.
 
 
I found and printed out, on my orange paper, the face and spider I wanted and then cut out my ovals around them.

For my sentiment I went into the free online program Picmonkey and chose letters that I thought would be appropriate then printed my word out on white cardstock.

To make the edges of my sentiment a bit more fancy I just cut them from each corner to the middle with scissors to give the effect of a banner. Then I inked the edges of my pumpkin in orange ink and the sentiment in purple (Rubber Stampede ink) as well as brought some of the purple ink onto the sentiment itself by lightly dabbing.
 
 
The main card is made from deep purple cardstock.

I matted the pumpkin with black and green cardstock.

To make the green cardstock a little more interesting I scored across the paper with a bone folder to make lines.

I cut the stem for the pumpkin free-hand in a light brown cardstock and then edged it and gave it more color with Tm Holtz Distress Ink in Olive.
 
 
That's it! You can make one too.

Happy Crafting!
 post signature