Showing posts with label handmade flowers. Show all posts

Monday, February 15, 2016

Handmade Card - Thank You with Pastel Flowers

Happy Monday! Hope everyone had a fabulous weekend. I spent the majority of the past week working on my new craft room, but I was able to squeeze in a greeting card over the weekend and I hope to accomplish another something crafty in the near future. 

My hubby and I have had twenty-two Valentines Days together and now I find out on Facebook that Valentines Day isn't even the REAL holiday anyway, today is. 

"February 15th is the REAL holiday, because all the chocolate is 70% off". 
The photo the above sentence was written on showed a shopping isle of candy on clearance and I have to say that I had never thought of February 15th in that way, but I will from now on. I found the meme very funny and kind of true.
So I want to wish all of you chocolate lovers a wonderful holiday!

Okay, now back to the regularly scheduled program. 
In early January I began making my own flowers again and I'm really enjoying seeing what I can come up with. I have collected a few more flower cutting dies and punches over the last couple of years and that steps up the flower design possibilities. What I don't have is a die or punch to make the flower centers so for these particular flowers I just cut long strips of paper and then used scissors to make the fringe. I cut the fringe very tiny so it took me about 10 minutes to complete each one. I think it was worth it because I really like the way they turned out. They're kind of Shabby Chic.

  
The flowers on my card have a very delicate appearance so I decided to keep my background soft as well. To make the background I used cream colored card-stock that I adhered white die-cut flowers to. I wanted the white flowers to be subtle so I used translucent card-stock over them to fade them out a little.  

To give the translucent card-stock a decorative edge I made stitches on all four sides by using a tracing wheel. Then I connected the dots by lightly scratching lines with a metal tool that has a fine tip. To make the sentiment I used the Sizzix Thinlits (660223) and colored the letters with Stampede ink in the color Purple and then went over the purple with Versa Magic Chalk ink in the color Pixie Dust.


How To Make the Flowers
Using a die-cut flower as a flower base to attach large petals to.
  1. I used Fiskars Petal Punches in different sizes to make the petals
  2. Then I used Stampede ink in Purple and Petal Pink and tried to blend them together so there wasn't a harsh line where the colors met.
  3. Once the ink sat for a moment I quickly dipped each petal into a cup of water so I could break down the paper fibers and manipulate it more easily. Using the water also blended and softened the ink more.
  4. When I had the shape that I wanted I used my heat tool to dry them which made them stiff and keep their new shape. 
  5. Then I glued each petal to a small, die-cut flower.
  6. Before placing the center of the flower I laid the flower on a thick foam mat and used the end of a Sharpie marker to give the flower more shape, concentrating on the very middle where my flower center would be placed. I basically pushed until I made the center a bowl-shape. Be careful not to rip your flower during this process. 
  7. Finally I glued my flower center into place and shaped it by spreading out the fringe.

To Make the Flower Centers
I used an very thin 11 inch strip of white paper of which I colored with yellow Stampede ink and then I cut the fringe with scissors. Once I was done cutting I rolled the strip and glued the end.


What I like most about making my own flowers is that every one is different and just the slightest changes can have a huge impact on their appearance. I hope you'll give making your own flowers a shot if you haven't already.


Thanks for stopping by and come back again for more.
Happy Crafting!

Monday, October 13, 2014

Altered Paint Can with Altered Paint Brush for Gift Giving

Hello Everyone! Hope you're all having a good day.
 
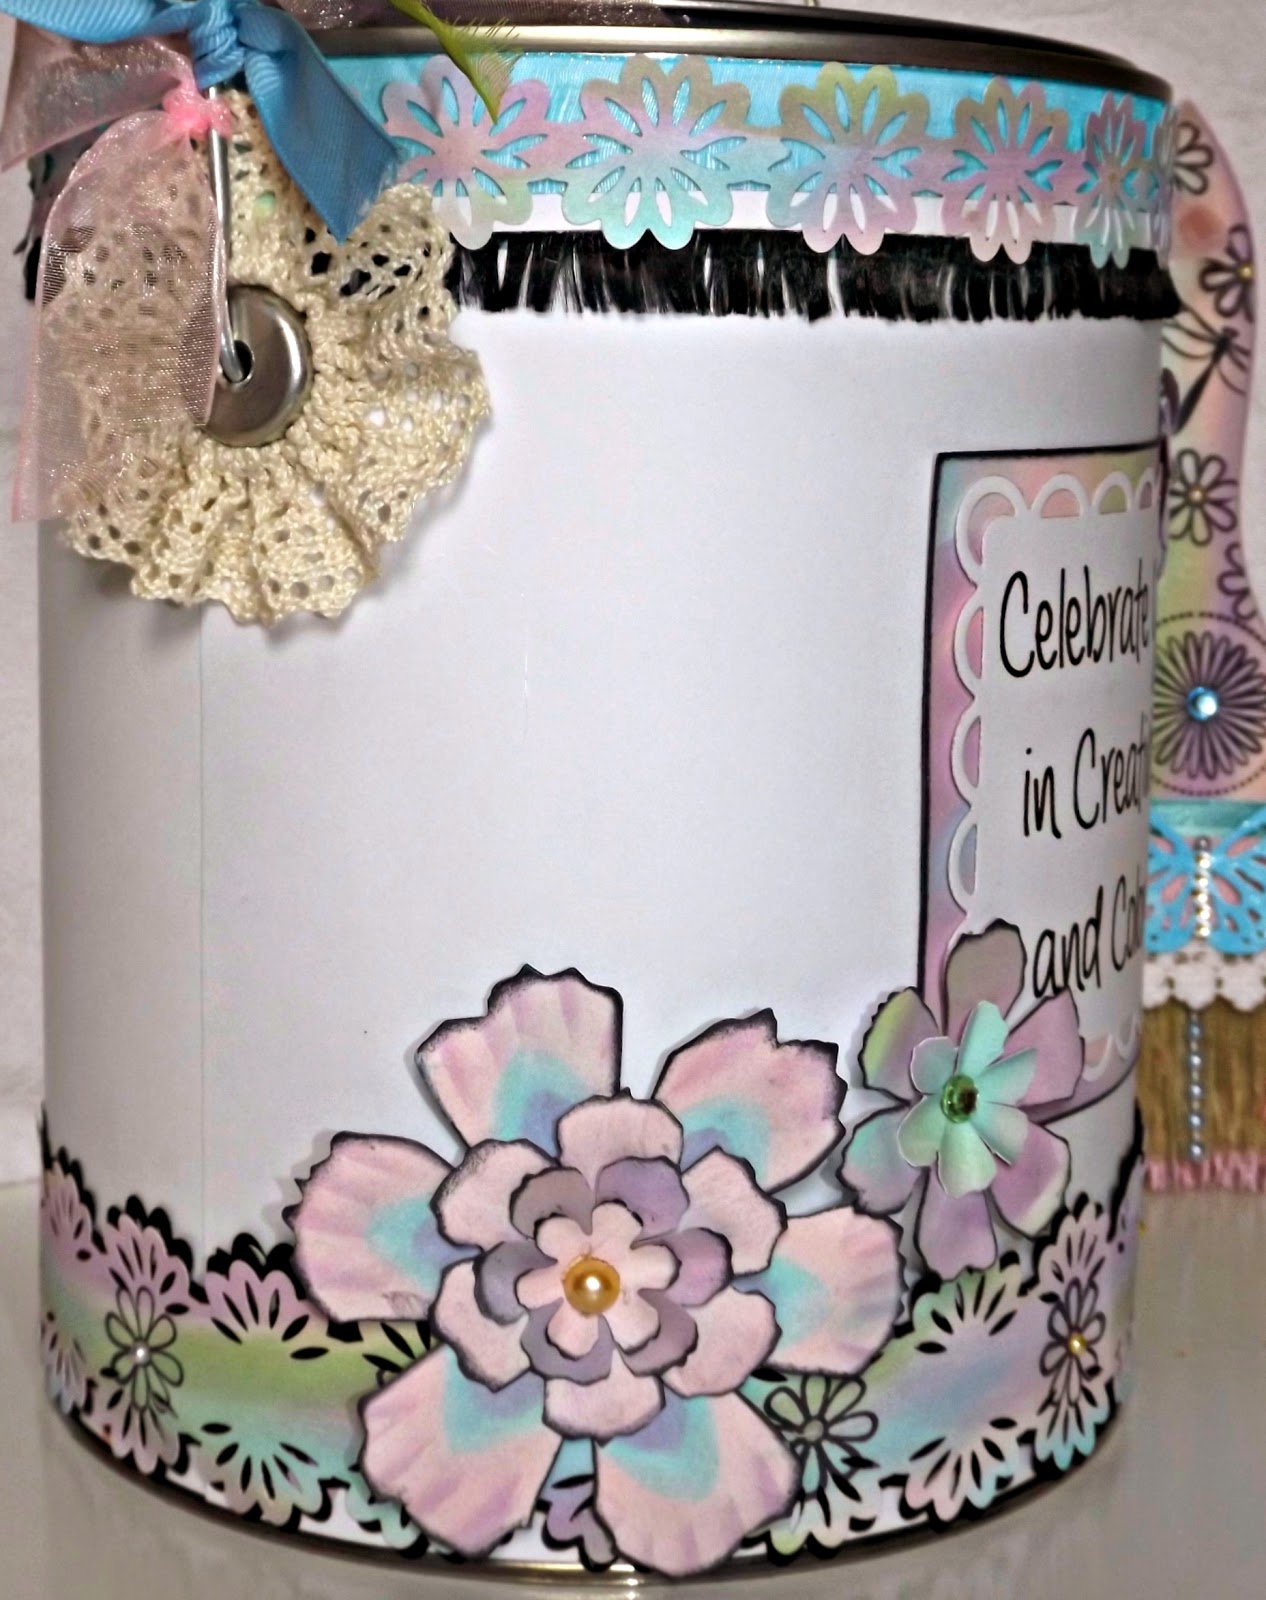
For a while now I've wanted to alter a paint brush. There are so many beautiful brushes on the web, but I kind of hit a wall as I like the things I make to have a purpose other than collecting dust. So I decided to add a paint can. I was constantly seeing them separate and thought it would be cute to do them together.

Once the idea hit me, I thought this would be an adorable gift for a beginner, paper crafter filled with little stamps, inks, paper punches and so forth.

As I decorated the can I decided to keep it somewhat plain with a lot of blank, white space (especially on the sides and back) for the new crafter to add her own touches. I left the lid untouched as well, although I may add a white circle with a personalized note should I decide to give it as a gift or sell it. 

A gift package to be filled with items that inspire creativity.


The Brush
 
I dragged the ink pads (VersaMagic in Spring Pansy, Aloe Vera, Sea Breeze and Pixie Dust) across the surface making sure the edges of each color blended into the next. I love this particular ink for the soft colors and chalky finish.

For the flowers, butterfly, and dragonfly I used clear stamps and Ranger Archival Ink in Jet Black. 
 
Then all that was left was to embellish my brush. I chose gems, pearls, lace, ribbon and a paper butterfly punch to top it off. For the hanging pearl strands I just hot glued the top bead to the brush bristles. To make the butterfly firm and shiny I used a light turquoise embossing powder over the entire butterfly.

Once my paint brush was finished I had an afterthought and decided to dip the bristles in pink paint. This step should be done before you decorate your brush and left to dry. Fortunately it worked out okay for me.
The Paint Can
I bought my empty paint can at my local hardware store for about $3.50.

Honestly I had difficulty getting started with this. Trying to measure the paper correctly that wraps around the can was a real pain. Well at least until I said, "Heck with it", grabbed a couple of pieces of eight and a half inch by eleven inch cardstock and made a front panel and a back panel.

I'm not a measuring kind of gal, but I did measure from the bottom ridge of the can to the top ridge so I could use my paper cutter to get a precise cut. If you will be putting a border on your can as I did you don't have to worry about this cut being perfect either since it will be covered.

Then I held my cut paper up to the can and made a mark where the handles were located. In the end, my holes for the handle were a little too big and not round, but it didn't matter since I was going to be covering that area up with lace flowers.
 
Using small sections of coordinating paper may be easier than trying to cover the whole can at once like I did.
 
To make the lace flowers I did a running stitch in lace ribbon with jewelry wire. Then I hot glued them to the can.

The rest was easy as you can add anything you want to decorate it.

If you have any questions please feel free to ask :)

Happy Crafting!
post signature

Monday, June 9, 2014

Flower and Pearl Tag Journal

I'm getting back to finishing my craft room makeover today, but before I do I want to reshare my Tag Journal that I made. I call it a Tag Journal because the pages are filled with decorative tags that I can pull out and write something on the back of. I had made this in December of last year and only had a couple of not-so-good photos of the outside, so I'm sharing it again with some updated photos.
My journal is for keeping a record of the happy little moments I have throughout the year. I really don't have time for a diary, nor do I print very many photos to make a scrapbook, so this seemed the best solution. I decorated my journal with vinyl wall-border, cream colored cardstock, pearls, and handmade lace, ribbon and paper flowers. I also decided to add a couple of hat pins I made from beads that go beautifully with the colors of my journal.
For the title I decided to go with the word tender because the moments I write down are the ones that touch my heart in some way.   

 
The fun thing about my journal is that I do not make all the tags ahead of time, but instead leave open places on each page and add tags when I feel like making them. This way as I learn new things, acquire new die shapes and make new embellishments, my tags will reflect that and I always have a little project to do if I run out of ideas for the moment. Below are some of the tags I already wrote on and how they look when they're placed inside.
 I also made a box to hold my journal so it doesn't get dusty and dirty. I made it out of chipboard and larger than the journal so it doesn't crush the flowers and as I add tags there is room for the journal to expand. I sat it upright so you can see the details of the top. I covered the top and sides with a transparency so that it can be easily wiped off and the decorative scrapbook paper is protected underneath. The box is embellished with a handmade paper rose and some lace.

 Happy Crafting!
  post signature

Thursday, December 19, 2013

Handmade Flowers

Handmade lace, ribbon and cheesecloth flowers and other embellishments to use in craft projects such as... 
  • mini albums 
  • scrapbooks 
  • art journals
  • altered frames and boxes 
  • mixed media collages 
  • hair accessories 
  • prom and wedding arrangements
  ...and just about anything else.

I love making my own flowers, especially flowers that are just plain cute. I've included links below to some of the best flower making tutorials I've found on the web. My favorite flowers and projects have come from Jennings644.
Happy flower making!


Video Tutorials: Making Flowers
 
Shabby Beautiful 
(Lace Flower with wire running stitch)

NurseTara04
(Lace Flower with wire straight through hem)

jennings644
(Lace Flower - sew running stitch)

jjshowers
(Paper Rose)

hectanooga1
(Paper Rose)

alittleshabbychic
(Cheesecloth Flower - hot glue)

Thank you ladies for sharing what you know :)