Thursday, April 10, 2014

Ink and Hand Sanitizer Art

Hello peeps! Today I took part in learning from a live show done by +Kraaft Shaak. During which the topic was Gelli Printing and toward the end of the video, ink was used. I saw a video sometime last year of someone adding drops of ink to hand sanitizer (in the bottle) and I had tried it, but the colors came out very pale looking and I was low on ink so I didn't try again. Although the texture was really interesting.

This time I used a piece of cardboard covered with cellophane to give me a flat work surface, then I smoothed hand sanitizer over the cellophane with my brayer. Once I had an even coat I added ink drops to the surface. I placed my paper on top of it and used my hands to make sure it was flat and picking up the ink. When I pulled it up I was pleasantly surprised.

The materials I used were Tim Holtz Adirondack inks in Stream, Wild Plum, and Butterscotch and just a squeeze bottle of hand sanitizer.


The white showing is where no ink reached the paper.

Then I took these photos to Picmonkey and realized how fun it was to add more contrast to see details. Below is an example.

Try it out and share what you create.


Now for a little fun :)


Happy Crafting!

#alcoholinkart

Copyright © 2014 Angela Conklin - Heartedly Handcrafted
All Rights Reserved

Tuesday, April 8, 2014

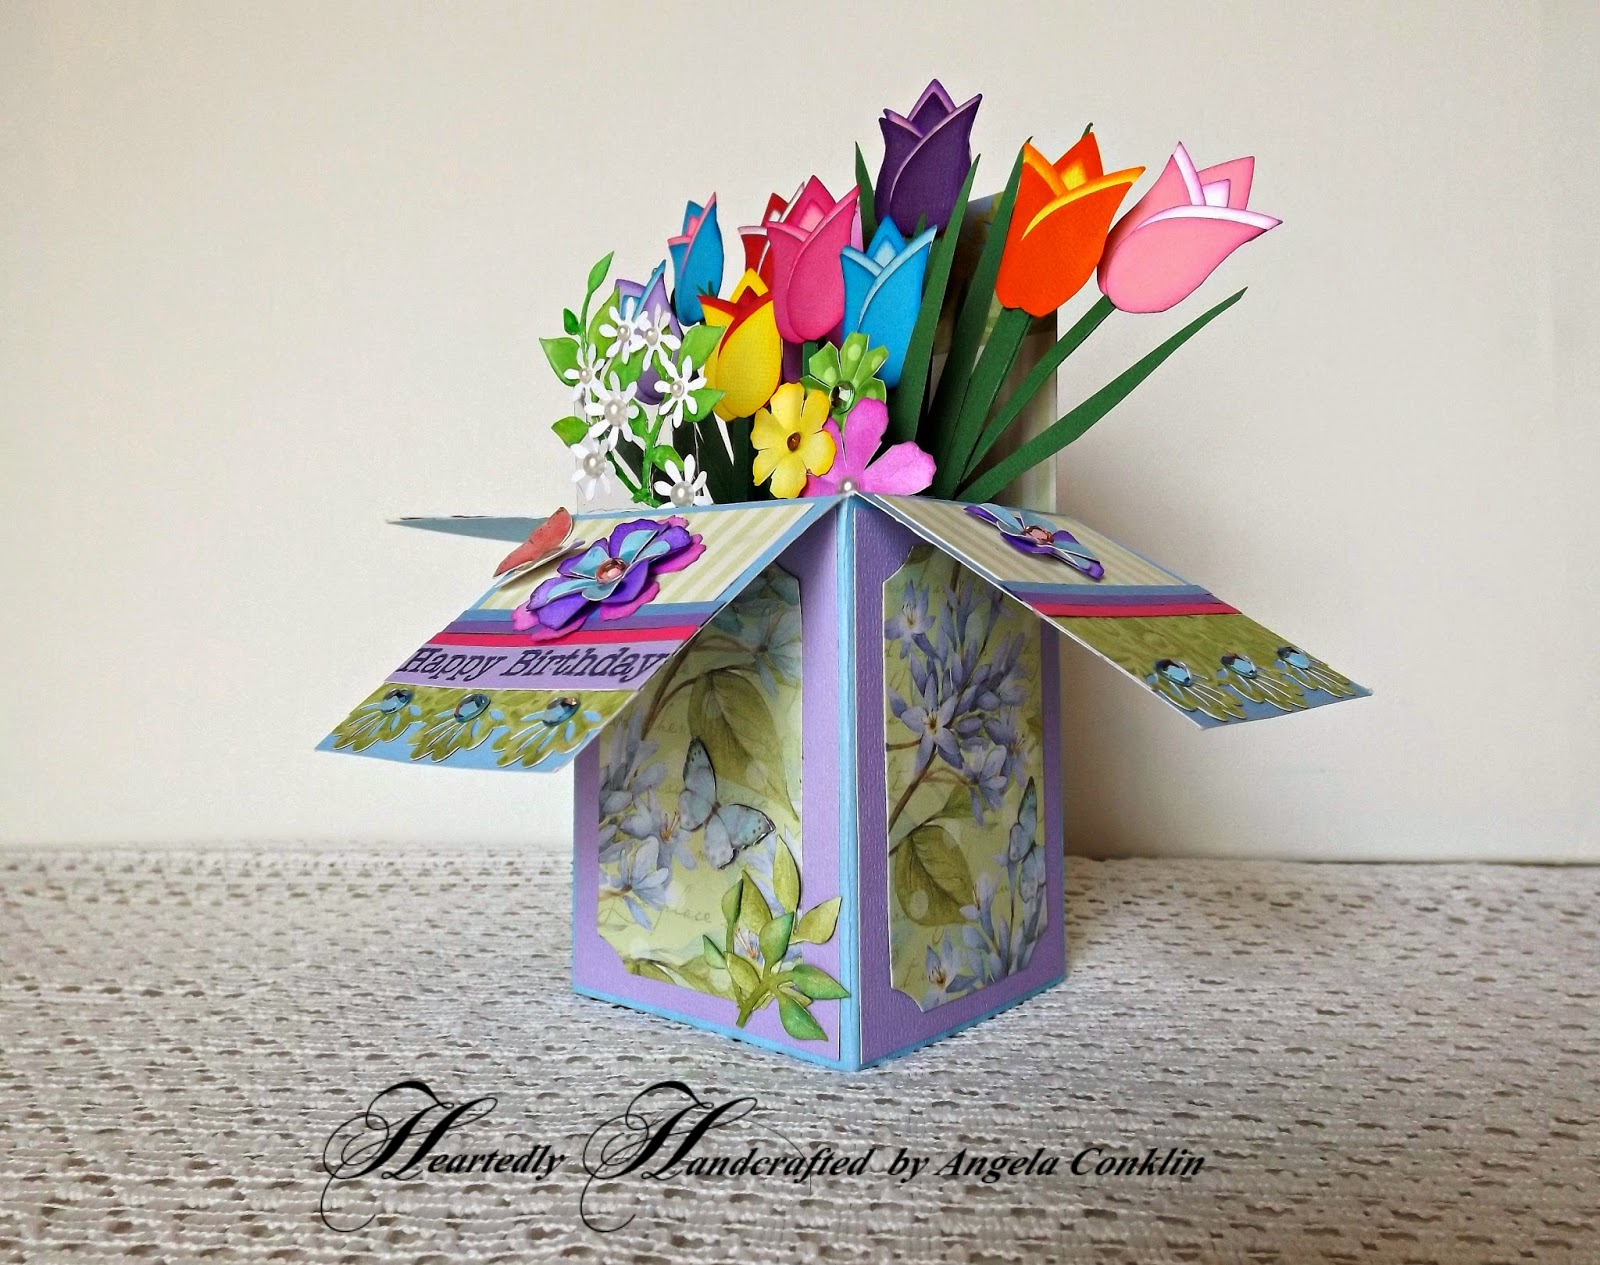
Tulip Birthday Card

Hello peeps! It's a gorgeous day outside here in western Pennsylvania. Just got done teaching my son to drive and I have to say although I'm excited for him and he's doing very well I can't help the need to make my seat belt a little bit tighter.

Today I want to share a card I've been working on over the past week. Each tulip has 6 petals and was hand inked. It was honestly more work than I thought it would be, but definitely worth it. I like the results of the two colors of paper used together and they're very sturdy flowers. I cut an 11 inch strip of paper and then folded them in half to make the stems. I also placed an extra inner layer of paper inside the box, basically a box in a box, so it's very solid. I free-hand cut the leaves for the tulips since in nature they would be turned different directions and would not all be the exact same shape when viewed from one direction. I wanted to place the sentiment in the bouquet, but because the flowers have stems they stick up quite high so I found that there was no where to place it without covering up flowers. My solution was to place the sentiment on the front flap which worked out quite well. This was another fun card to make and I can see myself doing quite a few more in the near future. 


#birthdaycard #cardinabox

Happy Crafting!

Friday, April 4, 2014

Mother's Day Card made with K&Company Susan Winget Paper


Hello everyone! 
I'm excited to finally share a Mother's Day Card that I made for Paperhaus Magazine. I used my favorite papers (K&Company - Susan Winget) which I felt were perfect for this particular project. The paper is so colorful and feminine. I just can't get enough of it. In fact it's the one printed paper collection that I have bought more than once and will buy again.


I used a Spellbinders die-cut circle and scalloped circle to frame the butterfly area of the card. The butterfly was already printed on the paper, so I just partially cut out the wing area and bent the wings upward to give it a three dimensional look and feel. 


I glued a cream colored ribbon to my card face, then topped it off with a thin, light pink, translucent ribbon. This formed the base strip to adhere flowers. The flowers were made from a Sizzix die and then I splattered and spray painted them with paint sprays that I made from Martha Stewart's Pearl Paints. 

 I used a Martha Stewart border punch to make the scalloped trim of which I layered with coordinating K&Company paper from the same tablet.


 Happy Crafting!
#mothersdaycard


Sunday, March 30, 2014

Flower Box Greeting Card

Hello everyone! I'm so excited today to share with you a new kind of card (new to me) that I had so much fun making.
A greeting card that transforms into a decorative box just by opening it. I love it! 
I was surprised how easy this was to make. It's a bit time consuming with the measurements and cutting, but well worth it. I had caught a video on YouTube by +Wendy Cranford and another video by +Tina Weller that inspired me to give it a shot. I have placed the links for them at the bottom of this post. They take you through each step of the project and Tina Weller provides links to who inspired her to try it as well. 


Initially I was only going to use purple and green, but the project just grew as I went with more and more color. I love the way it turned out and I will continue to see what decorative accents I can come up with as there is no limit to the possibilities. Spring is barely here and I'm already thinking about the cute Christmas cards I can make with this design.


I used ek flower punches and Sizzix die cuts to make the flowers and then I colored them with Rubber Stampede Dye based inks. Each flower got a gem or pearl embellishment and for the larger flowers I placed a button behind the pearl for more color.


Here is some of the equipment I used and the printed paper is from K&Company Susan Winget which is my favorite papers. I just can't get enough of them and use them in my projects often.

This is the card laying flat with the two flaps pulled down to expose the inside. I think it looks gorgeous already. I added a beautiful purple paper to the inside of the flaps from DCWV's Violet Leaf Stack.

Sorry about some fuzziness in the photos. The sun is just not cooperating and I find myself in odd positions to try and get a little light.

Links to Videos
Wendy Cranford
https://www.youtube.com/watch?v=GiiGXr0UyEQ

Tina Wellers
https://www.youtube.com/watch?v=7XHN5WG2hOQ


I just came across this and noticed it was the exact measurements that I used. If you don't like videos because you'd rather see the measurements at a glance, this step-by-step tutorial from SplitCoastStampers makes it very easy.
http://www.splitcoaststampers.com/resources/tutorials/popupboxcard/
You can find an adorable version of this card by +Heather Kraafter
http://kraaftshaak.com/card-creating-fun-part-1-2/


A special "Thank you" for the How-To videos ladies


Happy Crafting!

Thursday, March 27, 2014

Magnetic Burlap Card for Easter - From Card to Decoration

Hello everyone! I'm back in the crafting saddle again and ready to share a new card! A lot of thought went into this one and my goal was to use mostly burlap; so the background, the eggs, the grass, and basket accents are all burlap.

I was looking at greeting cards on Etsy and read in one of the descriptions that the card being sold didn't include an envelope. The reasoning behind this is because it was being sold as a decoration. I'm all for cards being a decoration, but was it really a decoration? It was a beautiful card that could definitely be framed or something, but does your everyday person frame their cards?  The recipient could just leave it on a mantle for a while, but is that truly a decoration or just a pretty card sitting on a mantle? I've also heard people state, "There is no way I would spend that much for a card that will just be thrown away". Well, even if it's not thrown away, what do you do with it? For the non-crafty person or the very busy person, that's a big question.

After some thought I decided to come up with something that really does make a card a decoration. It may not be the best answer and definitely not the only one, but this was my idea. I also want to add that people may be doing this already and I just haven't seen it. 

Make a card that the front lifts off to stand on it's own.


I placed magnetic strips between the decorative part of the card and the card itself. This allows the receiver to easily lift the front off of this #Eastercard and place it on his/her refrigerator, filing cabinet at work or where ever she wants. Then when Easter is over it can be placed with other Easter decorations and put back up next year.


 I had bought a pack of magnetic sheets for printing on and just cut some strips from one page. The strips are strong enough to stick to the refrigerator, but easily pulled from one another.


I cut the eggs out of paper-backed burlap (just free handed them as they don't need to be perfect just close in size) and then used markers to decorate them.


And here it is on the refrigerator :)
#Easterdecoration


Happy Crafting Everyone! 


Copyright © 2014 Angela Conklin - Heartedly Handcrafted
All Rights Reserved

Saturday, March 1, 2014

Lov(in') the Photo Booth - Scrapbook layout

My daughter and her boyfriend have been together well over a year now. Although as a parent you hope that your daughter doesn't get too serious at a young age, he has been nothing but wonderful to her and for her. She smiles more. Her grades are awesome (honors) since she started spending time with him. She's just happy and of all the young men he's definitely one of the good ones. So how can I not support that? :)

I made this for the Memory Nest February Challenge, but I also wanted to make something special for my daughter. I left space on the booth so she can do some journaling if she wants to. I also decided, since going to the mall and getting their photos taken in the photo booth has become "their thing", that I should recreate the photo booth for their pictures.


Happy Crafting!


Update: What camera do you use to take photos of your crafts?

Hello Everyone! These are the answers I've gotten so far for "What camera do you use to take pictures of your crafts?". Each of them got a thumbs up from their users. So if you're looking for a camera you may want to consider looking into these or if you have a phone camera, give that a shot before purchasing a camera.
  • Panasonic Lumix
  • Canon EOS Rebel
  • Samsung Galaxy S3 (phone camera)
  • iPad or iPhone
  • Samsung 3
  • Samsung Galaxy 4 
  • I just bought the Fuji S4830 and I'm very happy with it :)
    This photo was not taken by me but a photo shared by FUJIFILM. Great camera and definitely one to check out!