Friday, February 28, 2014

Pics with My New Camera

I'm loving my new camera. I have a lot to learn about it, but so far I'm enjoying using it as the photos are surprisingly "really" good. After looking into all the camera types and feeling confused/overwhelmed as well as not being able to consider a cellphone (no service here in the country) I decided to research photography. I learned a lot so far and have barely scratched the surface, but I learned enough to buy a good camera.

I was very fortunate as I've seen this camera new up to $249.00. Mine was new, but the display so I got money off and because the new models are coming in this week and all they had was the display left they took it from $179.99 to my final price of $116.00. I was thrilled!!! I have seen it online for some good deals and bad, so if you're looking for a new camera shop around a lot first.

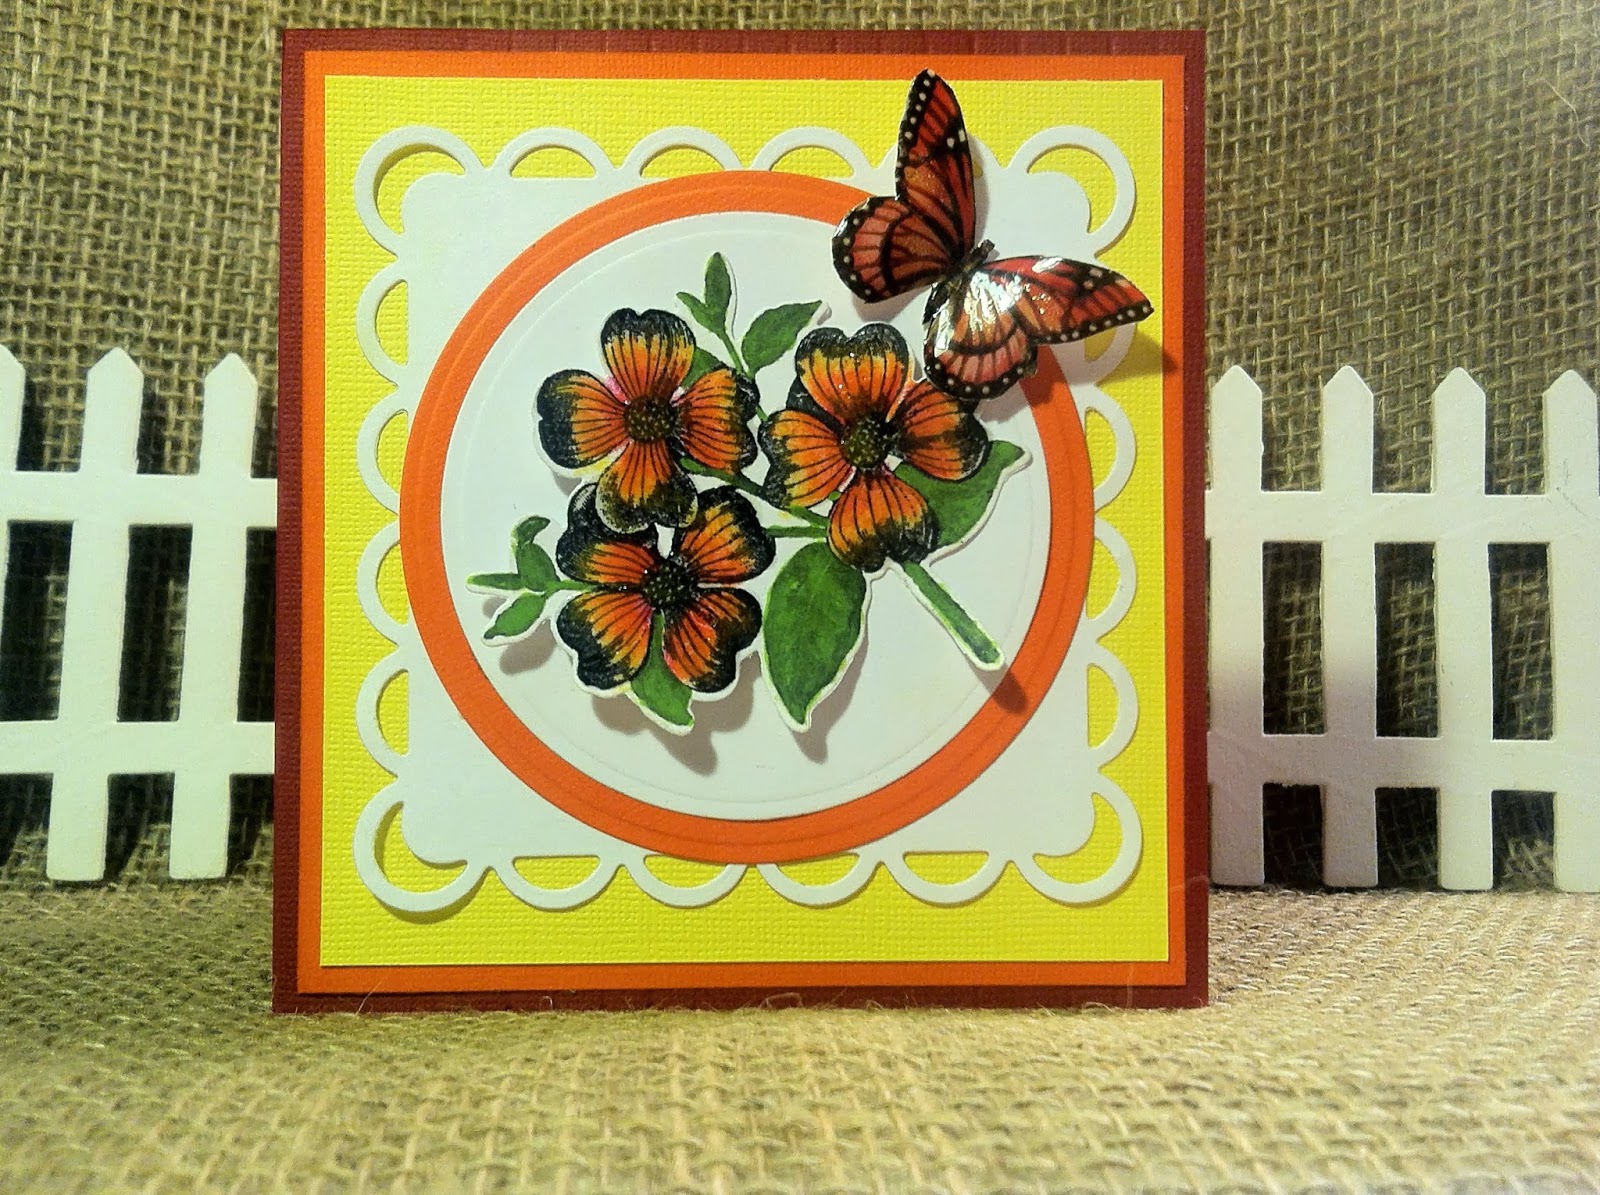
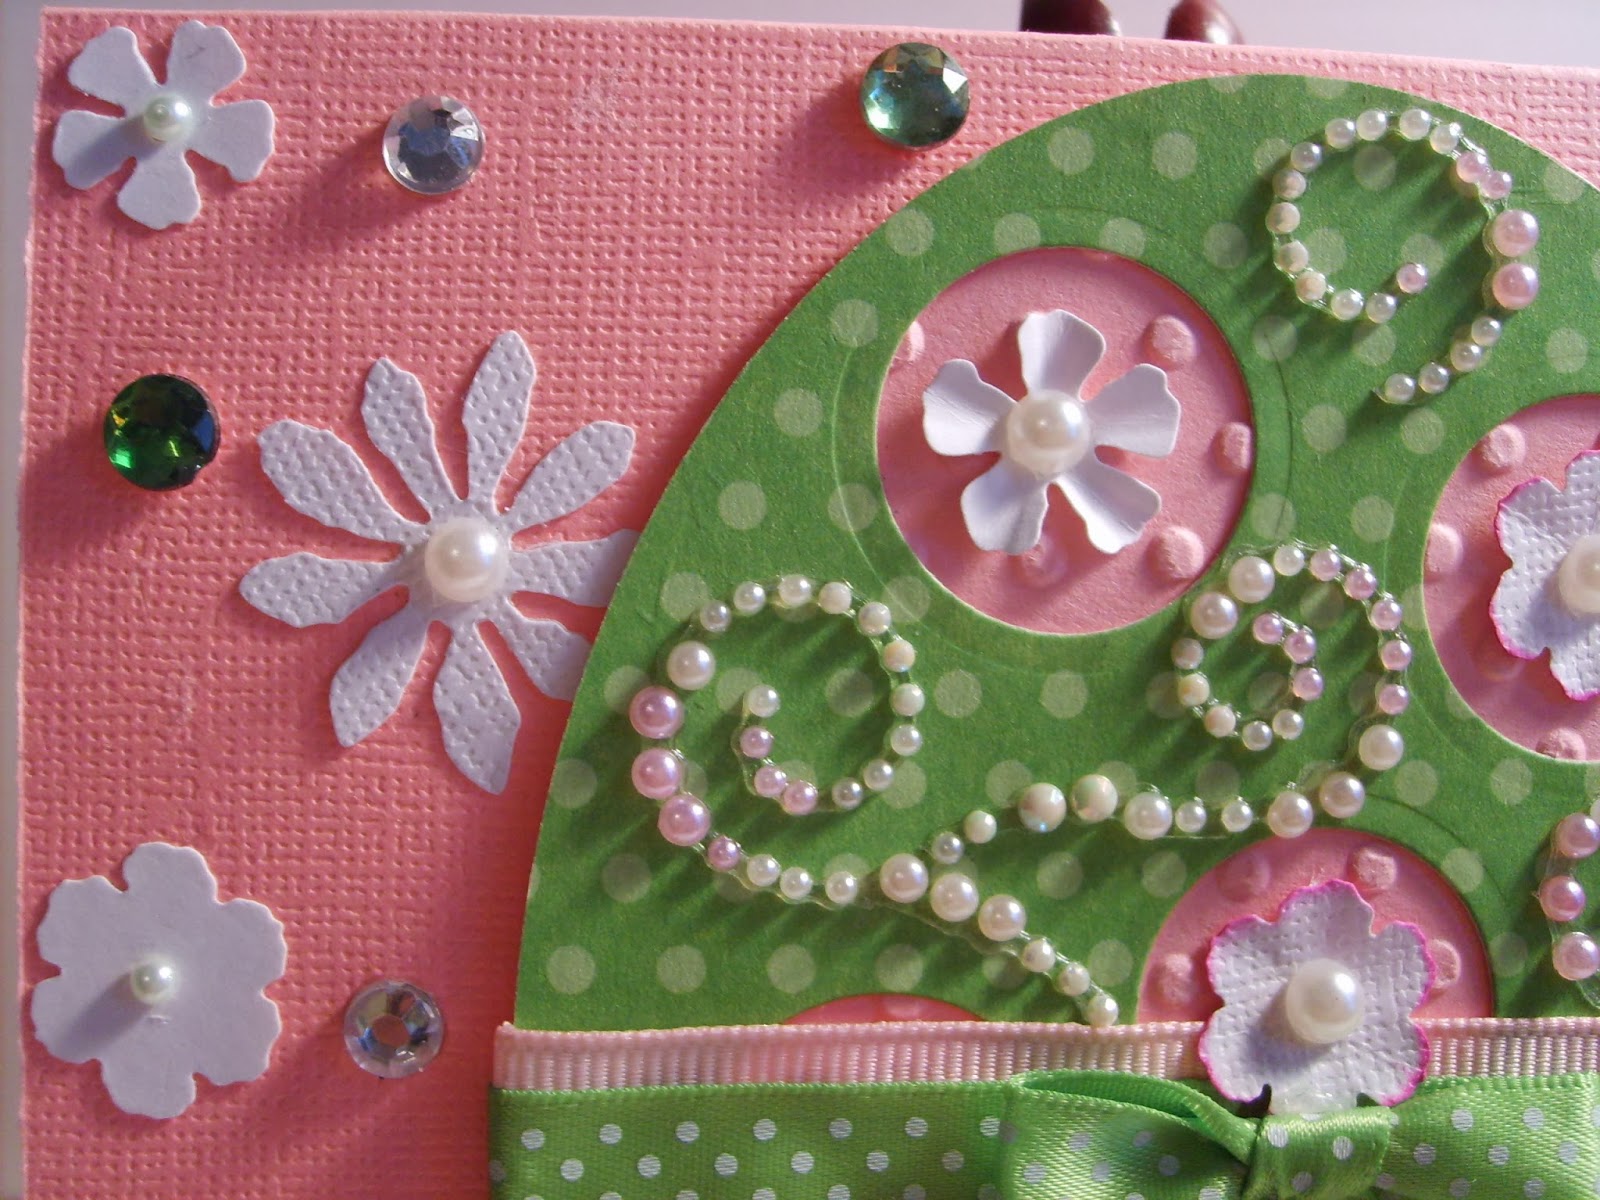
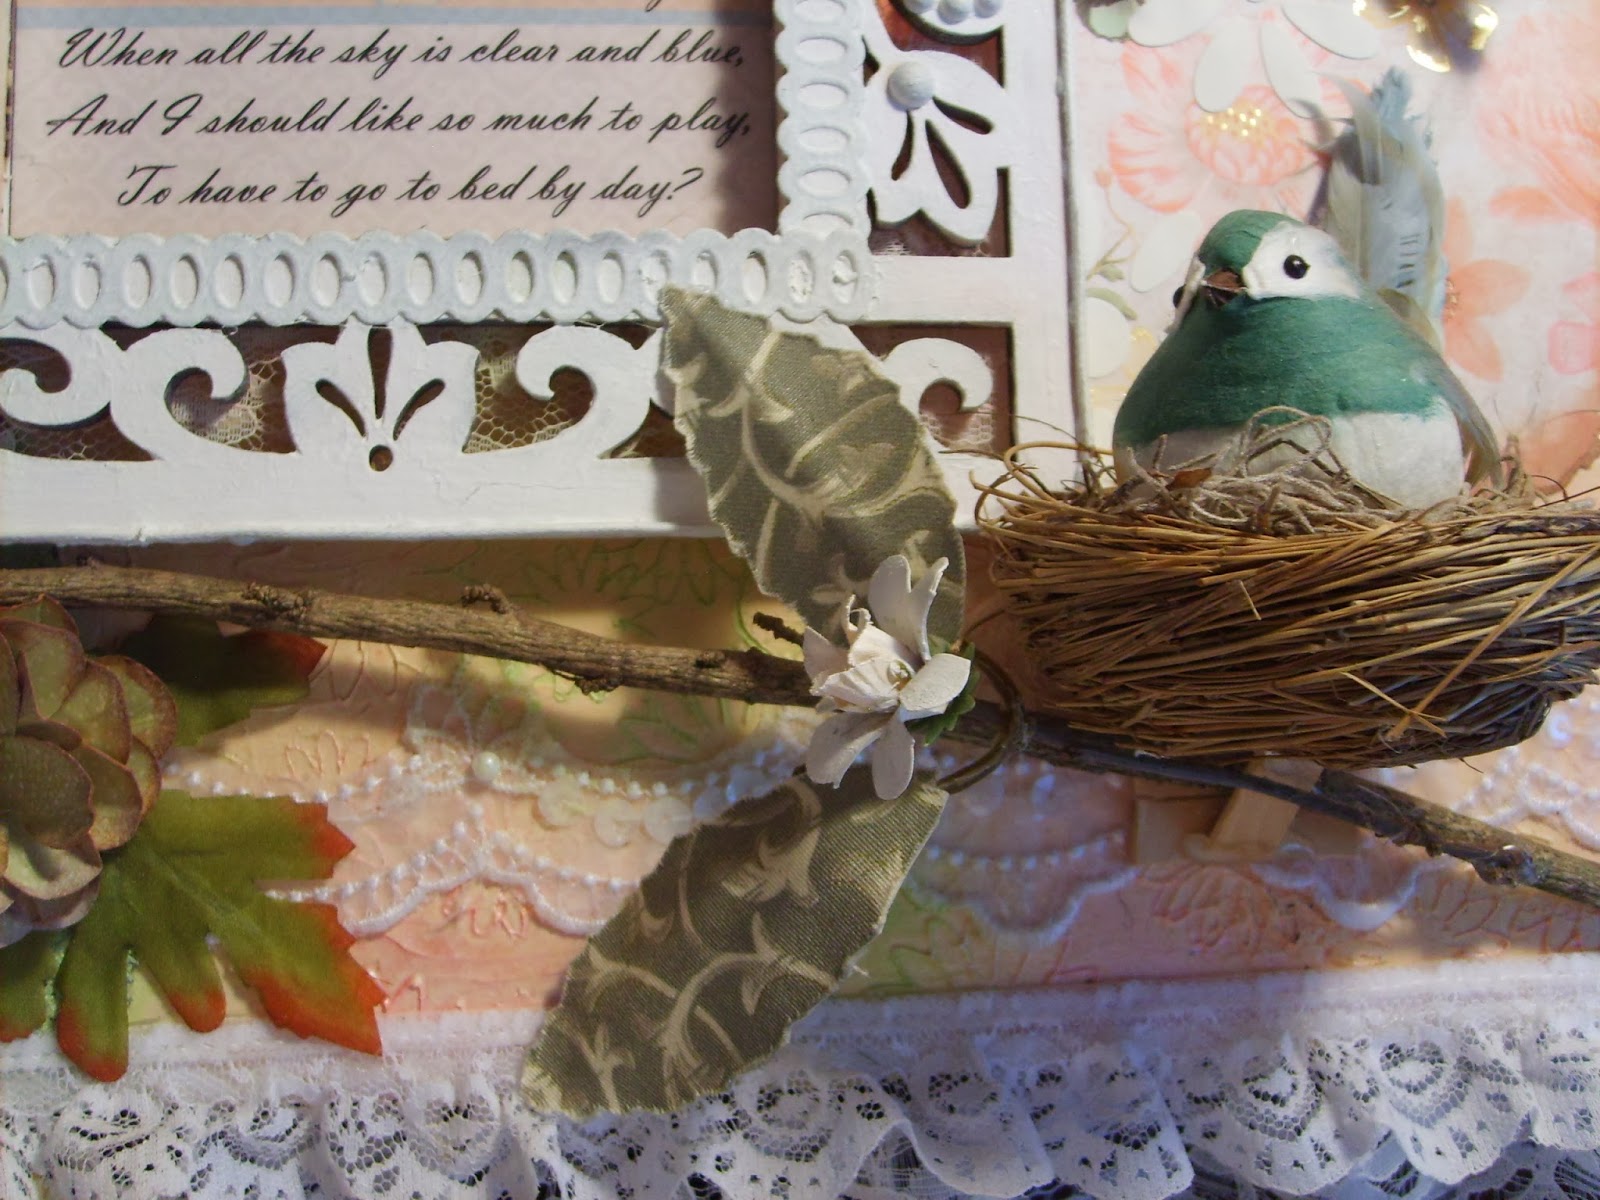
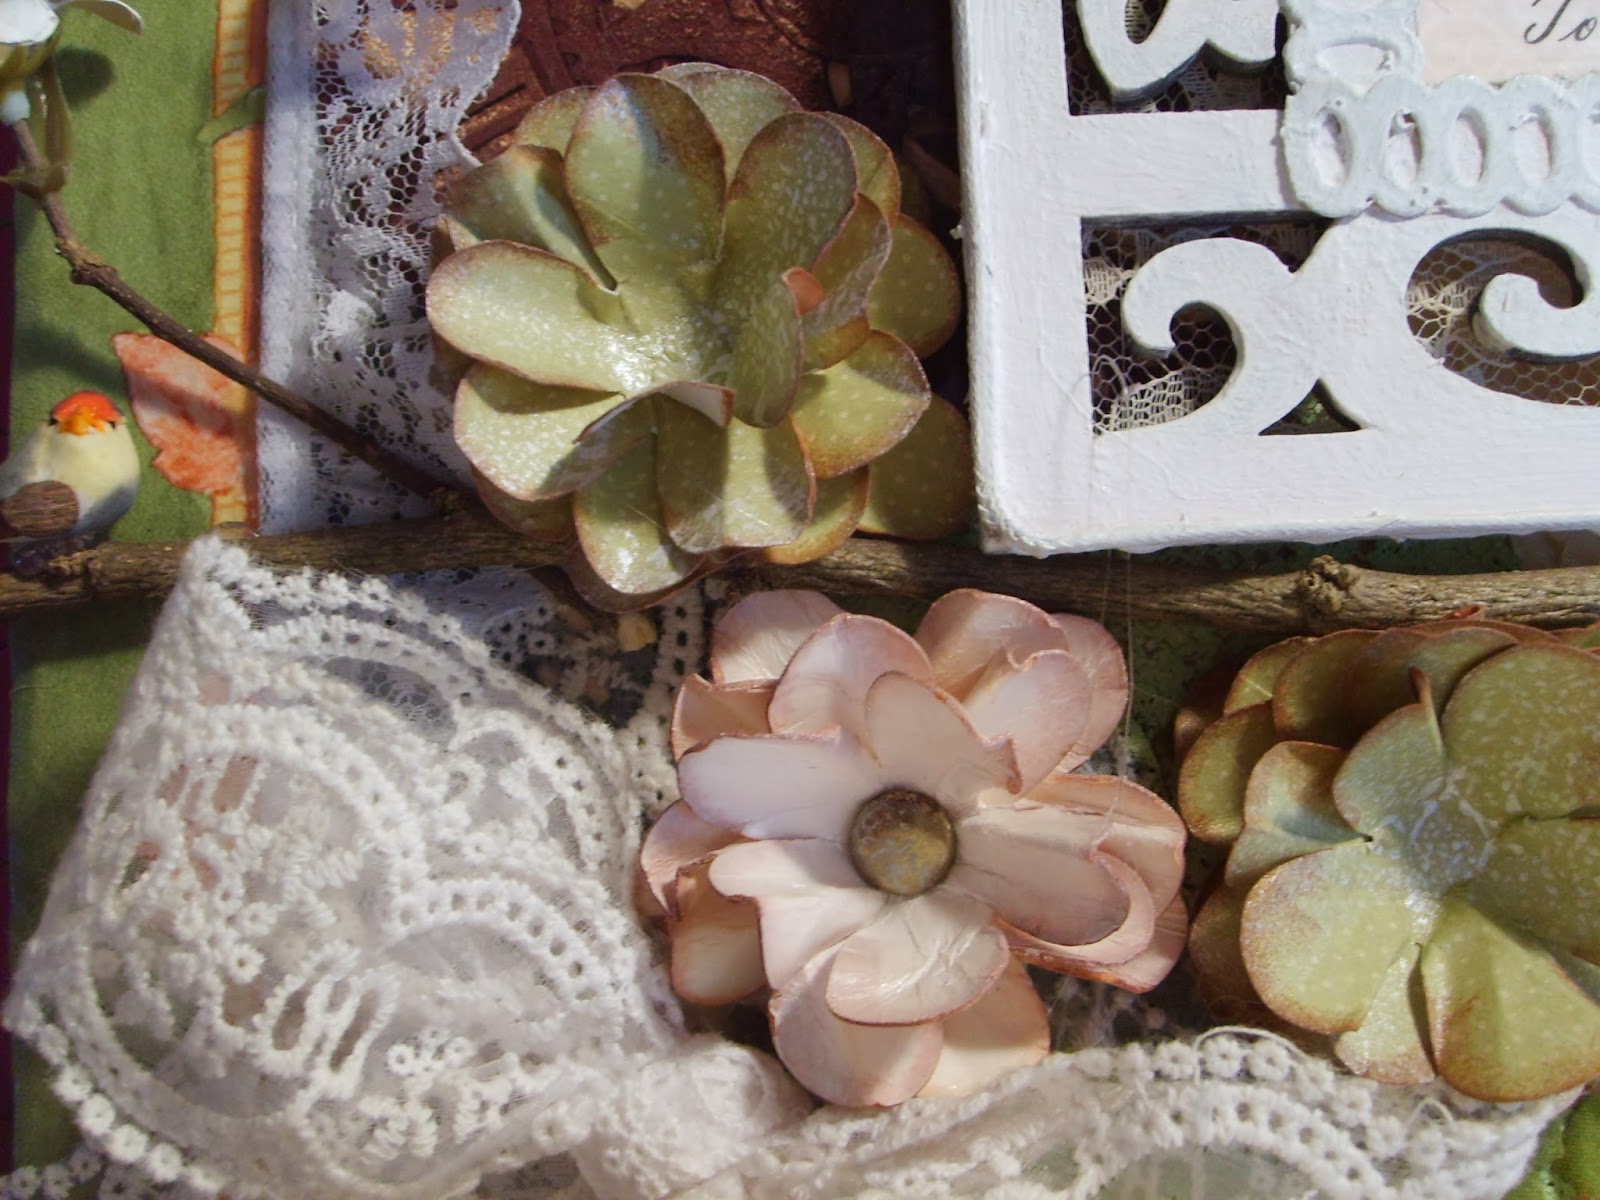
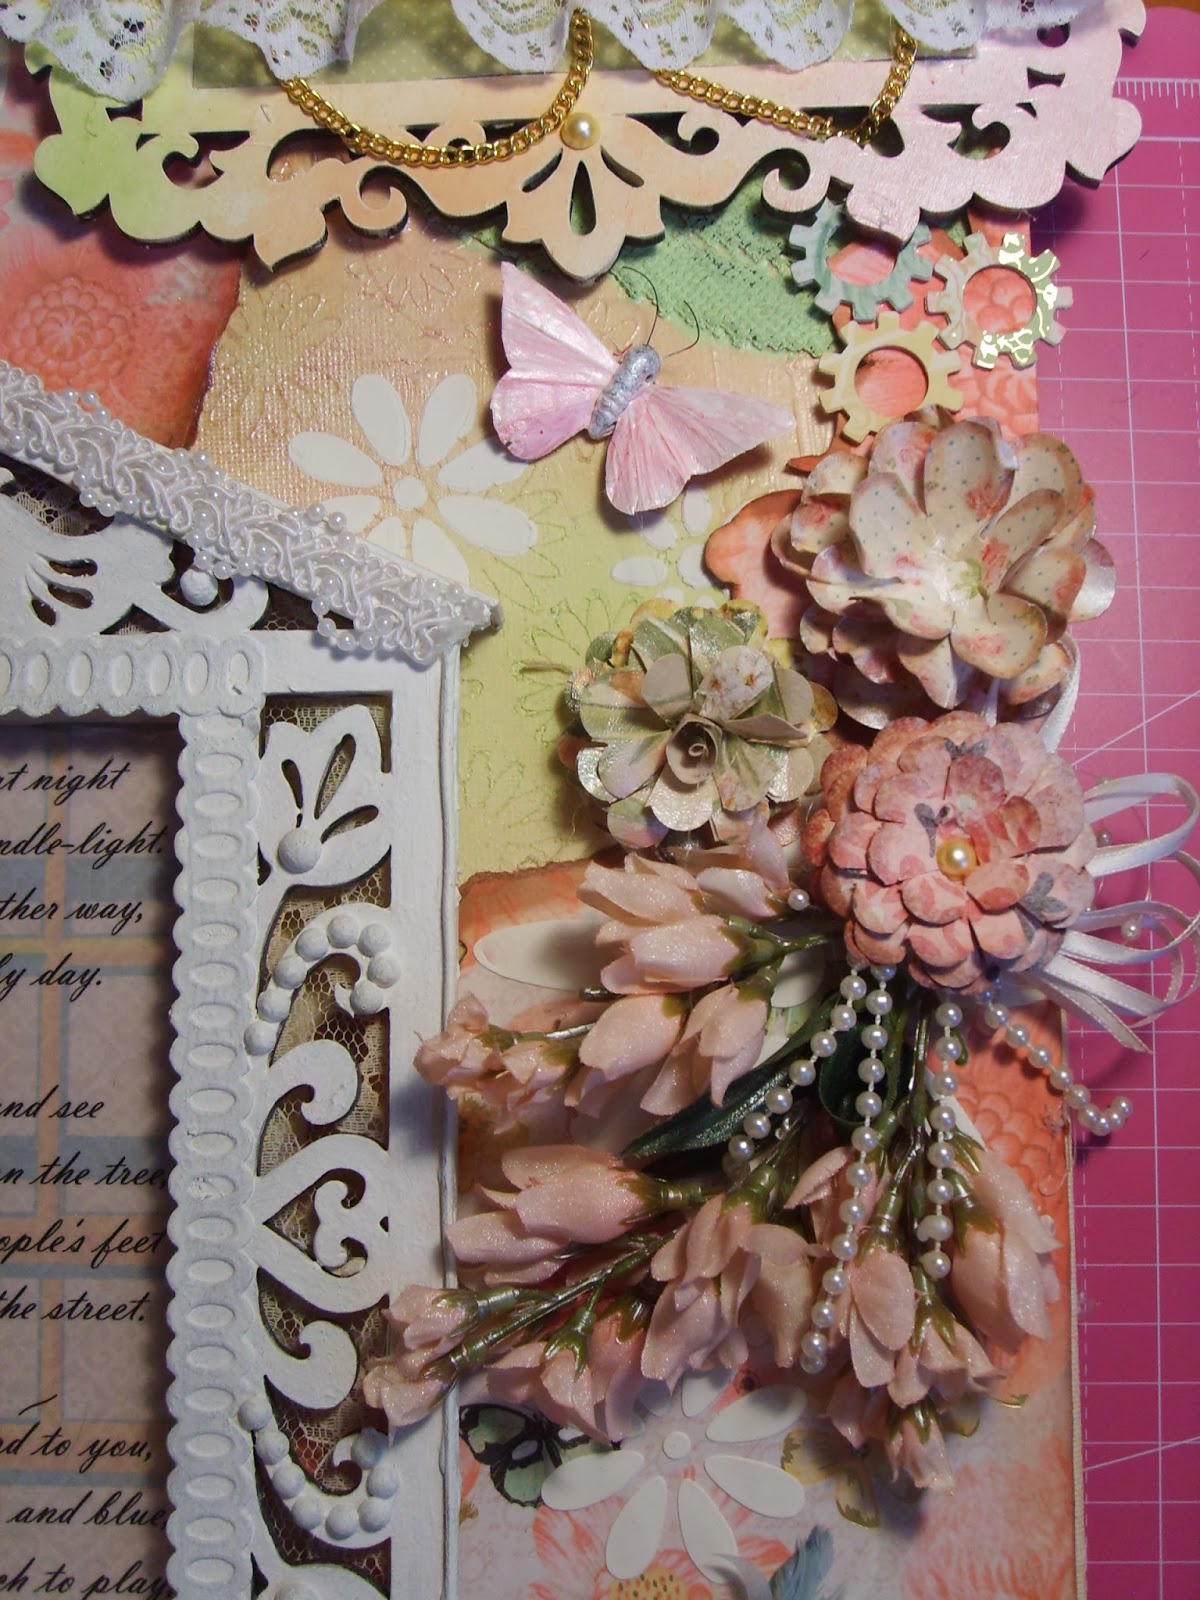
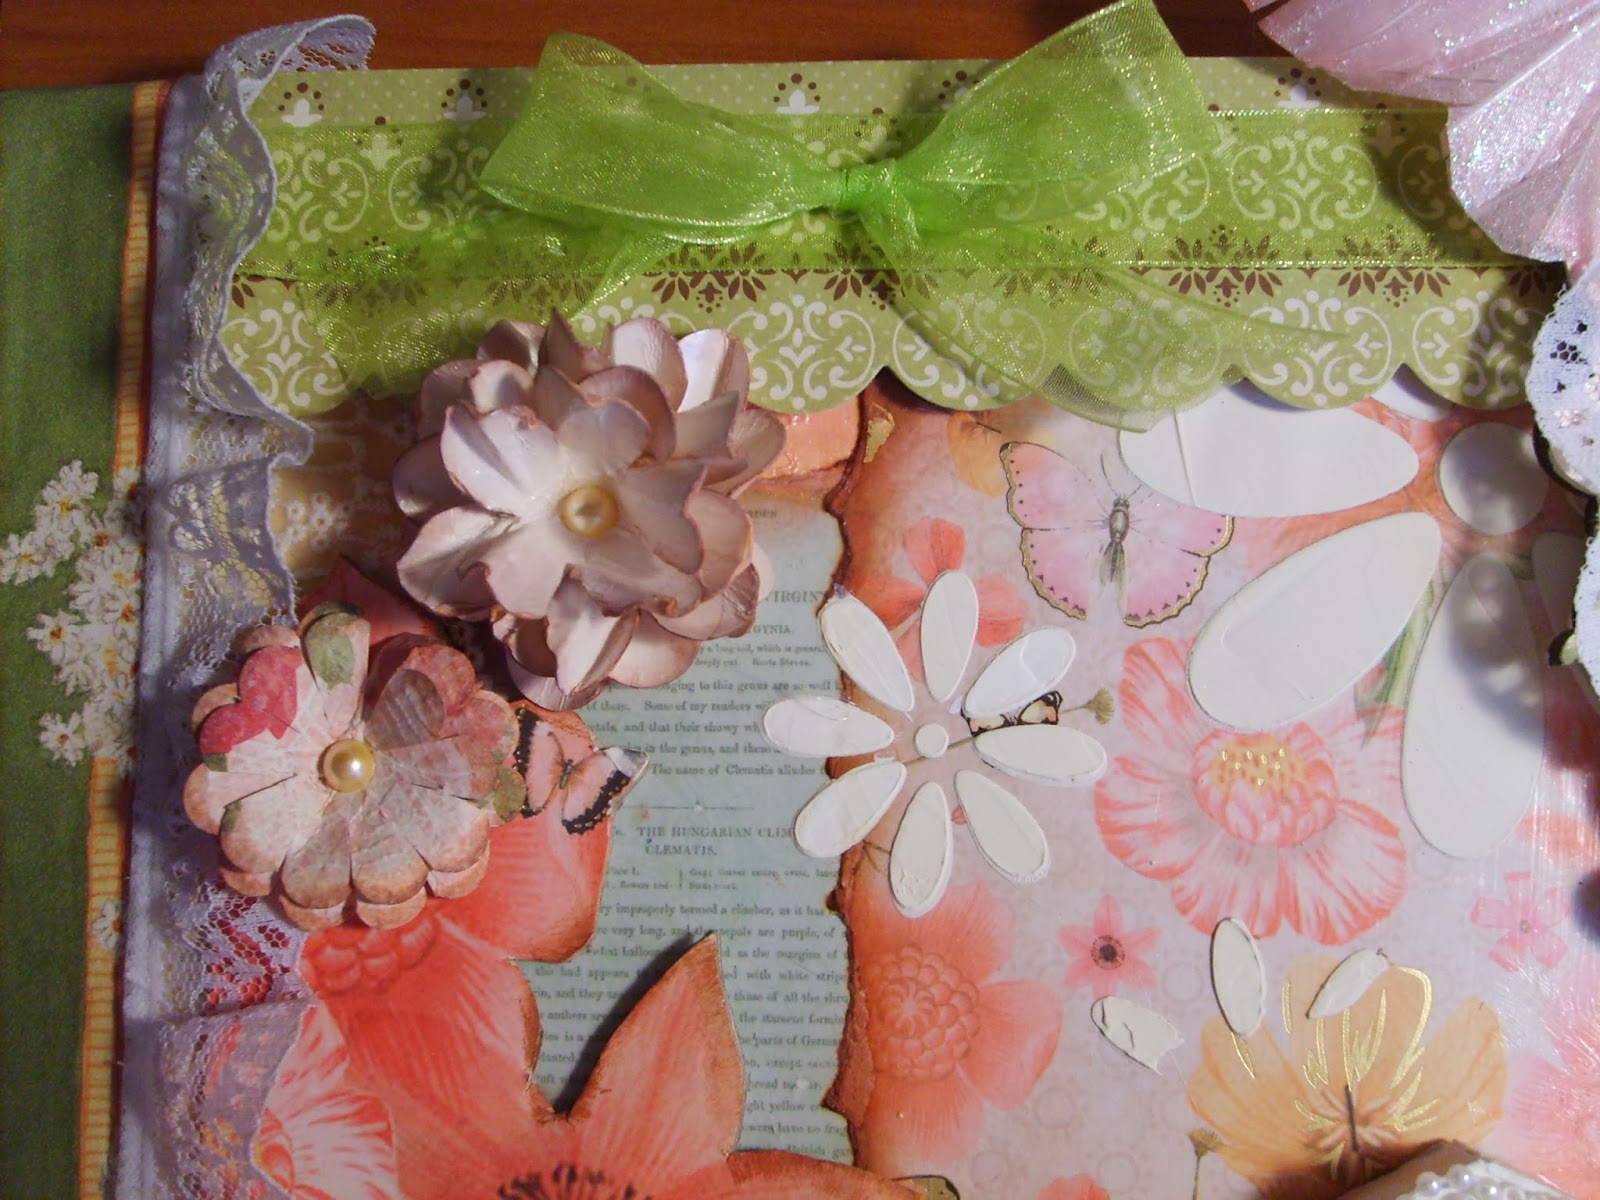
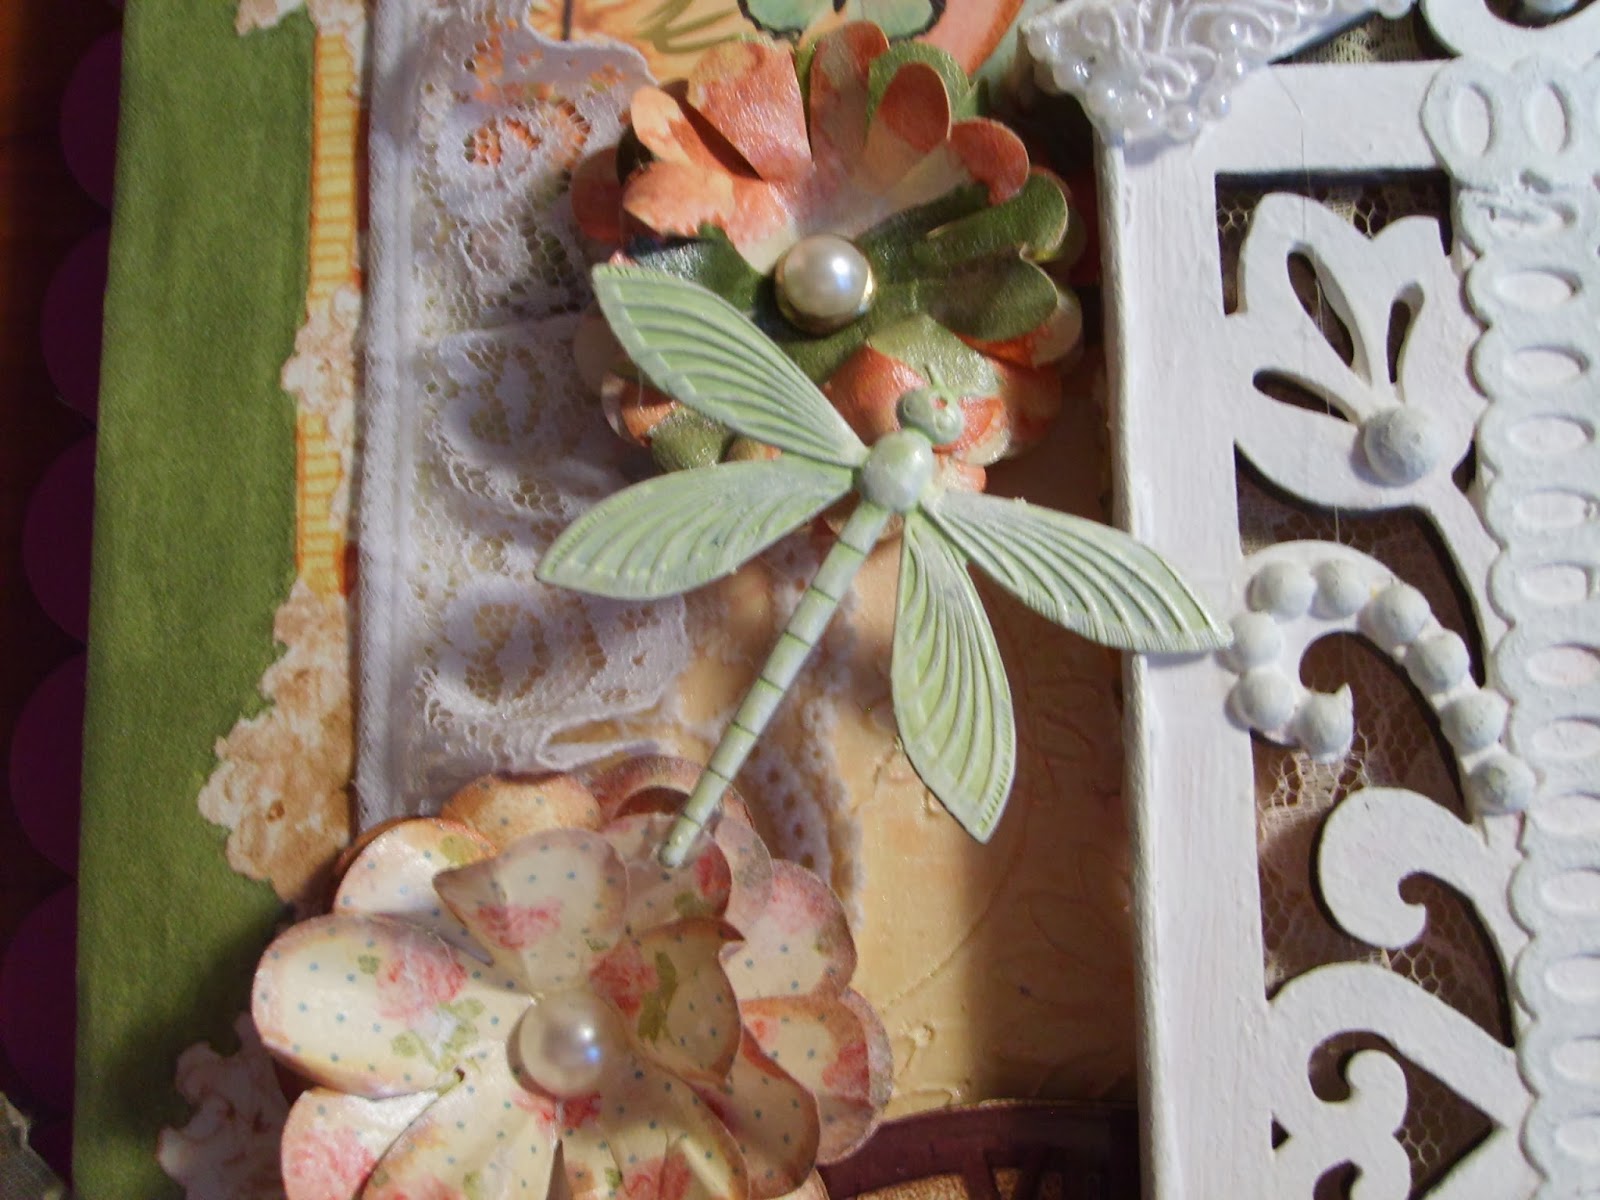
I chose this camera because after reading about features on the web I decided I wanted a Mac feature and Super Mac for extreme close-ups. I also wanted an Aperture setting and to be able to adjust it. This camera also allows me to adjust shutter speed, white balance, etc. so that I can get clear, true to color, very detailed close ups. The funny thing is that I notice things I hadn't before on the greeting cards I took photos of, such as fuzz, adhesive strings and so forth. I'm glad I see those things so that I can remove them. I didn't know anything about cameras just two days ago, so a little research proved to be a good thing. Below is the camera I bought and a few pics I snapped with it.


Fujifilm FinePix S4830 Digital Camera With 16 Megapixels And 30x Optical Zoom


The Fuji FinePix 16MP Digital Camera, S4830 is equipped with a powerful FUJINON optical zoom lens armed with sensor shift OIS to reduce blur and a Super Macro mode for extreme close-up images down to 2cm. In addition, the Fuji FinePix 16MP Digital Camera, S4830 boasts a 16MP 1/2.3 CCD sensor that captures even the finest details. A Scene Recognition Auto mode with six different scene types can cleverly recognize the subject you're shooting and decide on the settings required. Autofocus times as fast as 0.3 seconds, and start-up times of up to 1.3 make the S4800 a responsive and hassle free way to capture your best photos. In addition, record HD movie 720P/30fps in 16:9 format, take advantage of the convenient Mode Dial for selecting a variety of shooting modes, a large 3.0 LCD screen. Users can also take advantage of Instant Zoom, Individual Shutter 3D...
Photos I took with it so far: the color is perfect.


Wednesday, February 26, 2014

Come do a "Year Of Firsts"


Click on the link above or on the Year of Firsts tab in the menu above to see what I'm doing and challenge yourself.

Tuesday, February 25, 2014

What Camera Do YOU Use?

Hello Everyone! I need some help. My camera bit the dust as it was quite old so now I need to buy a new one. I'm wondering what camera you (crafters) use to take photos of your crafts. I would like to stay below $200, but if you use a more expensive camera that would be good information to have too. Any help would be greatly appreciated as I would like the close-ups of my layouts, cards, etc. to look their very best :)

Spring Card with Watercolors

Hello Everyone! I decided to try watercolors today and colors I rarely use. Although I found it difficult to stay in the lines of the stamped image I like the effect of the bright and blended colors that I got using watercolors. I also wanted the images to pop off the page so I kept the background simple and used Glossy Accents on the flowers and butterfly and then shaped the butterfly's wings after it was dry. I didn't want the flower bouquet to lay flat so I only used tape in the middle to adhere it to the card.

I'm honestly not sure what I think of the card in general, but I do like the effect of the watercolors and Glossy Accents.


Happy Crafting with #watercolors !

Friday, February 21, 2014

Handmade Easter Egg Card

Hello Everyone! The best part about this project is that I could decorate an egg without stained fingers. It was a lot of fun and I'm thinking I may have to make a few more "egg" cards just to see what I can come up with. I love all colors, especially when they are used together, but I'm finding that I must favor green and pink when making cards and layouts because I seem to use them a lot.


I used an oval die to cut out the egg and a small round die to form the spots on the egg.

I love this pink textured paper. To embellish the card I used die cut flowers and adhesive flat-backed pearls. To keep consistent with the polka dots of the green paper I embossed smooth pink paper that I placed just behind the egg and used a green ribbon with polka dots.


Happy Crafting Your #eastercards and #eastereggs !


Sunday, February 16, 2014

Sweet Dreams Canvas Collage

Hello everyone! Just a quick note: I think my camera is biting the dust. The lens gets stuck every time I turn it on and when it's shut down and is supposed to retract. Looks like it's time to get the camera I didn't get for Christmas. I got a video camera instead, so can't complain too much. :)

At 22x18, this is a huge piece and I had trouble getting it all in the camera and keeping it focused. I created this for a special little girl to hang in her room. The framed words are a bedtime poem that my mother recited to me every night from the time I was born. In fact I think it's why I could talk in full sentences by two years old because I was reciting it as well between two and three years old. To say the least this poem means a lot to me and I thought it would be great for a canvas collage. I wanted a lot of layers and things to look at. I also wanted it to have kind a hint of a seventies feeling with the orange and green colors and funny cut-out flowers. Don't know if I pulled it off though.


I used upholstery material for the leaves, a real tree branch and used paper to make the flowers of which I sprayed with homemade paint sprays then edged with ink. I used a popcycle stick to support the nest.


Along the left side I used a strip of wall border wallpaper. I also integrated an old book page about flowers and then used modeling paste to overlay some white flowers on the floral scrapbook paper.


Hope you like it. Happy Crafting!

Friday, February 14, 2014

Valentines Day Card - Hot Air Balloon

Happy Valentines Day! Just a fun card
to celebrate the day :)


Thank you to Bird's Cards for the free digital image. There are a lot of fun digital images on her page.


I used cheap Cra Z Art colored pencils I picked up at K-mart which I like. They are soft and the color is bright.


 I wanted clouds that looked like a child drew them to float in the sky to make the card fun.


The hearts are just sticky foam hearts that I used a blue colored pencil on the edges of. I also used large glue dots to pop the balloon and cloud out to give them more dimension.


Hope you like it. Happy Crafting!


Thursday, February 13, 2014

Valentines Day and All Occassion Cards

Around running to the store and appointments I spent my free time today making cards. It amazed me how many decisions I made when creating them and how hard making final decisions can be. "Should I use a bow?" "What color should I make her hat?" "Will it look okay to make my bee pink?" "Oh know! What do I do to cover up my mistake?" It's exercise for the brain so no wonder I feel so mentally exhausted afterward, but it's a good mental exhaustion.

I also took notice of how many times I got my paper-layers stuck together in the wrong position. What a nightmare! I had to pull the heat-tool out to soften the adhesive and even when the papers came apart they curled up from pulling on them. This happened to me three times today, but in the end I didn't have to start from scratch with anything. I made it work. So here are the cards I made today. I'm too tired to include my materials and how I did them. So I'll do it later. Hope you like them.


Happy Crafting!

Thursday, February 6, 2014

Valentines Day Zentangle Scrapbook Layout

Hello Everyone! I wanted to take a break for the day from cutting and pasting and decided to relax with some Zentangle. The nice thing about learning many arts and crafts from Youtube videos and so forth is that you can begin to overlap the different things that you've learned. If you've ever been interested in Zentangle you should really try it. Basically it's just doodling. There is no need to plan ahead. As you go along you'll automatically know where you need light areas and dark areas. If you have trouble thinking of shapes to make, there are plenty of how-to sites that will show you how easy it is to make different designs. So give it a shot and remember it's suppose to be a relaxing art form. Anything goes.

 I used a black, Sharpie marker and a fine point marker for the smaller areas.
To make the center oval and surrounding circles I used Spellbinders Nestabilities dies to trace around.
Copyright © 2014 Angela Conklin - Heartedly Handcrafted
All Rights Reserved

Make a Photo Appear Larger for a Scrapbook Layout Design

Hello! Just a quick tip that may help you out one day when you want to do a layout of which your photo peeks out in different spots or is just too small for your design.

Sometimes the design of a layout calls for a larger photo (one that encompasses a wider or taller background view). When I made my layout I was using an inspiration piece (below) to design it from. In the inspiration piece there are three cog-like decorations on the wall. I wanted to incorporate these somehow into my layout.


I decided to use them on the blind of my window.


The actual photo stops where I have drawn the red line.

This caused a problem. I had already cut three holes out of my blind. I wanted the cogs to surround them and since I had the blind partially covering what was suppose to be the continuance of a glass window there was nothing behind the holes but white paper. 

Sure I could have ignored it or filled the holes, but there was another choice that was as easy and would allow me to get the look I wanted. I printed the same photo again and then just cut three small portions from it that I felt would look realistic behind the holes. The trickiest one was the hole on the left that would still show the tree so I just cut a piece with smaller branches on it (since branches get smaller at the very top of a tree) and made sure the branches were faced in a realistic direction when I glued the piece into place. 

So if you decide to do a layout that will require your photo to "appear" larger, there is a way to do it.

Happy crafting!

Monday, February 3, 2014

Spring Center Fold Card with Quilled Dragonfly and Burlap Mat

It's all about the quilling.

Hello everyone! I want to share my funky little Spring card. A couple of weeks ago I bought a quilling tool and some quilling paper strips. I've seen some beautiful cards and jewelry online made from it and had to try it out.  The first time I tried I only made loose circles and for the second try I made some flower petals that came out all different sizes. This time the sizes were a little better so I decided to try making a dragonfly. I need quite a bit more practice getting the sizes and shapes right and it takes me about 3 minutes just to make one shape. To say the very least, I'm quite slow at it, but I like the look of it so I'm not giving up.

The quilled shapes are a little tricky to glue down since there is movement to them. So if you have any advice on how to best go about this I would greatly appreciate it. I haven't decided whether to add a sentiment to the front of my card or not, but for now it's done. 


Happy Crafting!

Saturday, February 1, 2014

Thank you Card in Chocolate and Pink

It's a dreary, cold day here in Pennsylvania, but I don't dare complain as I've been crafting away for hours already. Although I sure will be a lot happier when the sun comes out and makes picture taking easier. I took over a hundred photos of this card for a few decent ones. Thank goodness for digital cameras. I would be in big trouble if we were still dependent on rolls of film.

No sunlight in the windows led me to very tired arms; one holding the light up in the air and the other trying to steady the camera and push the button. We sure do go through a lot for a decent photo. I'm already planning on taking new photos when the sun returns one of these days, but I was too excited to wait. So here's my latest card.


 To make the tree I used the same die twice; once with the brown paper and then with the pink. I glued the two trees together slightly off center to let the pink peak out from behind on one side of it. The effect is gorgeous, especially in these two colors.

Happy Crafting!